Vanilla Ice Cream Without Ice Cream Maker

- Time: 10 min active + 6 hrs chilling
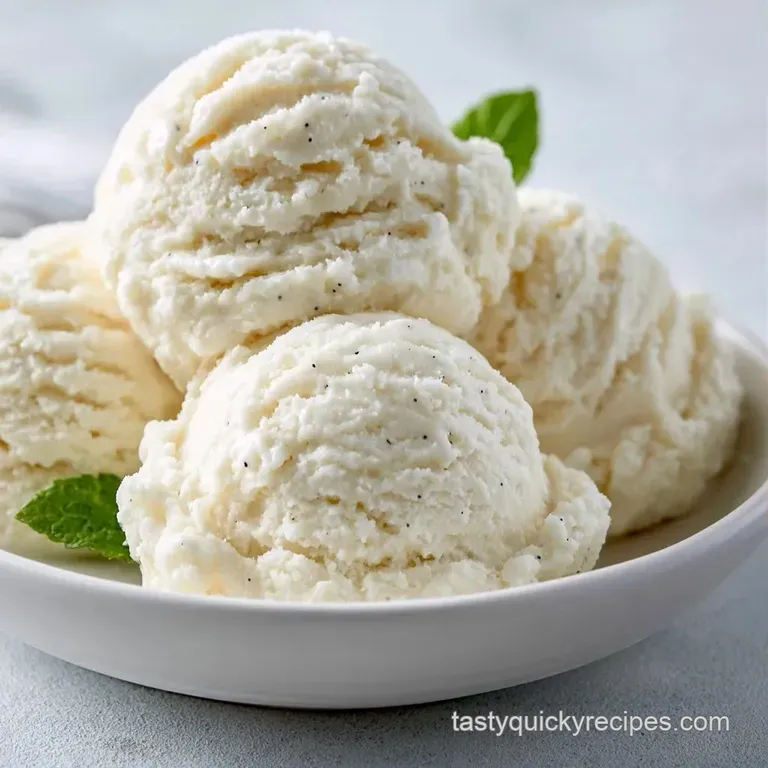
- Flavor/Texture Hook: Rich, creamy, and speckled with vanilla bean
- Perfect for: Quick desserts, summer parties, or beginner cooks
Imagine that heavy scent of vanilla hitting you the second you open the jar. For a long time, I thought you needed a bulky, expensive machine to get that professional texture at home. I figured without constant churning, you just ended up with a block of frozen milk.
But honestly, you don't need a machine. Forget the idea that churning is the only way to get air into your dessert. By whipping the cream first, we build the structure manually.
This version of Vanilla Ice Cream is a lifesaver when you want a high end treat but don't want to clean a complicated appliance. It's straightforward, uses a handful of ingredients, and tastes like something from a boutique creamery.
Vanilla Ice Cream Specs
Right then, let's look at the numbers. This is a low effort, high reward dish. Since there's no cooking involved, the "prep" is just the mixing. The real work is done by your freezer over the next few hours.
You'll get about 8 generous scoops. It's a dense, satisfying treat that doesn't melt instantly. If you're craving something with a bit more spice, this pairs well with a slice of Cinnamon Applesauce Bread for a cozy dessert.
| Method | Time | Texture | Best For |
|---|---|---|---|
| No Churn | 6 hrs | Dense & Rich | Easy Prep |
| Machine | 4 hrs | Airy & Light | Traditionalists |
What Each Ingredient Does
I've found that every item here serves a specific purpose. If you drop one, the texture changes.
| Ingredient | What It Does | Best Swap |
|---|---|---|
| Heavy Cream (475 ml) | Provides the fat and air bubbles | Double cream (thickens more) |
| Condensed Milk (180 ml) | Adds sweetness and prevents ice crystals | Evaporated milk + sugar (less creamy) |
| Vanilla Bean Paste | Deep flavor and those pretty black specks | Vanilla extract (no specks) |
| Lemon Juice (5 ml) | Cuts through the heavy fat for balance | Apple cider vinegar (similar tang) |
The Gear You'll Need
You don't need much here. A chilled metal bowl is a huge help because it keeps the cream cold while you whip it. If your kitchen is hot, put the bowl in the freezer for 10 minutes first.
I use a hand mixer, but a stand mixer works just as well. You'll also need a silicone spatula for the folding part. A 9x5 inch metal loaf pan is the standard here, as metal freezes faster than plastic or glass.
Making the Base
The process is split into three phases: whipping, mixing, and setting. The goal is to keep as much air in the mixture as possible.
1. The Aeration Phase
Pour the cold heavy cream, vanilla bean paste, and sea salt into your chilled bowl. Use your mixer on medium high speed. Whip the cream until stiff peaks form. If you lift the whisk, the cream should stand straight up without drooping.
2. The Folding Phase
In a separate small bowl, stir the lemon juice into the sweetened condensed milk. Gently pour this over your whipped cream. Use your spatula to fold it in using a figure eight motion. Do this until no white streaks remain. Be gentle, or you'll deflate the air you just whipped in.
3. The Setting Phase
Transfer the mix into the loaf pan. Smooth the top with your spatula. Press a piece of parchment paper directly onto the surface. This creates a barrier that stops ice crystals from forming on top. Freeze for at least 6 hours.
Fixing Texture Issues
If your dessert comes out feeling like a popsicle, it's usually an air or temperature problem. The most common issue is over mixing during the folding phase, which collapses the bubbles.
Why Your Ice Cream is Icy
Ice crystals form when there is too much water and not enough fat or sugar to get in the way. Using heavy whipping cream with at least 36% fat is the best way to prevent this.
2 Signs You Over Whipped Your Cream
If the cream looks grainy or starts to turn into butter, you've gone too far. It will lose its smoothness and feel heavy on the tongue.
1 Fix for Hard to Scoop Ice Cream
If it's too firm, let it sit on the counter for 5 minutes. Alternatively, dip your scoop in hot water before diving in.
| Problem | Root Cause | Solution |
|---|---|---|
| Gritty Texture | Ice crystals formed | Use parchment paper on top |
| Too Soft | Not frozen long enough | Freeze for full 6 hours |
| Flat/Dense | Deflated during folding | Use a figure eight motion |
Swapping for Other Diets
You can tweak this to fit different needs, though some changes affect the outcome. If you go dairy-free, coconut cream is a solid choice. It has the fat needed for the structure, but it will add a tropical flavor.
For a lower sugar version, you can try a condensed coconut milk sweetener. Just keep in mind that sugar acts as an antifreeze. Less sugar usually means a harder, icier result.
| Original Ingredient | Substitute | Why It Works |
|---|---|---|
| Heavy Cream | Full fat Coconut Cream | Similar fat content. Note: Adds coconut flavor |
| Condensed Milk | Maple Syrup + Cream Cheese | Provides sweetness and thickness. Note: Tastes tangier |
Storage and Waste Tips
Keep this in the back of the freezer, away from the door where the temperature swings. It stays fresh for about 2 weeks. If you store it longer, it might develop a "freezer taste."
To avoid waste, don't toss the empty condensed milk can. You can use a bit of leftover milk in a coffee or as a sweetener for oatmeal. If you have leftover whipped cream, fold in some berries for a quick mousse.
Three Ways to Plate
Since we're going for a polished look, how you serve it matters. Whether you're doing a quick snack or a dinner party, these levels work.
| Level | Presentation | Pro Tip |
|---|---|---|
| Simple | Chilled bowl | Add a single fresh mint leaf |
| Polished | Coupe glass | Top with crushed nuts or berries |
| Restaurant | Quenelle shape | Pair with a warm Rhubarb Crunch recipe |
Chef's Note: To get that professional "quenelle" (the elegant oval scoop), use two warm spoons to mold the ice cream rather than a traditional scoop.
Why This Method Works
I've always wondered why No Machine Vanilla Ice Cream actually stays scoopable. It comes down to the sweetened condensed milk. The high sugar concentration lowers the freezing point of the water in the cream.
Basically, the sugar prevents the water from freezing into large, jagged crystals. When you combine that with the air trapped in the whipped cream, you get a smooth, rich texture without the need for a Machine Vanilla Ice Cream setup.
Recipe FAQs
How to make vanilla ice cream?
Whip cold heavy cream, vanilla bean paste, and sea salt until stiff peaks form. Fold in sweetened condensed milk mixed with lemon juice, then freeze in a loaf pan for 6 hours.
Is an ice cream maker required for this recipe?
No, this is a common misconception. You can achieve a professional, creamy texture using a hand mixer and a freezer.
How to make vanilla ice cream without an ice cream maker?
Fold lemon infused sweetened condensed milk into stiff peaked whipped cream. Smooth the mixture into a metal loaf pan and freeze for at least 6 hours.
How long will this homemade vanilla ice cream last in the freezer?
Store it for up to 2 weeks. Keep the container in the back of the freezer to avoid temperature swings and freezer taste.
What is the simplest recipe for vanilla ice cream?
Use heavy cream, sweetened condensed milk, and vanilla bean paste. This no-churn method eliminates the need for complex equipment or cooking.
How to make 3 ingredient vanilla ice cream?
Mix heavy cream, vanilla bean paste, and sweetened condensed milk. Omit the lemon juice and sea salt to simplify the ingredient list.
How to make ice cream for diabetic patients?
Substitute the sweetened condensed milk with a sugar-free condensed alternative. If you enjoyed balancing sweetness in applesauce muffins, apply that same flavor testing approach to your sugar-free choice.
No Churn Vanilla Ice Cream 4

