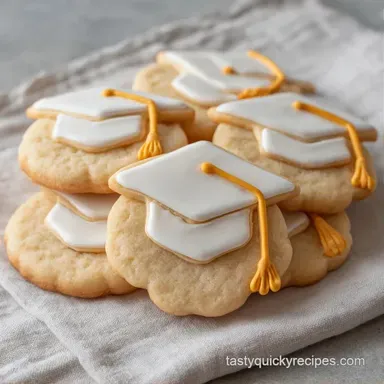
Classic Graduation Sugar Cookies: Velvety and Soft
- Time: 20 min active + 1 hour chilling
- Flavor/Texture Hook: Buttery, soft bite, and velvety smooth
- Perfect for: Graduation parties, gift trays, or Class of 2026 celebrations
- Classic Graduation Sugar Cookies
- The Secret to No Spread
- Component Analysis
- Ingredients and Substitutes
- Essential Baking Gear
- Step-by-Step Instructions
- Pro Tips and Pitfalls
- Troubleshooting Common Issues
- Adjusting the Batch Size
- Cookie Myths
- Storage Guidelines
- Serving and Enjoyment
- Recipe FAQs
- 📝 Recipe Card
Classic Graduation Sugar Cookies
The smell of vanilla and warm butter hitting the air is the only way to start a graduation party. I remember the first time I tried to make these for my cousin. I was so stressed about the shapes being perfect that I forgot to chill the dough.
I pulled the tray out of the oven, and instead of cute graduation caps, I had buttery, golden blobs. It was a disaster, but it taught me that patience is actually an ingredient.
Now, I've got the process down to a science. These are the kind of treats that look like they came from a fancy bakery but actually just come from a messy home kitchen. We're going for a cookie that holds its shape perfectly so your icing doesn't slide off.
If you've ever struggled with cookies that flatten out or taste like cardboard, this is the fix.
We're focusing on a soft, buttery base that doesn't fight with the royal icing. You'll get a clean snap on the edge but a tender center. It's a quick win for anyone who wants to look like a pro without spending ten hours in the kitchen. Let's get these ready for the big day.
The Secret to No Spread
Cornstarch Buffer: Replacing a bit of flour with cornstarch lowers the protein content, which stops the cookies from toughening up.
Fat Solidification: Chilling the dough for an hour ensures the butter stays cold, so the cookie sets before the butter melts.
Air Incorporation: Beating butter and sugar until pale creates tiny air pockets, giving the cookies a light, velvety feel.
Low Rise Balance: A tiny amount of baking powder gives just enough lift without making the cookies puff up and lose their shape.
| Feature | Cut Out Method | Drop Cookie Method | Best For |
|---|---|---|---|
| Shape | Precise/Custom | Natural/Round | Decorating |
| Chill Time | 1 hour required | Not needed | Speed |
| Texture | Dense/Smooth | Chewy/Craggy | Icing |
| Edge | Clean/Sharp | Soft/Rounded | Aesthetics |
Component Analysis
| Ingredient | Science Role | Pro Secret |
|---|---|---|
| Cornstarch | Tenderizer | Keeps the edges sharp during baking |
| Unsalted Butter | Structure/Flavor | Must be softened, not melted, to hold air |
| Powdered Sugar | Icing Stability | Provides the smooth, matte finish for colors |
| Lemon Juice | Flavor/Set | Helps the icing harden so it doesn't smudge |
Ingredients and Substitutes
For the dough: - 2 ¼ cups (280g) all purpose flour Why this? Provides the main structure for the cookie - ½ cup (60g) cornstarch Why this? Creates that signature soft, bakery style bite - 1 tsp (5g) baking powder Why
This? Minimal lift to prevent flatness - ¼ tsp (1.5g) salt Why this? Balances the sweetness of the sugar - ¾ cup (170g) unsalted butter, softened Why this? Gives the rich, velvety mouthfeel - ½ cup (100g) granulated
Sugar Why this? Sweetens and helps with browning - 1 large egg, room temperature Why this? Binds everything and adds richness - 2 tsp (10ml) pure vanilla extract Why this? The primary aromatic flavor
Substitute: Use almond flour for a nuttier taste, but the dough will be softer and harder to roll.
For the icing: - 2 cups (240g) powdered sugar Why this? The base for the smooth frosting - 2 tbsp (30ml) milk Why this? Controls the consistency/flow - 1 tbsp (15ml) lemon juice Why this? Cuts the sugar and helps it set -
½ tsp (2.5g) vanilla extract Why this? Ties the icing flavor to the cookie - Gel food coloring Why this? Intense color without thinning the icing
Substitute: Use maple syrup instead of milk for a caramel like undertone.
Essential Baking Gear
You don't need a professional studio, but a few things make this easier. A stand mixer such as KitchenAid is great for creaming the butter, but a hand mixer works fine too. You'll definitely want a rolling pin and some parchment paper.
Trust me, don't grease the pan with butter; use parchment or a silicone mat to ensure the bottoms don't brown too quickly.
The most important part is the cutters. I use graduation cap and diploma shapes. If you don't have these, you can use a round cutter and just pipe the designs on. A piping bag with a small round tip is a must for those clean lines on the diplomas.
Step-by-step Instructions

Phase 1: Crafting the Dough
- Whisk together the all purpose flour, cornstarch, baking powder, and salt in a medium bowl. Note: Sifting these helps avoid lumps in the final cookie.
- Beat the softened unsalted butter and granulated sugar on medium high until the mixture looks pale and fluffy.
- Mix in the egg and vanilla extract, beating until the batter is fully incorporated and velvety.
- Add the dry ingredients on low speed, mixing only until the flour streaks disappear. Note: Overmixing makes the cookies tough.
Phase 2: Chilling and Shaping
- Wrap the dough tightly in plastic wrap and refrigerate for 1 hour. Note: This is the most critical part to stop spreading.
- Roll the dough on a lightly floured surface until it is a consistent 1/4 inch (6mm) thick.
- Use your graduation cap and diploma cutters to cut the shapes. Note: Dip the cutter in flour if it sticks to the dough.
Phase 3: Baking to Perfection
- Bake the cookies for 10 minutes until the edges are just barely golden. Note: Do not overbake, or they will lose their softness.
Phase 4: Decorating for the Class of 2026
- Combine powdered sugar, milk, lemon juice, and vanilla extract in a bowl.
- Stir in gel food coloring and pipe onto the cooled cookies. Note: If the icing is too thick, add a drop of milk.
Pro Tips and Pitfalls
When making Classic Graduation Sugar Cookies, the biggest mistake is the butter temperature. If it's too melty, your cookies will spread. If it's too cold, you'll get lumps in your batter. It should give slightly when you press it with your finger, but still hold its shape.
Another trick is to freeze your baking sheets for 10 minutes before putting the dough on them. This gives the butter an extra moment to stay solid as the oven starts to heat up. For those who love variety, you can try adding a pinch of cinnamon to the dough, which pairs well with a Cinnamon Applesauce Bread if you're serving a full dessert spread.
Chef's Note: If your icing is bubbling, you're stirring too fast. Switch to a slow, folding motion to keep the surface smooth and glass like.
Troubleshooting Common Issues
| Issue | Solution |
|---|---|
| Why did my cookies spread too much | This usually happens because the butter was too soft or the dough didn't chill long enough. The fat melts before the flour structure sets. |
| Icing too runny | Too much milk or lemon juice is the culprit. You can fix this by whisking in more powdered sugar, one tablespoon at a time. |
| Prevent sticking | Flour your cutters lightly between every few cuts. This ensures the dough releases cleanly without distorting the shape of the graduation cap. |
Common Mistakes Checklist
- ✓ Chilled dough for at least 1 hour
- ✓ Measured flour by weight or scooped and leveled
- ✓ Rolled to exactly 1/4 inch thickness
- ✓ Removed from oven before they turned dark brown
- ✓ Let cookies cool completely before icing
Adjusting the Batch Size
If you're only making a few cookies for a small family gathering, you can halve the recipe. Use a smaller baking sheet and reduce the bake time by about 2 minutes. Since you can't easily halve an egg, crack it into a bowl, beat it, and use about 2 tablespoons of the mixture.
For those making a huge batch of Classic Graduation Sugar Cookies for a whole class, I recommend doubling or tripling the recipe. However, don't just multiply the salt and baking powder by three; go with 2.5x for those to avoid a metallic taste.
Work in batches with your rolling pin, and keep the remaining dough in the fridge so it doesn't get warm while you're cutting.
If you're baking multiple trays at once, lower your oven temperature by 25°F (approx. 15°C) and extend the time by 2-3 minutes. This helps the heat distribute evenly across the oven, which is a common issue when the racks are full.
| Goal | Adjustment | Result |
|---|---|---|
| Half Batch | Use 1/2 egg | Smaller yield, shorter bake |
| Triple Batch | 2.5x leavening | High yield, batch processing |
| Extra Soft | Add 1tbsp cream | More tender, slightly more spread |
Cookie Myths
Some people think you need to use a professional convection oven to get a flat, consistent cookie. That's not true. A standard oven works perfectly as long as you use parchment paper and don't crowd the pan.
Another myth is that "room temperature" eggs are just a suggestion. According to King Arthur Baking, temperature matters because cold eggs can seize the creamed butter, creating a broken emulsion. This leads to a grainy texture instead of that velvety finish we want.
Finally,, don't believe that you have to use expensive "cake flour" for a soft cookie. The addition of cornstarch to all purpose flour does the exact same job by reducing the protein levels, saving you a trip to the specialty store.
Storage Guidelines
These cookies stay fresh in an airtight container at room temperature for about 5 days. If you've iced them, make sure the icing is completely dry to the touch before stacking them. Use pieces of parchment paper between layers to prevent the designs from sticking together.
In the fridge, they'll last up to two weeks, but they can get a bit hard. Just let them sit out for 15 minutes before eating to bring back that softness. For long term storage, the freezer is your friend. You can freeze the baked, un iced cookies for up to 3 months.
Just wrap them tightly in foil and then place them in a freezer bag.
To avoid waste, don't throw away the leftover royal icing. You can freeze small dollops of icing on a tray, then pop them into a bag. When you're ready to use them again, just thaw them in the fridge.
If you have scraps of dough left over, roll them into small balls and bake them as "tester" cookies to check the oven temp.
Serving and Enjoyment
When it's time to present your Classic Graduation Sugar Cookies, a tiered platter works best. It creates a visual impact and keeps the cookies from crushing each other. I love pairing these sweet treats with a refreshing Homemade Iced Tea to balance out the sugar.
If you're transporting them to a party, use a rigid plastic container. Avoid cardboard boxes if the icing is still a bit tacky, as the cookies will slide and smudge. To keep them looking fresh for hours, keep the container in a cool, dry place away from direct sunlight, which can melt the icing.
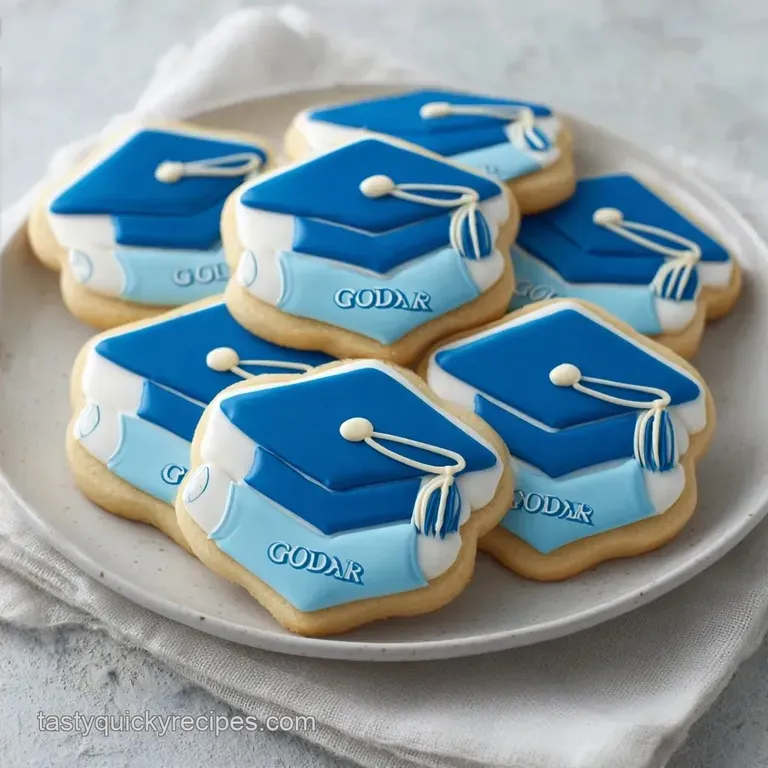
For a final touch, you can sprinkle some edible gold glitter or tiny nonpareils on the caps for extra flair. These cookies are all about the celebration, so don't be afraid to go overboard with the colors.
Whether it's the school colors or a bright gold for the Class of 2026, these treats are the perfect way to say "you did it."
Recipe FAQs
Why did my cookies spread too much in the oven?
Too soft butter or insufficient chilling is the cause. The fat melts before the flour structure sets, which leads to a loss of the graduation cap shape.
Do I really need to refrigerate the dough for an hour?
Yes, chilling is essential. Refrigerating the dough for at least 1 hour solidifies the fats, ensuring the shapes remain sharp after baking.
How to fix royal icing that is too runny?
Whisk in more powdered sugar one tablespoon at a time. This thickens the consistency if too much milk or lemon juice was added during preparation.
How to prevent the dough from sticking to the cookie cutters?
Flour your cutters lightly between every few cuts. This ensures the dough releases cleanly without distorting the detailed diploma or cap shapes.
How long do these cookies stay fresh at room temperature?
Store them for up to 5 days in an airtight container. Make sure the icing is completely dry before stacking them with parchment paper between layers.
How much should I charge for a dozen homemade cookies?
Charge between $12 and $24 per dozen. Price based on your ingredient costs and the extra time required for detailed royal icing work.
Can I make other cookie varieties for the graduation party?
Yes, adding variety is a great idea. If you enjoyed mastering the dough handling here, see how the same principle works in our peanut butter cookies.
Classic Graduation Sugar Cookies