Homemade Graduation Sugar Cookies: Velvety and Maple
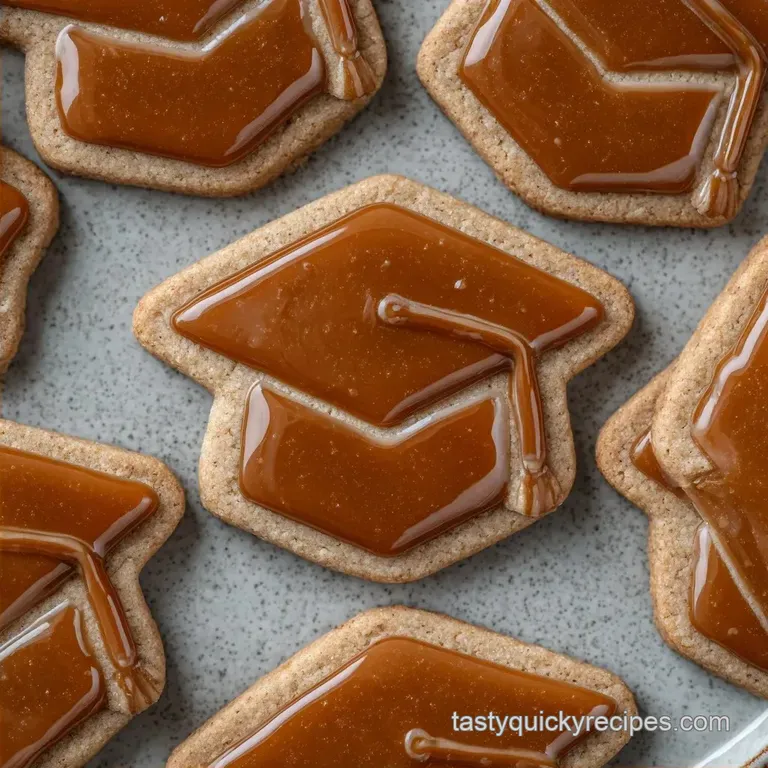
- Time: 20 min active + 2 hours chilling
- Flavor/Texture Hook: Velvety bite with a hint of maple
- Perfect for: Graduation parties, dessert tables, and beginners
- Easy Homemade Graduation Sugar Cookies
- How to Nail the Texture
- The Recipe Details
- Essential Kitchen Gear
- Step-by-Step Baking Process
- Fixing Common Cookie Issues
- Troubleshooting Common Issues
- Ways to Swap Ingredients
- Adjusting the Batch Size
- Cookie Truths
- Keep Them Fresh
- What to Serve Along
- Recipe FAQs
- 📝 Recipe Card
The smell of warm vanilla and toasted butter is basically the official scent of graduation season. I remember the first time I tried to make themed cookies for a family party, and they ended up looking like sad, sugary puddles. I had ignored the chilling step because I was in a rush, and the result was a disaster.
But once I figured out the relationship between butter temperature and dough stability, everything changed. Now, I can whip up a batch that looks like it came from a high end bakery, even if I'm just using my old trusty oven.
You're going to love these Homemade Graduation Sugar Cookies because they aren't just pretty. They have this subtle maple depth that makes them feel more special than a standard sugar cookie. Trust me, your guests will be asking for the recipe.
Easy Homemade Graduation Sugar Cookies
Right then, let's talk about why these actually work. Most sugar cookies fail because the fat melts too quickly in the oven, causing the edges to bleed into one giant blob. We avoid that by keeping the butter chilled and adding cornstarch, which softens the protein in the flour.
- The Cold Butter Effect
- Chilled butter creates tiny pockets of fat that take longer to melt, meaning the cookie keeps its shape.
- Starch Stability
- Cornstarch interferes with gluten development, giving you a tender, velvety texture instead of a tough one.
- Syrup Viscosity
- Maple syrup provides a different kind of sweetness and moisture than granulated sugar, which helps the icing stick better.
- The Long Rest
- Chilling the dough for 2 hours lets the flour fully hydrate, preventing the cookies from spreading.
| Feature | Fresh From Scratch | store-bought Mix | Impact |
|---|---|---|---|
| Texture | Velvety and tender | Often gritty or sandy | Fresh is much smoother |
| Flavor | Maple and vanilla depth | Generic "sweet" taste | Scratch has more character |
| Shape Hold | High (with chilling) | Low (tends to spread) | Fresh stays sharp |
How to Nail the Texture
If you want these to look professional, you have to be strict about the dough. It should be stiff and non sticky. If it feels like it's sticking to your fingers, don't just dump in more flour. Instead, pop it in the fridge for another 15 minutes.
The secret to those crisp edges is the roll out. I always use two sheets of parchment paper. This means you don't have to add extra flour to the counter, which is a huge win because too much extra flour makes the cookies dry and tasteless. According to the experts at King Arthur Baking, managing your flour levels is the key to a tender crumb.
When you're cutting your shapes, press straight down. Don't twist the cutter, or you'll distort the edges. Once they're on the tray, give them space. If they're too close, the heat can't circulate, and you'll get pale spots on the sides.
The Recipe Details
Before we get into the steps, let's look at what's actually happening in the bowl. I've found that using chilled butter instead of room temperature butter is the real trick here. It keeps the dough manageable and the final result looks sharp.
| Ingredient | Science Role | Pro Secret |
|---|---|---|
| Cornstarch | Softens gluten | Prevents the "tough" cookie feel |
| Maple Syrup | Humectant & Flavor | Adds a rich, golden hue |
| Chilled Butter | Structure | Stops the cookies from flattening |
| Powdered Sugar | Icing stability | Creates that glossy, smooth finish |
The Shopping List
- 2 1/4 cups all purpose flour Why this? Standard protein level for structure (Sub: gluten-free 1:1 blend)
- 2 tbsp cornstarch Why this? For a velvety texture (Sub: Arrowroot powder)
- 3/4 cup unsalted butter, chilled Why this? Prevents spreading (Sub: Cold coconut oil)
- 1/2 cup pure maple syrup Why this? Natural sweetness and depth (Sub: Honey)
- 1 large egg, room temperature Why this? Binds the dough (Sub: Flax egg)
- 2 tsp vanilla extract Why this? Classic aroma (Sub: Almond extract)
- 1 tsp baking powder Why this? Just a tiny bit of lift (Sub: Baking soda + cream of tartar)
- 1/2 tsp fine sea salt Why this? Balances the sugar (Sub: Kosher salt)
- 2 cups powdered sugar Why this? For the icing (Sub: Icing sugar)
- 3 tbsp whole milk Why this? Thins the icing (Sub: Heavy cream)
- 1/2 tsp vanilla extract Why this? Extra flavor in icing (Sub: Maple extract)
- natural food coloring Why this? For school colors (Sub: Beet powder for red)
Essential Kitchen Gear
You don't need a fancy setup, but a few things make this way easier. A stand mixer such as KitchenAid is great, but a hand mixer works just fine. The most important part is the parchment paper. If you grease the pan with butter or oil, the cookies are more likely to slide and spread.
I also highly recommend using piping bags. If you don't have them, a Ziploc bag with a tiny corner snipped off does the trick. For the colors, I love using gels rather than liquids. Liquid colors can thin out the icing, making it run off the cookie.
Step-by-step Baking Process
Let's get into it. Remember to keep your butter cold right until you need it.
- Cream the chilled butter and maple syrup. Note: Don't over beat; you just want them combined, not fluffy.
- Beat in the egg and vanilla extract.
- Whisk the flour, cornstarch, baking powder, and salt in a separate bowl.
- Gradually mix dry ingredients into the wet. Stop as soon as a stiff, non sticky dough forms.
- Wrap the dough tightly in plastic wrap.
- Refrigerate for at least 2 hours. Note: This is the most important step for shape retention.
- Roll dough between two parchment sheets to 1/4 inch thickness.
- Stamp out your shapes.
- Bake at 350°F (175°C) for 12 minutes until edges are barely pale gold.
- Whisk powdered sugar, milk, and vanilla until glossy.
- Outline cooled cookies and fill them in.
- Let them set for 4 hours before you dare move them.
Fixing Common Cookie Issues

Even for the best of us, things can go sideways. Usually, it comes down to temperature. If your kitchen is too hot, the dough starts to soften before it even hits the oven.
Troubleshooting Common Issues
| Issue | Solution |
|---|---|
| Why Your Cookies Spread | This usually happens because the butter was too warm or the dough didn't chill long enough. If the fat is already semi liquid, the cookie will collapse before the flour sets. |
| Icing Too Runny | Too much milk is the usual culprit. Icing should feel like thick toothpaste. If it's flowing like water, it won't stay on the cookie and will bleed into the edges. |
| Why Are My Cookies Too Brown | Your oven might be running hot, or you left them in too long. For these, you want them barely colored. If they're dark brown, they'll lose that velvety texture and become crunchy. |
Common Mistakes Checklist
- ✓ Did you chill the dough for the full 2 hours?
- ✓ Is the butter actually chilled, not room temp?
- ✓ Did you roll the dough to a consistent 1/4 inch?
- ✓ Is the icing thick enough to hold a peak?
- ✓ Did you let the cookies cool completely before icing?
Ways to Swap Ingredients
If you're making these for someone with allergies, you can still get a great result. For a gluten-free version, a 1:1 GF flour blend works well, but you might find the dough is a bit stickier. Just add an extra 10 minutes of chilling time.
If you want a different flavor profile, try replacing the vanilla in the dough with almond extract. It gives a more "wedding cake" vibe that works beautifully for graduation. For the icing, you can use coconut milk instead of dairy milk for a subtle tropical twist.
If you're looking for more celebratory treats, you might enjoy my Chocolate Covered Strawberries recipe, which adds a great touch of luxury to any party platter.
Adjusting the Batch Size
If you're only baking for a small group, you can half this recipe. Just beat one egg in a small bowl and use half of it. Use a smaller baking sheet and reduce the bake time by about 2 minutes, as smaller batches sometimes heat up faster.
For a massive party, I'd recommend working in batches rather than quadrupling the dough. If the dough sits out too long while you're cutting the 100th cookie, the last few will spread.
If you do double the batch, lower your oven temp to 325°F and extend the time by a few minutes to ensure the center cooks through without burning the edges.
Cookie Truths
You might have heard that you should always use room temperature butter for cookies. For most things, yes. But for sugar cookies that need to hold a shape, that's a myth. Room temp butter leads to spreading.
Another one is that you need a professional oven to get a flat top. Not true. The secret is just the cornstarch and the chill. Even a basic home oven can do this if the dough is cold.
Keep Them Fresh
Store these in an airtight container with a piece of parchment paper between layers. They'll stay fresh on the counter for 3-5 days. If you're planning ahead, you can freeze the unbaked shapes on a tray, then transfer them to a freezer bag.
To bake from frozen, just add 2 minutes to the cook time. I've found that freezing the dough actually helps them hold their shape even better. For zero waste, if you have leftover icing, freeze it in a small airtight container. It lasts about a month and can be thawed in the fridge overnight.
What to Serve Along
Since these are quite sweet, I love pairing them with something refreshing. A glass of Homemade Iced Tea is the perfect balance to the maple and powdered sugar.
For the presentation, focus on color balance. I usually pick three colors: the school's primary color (like Navy), a metallic accent (Gold), and a clean neutral (White). Use the Navy for the main filling, the Gold for the borders, and the White for the graduation year or names.
This keeps the cookies looking polished and not cluttered.
Right then, you're all set to make some Homemade Graduation Sugar Cookies that will actually impress. Just remember: keep it cold, don't over mix, and be patient with the icing. You've got this!
Recipe FAQs
Why did my graduation cookies spread in the oven?
The butter was too warm or the dough was not chilled long enough. When the fat is semi-liquid, the cookie collapses before the flour can set in the oven.
What should I do if the icing is too runny?
Add more powdered sugar. The icing should have the consistency of thick toothpaste to prevent it from bleeding into the edges of the cookie.
How to color the icing for graduation themes?
Whisk natural food coloring into the powdered sugar mixture. Stir slowly until the color is uniform before transferring the icing to piping bags.
Is it true I can skip the two-hour refrigeration period?
No, this is a common misconception. Chilling the dough is the most critical step for maintaining the shapes of the graduation cutters.
How to ensure the cookies do not get too brown?
Bake at 350°F (175°C) for exactly 12 minutes. Remove the cookies as soon as the edges are barely pale gold to keep them light.
When can I stack the decorated cookies?
Wait 4 hours after flooding the icing. This ensures the icing is fully set so the designs do not smudge or stick together.
How to get the icing to look glossy and professional?
Whisk powdered sugar, milk, and vanilla until completely smooth. If you enjoyed achieving a glossy finish here, see how we use a similar technique for a velvety result in our ravioli sauce.
Homemade Graduation Sugar Cookies (24)