Quick Graduation Cookie Recipe: Buttery and Soft
- Time: 15 min active + 10 min baking
- Flavor/Texture Hook: Buttery, soft bite cookies with a glossy, velvet smooth icing
- Perfect for: Last minute party platters or student celebrations
- Quick Graduation Cookie Recipe
- Why These Cookies Stay Flat
- Component Analysis
- What You'll Need
- The Gear You'll Need
- Step-By-Step Baking Guide
- Fixing Common Baking Glitches
- Troubleshooting Common Issues
- Scaling Your Batch
- Common Baking Myths
- Keeping Cookies Fresh
- Serving and Pairing Ideas
- Recipe FAQs
- 📝 Recipe Card
The smell of vanilla and warm butter hitting the air is usually my signal that the party has officially started. I remember one June afternoon where I completely blanked on my cousin's graduation dessert. The guests were arriving in two hours, and I had nothing but a bag of flour and some butter in the fridge.
I didn't have time for the typical "chill the dough for four hours" routine that most sugar cookies demand.
I needed something that looked like I'd spent all morning on it, but actually came together in a flash. That's how this Quick Graduation Cookie Recipe became my go to. It's a bit of a cheat code for anyone who wants that professional, sharp edged look without the wait.
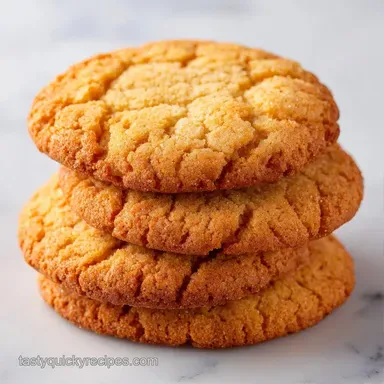
You can expect a cookie that's soft but holds its shape, topped with an icing that sets quickly so you can actually get them on a platter. It's an irresistible way to celebrate a big milestone without spending your entire day in the kitchen.
Quick Graduation Cookie Recipe
The goal here is a cookie that doesn't turn into a puddle the second it hits the heat. Most recipes tell you to cream room temperature butter, which is great for cakes, but for shaped cookies, it's a recipe for disaster.
By using chilled butter, we keep the fat from melting too fast, which means your graduation caps and diplomas actually look like caps and diplomas.
Then there's the icing. I've spent way too much time making royal icing that takes ten hours to dry. For this, we use a heavy cream and powdered sugar mix. It gives you that glossy, polished finish but stays a bit more flexible, so the cookies don't shatter when you take a bite.
Whether you're making these for a small family gathering or a huge class party, the process is the same. We're focusing on speed and precision. You'll get a treat that's sweet, buttery, and looks dedicated to the occasion.
Why These Cookies Stay Flat
Instead of the usual guesswork, there are a few specific things happening in the bowl that make this work.
- Cold Fat Control: Using chilled butter means the fat stays solid longer in the oven, preventing the dough from spreading.
- Starch Softening: The cornstarch interferes with the gluten development, creating a more tender, velvety crumb.
- Sugar Ratio: The high proportion of granulated sugar helps create a crisp edge while keeping the center soft.
- Rapid Setting: The heavy cream in the icing provides a fat barrier that helps the sugar stabilize faster than water based glazes.
| Method | Prep Time | Texture | Best For |
|---|---|---|---|
| Fast Method | 15 minutes | Soft & Tender | Last minute parties |
| Classic Method | 2 hours | Crisp & Snap | Long term storage |
| Chilled Method | 1 hour | Dense & Sharp | Intricate detailing |
Component Analysis
Knowing what each ingredient does helps you troubleshoot on the fly. For example, if you've only got milk and no heavy cream, you'll know exactly how that changes your icing.
| Ingredient | Science Role | Pro Secret |
|---|---|---|
| Chilled Butter | Structure Support | Keep it in cubes for faster, even creaming |
| Cornstarch | Crumb Modifier | Prevents the "tough" cookie feel |
| Powdered Sugar | Icing Stability | Sift it to avoid tiny lumps in your lines |
| Egg | Binder/Emulsifier | Room temp helps it blend without breaking butter |
What You'll Need
Get everything measured out before you start. It makes the 15 minute prep actually possible.
For the Sugar Cookie Base
- 1/2 cup unsalted butter, chilled and cubedWhy this? Prevents spreading during the bake
- 3/4 cup granulated sugarWhy this? Provides sweetness and edge crispness
- 1 large egg, room temperatureWhy this? Binds the dough together
- 1 tsp vanilla extractWhy this? Classic aromatic base
- 2 cups all purpose flourWhy this? Standard structure
- 2 tbsp cornstarchWhy this? For a softer, professional bite
- 1/2 tsp baking powderWhy this? Slight lift without too much puff
- 1/4 tsp saltWhy this? Balances the sugar
For the Quick Dry Icing
- 2 cups powdered sugar, siftedWhy this? Creates the smooth base
- 2 tbsp heavy cream or milkWhy this? Controls the thickness
- 1 tsp vanilla extractWhy this? Adds depth to the frosting
- Gel food coloringWhy this? Strong color without thinning the icing
Ingredient Swaps
| Original Ingredient | Substitute | Why It Works |
|---|---|---|
| Heavy Cream | Whole Milk | Similar liquid, but icing is slightly thinner |
| All Purpose Flour | 1:1 GF Flour | Works well, but crumb may be slightly more fragile |
| Unsalted Butter | Salted Butter | Works fine, just skip the added 1/4 tsp salt |
The Gear You'll Need
You don't need a professional kitchen for this, but a few tools make it easier. I use a standard stand mixer such as a KitchenAid, but a hand mixer works just as well.
- Electric Mixer: Essential for getting that pale, fluffy butter.
- Parchment Paper: Non negotiable. It prevents sticking and lets you roll the dough right on the sheet.
- Rolling Pin: A smooth one is best to get an even 1/4 inch thickness.
- Cookie Cutters: Graduation caps, diplomas, or simple stars.
- Piping Bags/Tips: For the icing, or just snip the corner of a plastic bag.
- Wire Cooling Rack: To prevent the bottoms from getting soggy.
Step-by-step Baking Guide
Follow these steps closely. The timing is tight, so keep your oven preheating while you mix.
- Cream butter and sugar. Using your mixer on high, beat the chilled butter and granulated sugar for 2 minutes until the mixture is pale and fluffy. Note: Don't over beat or you'll incorporate too much air.
- Mix in wet ingredients. Beat in the egg and vanilla extract until fully incorporated.
- Whisk dry ingredients. In a separate bowl, whisk together the flour, cornstarch, baking powder, and salt.
- Combine dough. Slowly add the dry ingredients to the wet. Mix just until a soft dough forms. Note: Over mixing here makes the cookies tough.
- Roll the dough. Place the dough directly on parchment paper. Roll to 1/4 inch thickness.
- Cut shapes. Use your cutters to press out shapes. Do this quickly while the dough is cool.
- Bake cookies. Bake at 350°F (175°C) for 8–10 minutes until the edges are barely golden.
- Cool. Move the cookies to a wire rack immediately.
- Make the icing. Whisk powdered sugar, heavy cream, and vanilla until the glaze is glossy and thick.
- Decorate. Divide icing into bowls, add gel colors, and pipe onto cooled cookies. Let set for 15 minutes.
Chef's Note: If you want a sharper edge, freeze your cut out cookies on the tray for 5 minutes before sliding them into the oven. This locks the shape even further.
Fixing Common Baking Glitches
Even the best of us have a batch that goes sideways. Usually, it's a temperature issue.
Troubleshooting Common Issues
| Issue | Solution |
|---|---|
| Why Your Cookies Spread | If your cookies turned into pancakes, your butter was likely too warm. According to King Arthur Baking for a mix of flavors. Or, if you have a crowd that loves a little more crunch, you can add a pinch of cinnamon to the dry ingredients. |
For those with dietary needs, you can make these gluten-free by using a high-quality 1:1 gluten-free flour blend. Just be aware that GF dough is often stickier, so you might need to roll it between two sheets of parchment paper.
If you want a vegan version, use a chilled plant based butter stick and a flax egg, though the texture will be slightly denser.
Scaling Your Batch
Sometimes 12 cookies just isn't enough for a whole graduation class.
Scaling Down (Half Batch) Use 1/4 cup butter and 1/3 cup sugar. Since you can't easily half an egg, crack one into a bowl, whisk it, and use about 2 tablespoons. Reduce bake time by about 1-2 minutes since the tray is less crowded.
Scaling Up (Double or Triple) When doubling this Quick Graduation Cookie Recipe, don't just multiply the baking powder by two. Use about 1.5x the leavening agents to prevent the cookies from puffing up too much. Work in batches so your mixer doesn't overheat and your butter stays chilled.
| Batch Size | Butter Amount | Flour Amount | Note |
|---|---|---|---|
| Half (6 cookies) | 1/4 cup | 1 cup | Use half a whisked egg |
| Double (24 cookies) | 1 cup | 4 cups | Bake in two separate batches |
| Triple (36 cookies) | 1.5 cups | 6 cups | Use a large stand mixer |
Common Baking Myths
Myth: You must chill sugar cookie dough for hours. Truth: While it helps, using chilled butter and cornstarch achieves a similar result in a fraction of the time. The cold fat does the heavy lifting.
Myth: Room temperature eggs ruin the butter. Truth: As long as you cream the butter and sugar first, a room temperature egg integrates better and won't cause the butter to seize, which actually helps the emulsion.
Myth: Sifting flour is a waste of time. Truth: For cookies, it's less critical, but sifting powdered sugar is mandatory for icing. Lumps in icing are a nightmare when piping small details.
Keeping Cookies Fresh
You don't have to bake these the day of the party. In fact, doing them a day early saves a lot of stress.
Storage Guidelines Store the baked, un iced cookies in an airtight container at room temperature for up to 5 days. If you've already iced them, keep them in a cool, dry place. I find that a container with a piece of parchment paper between layers prevents the icing from sticking together.
Freezing Tips You can freeze the raw cut out shapes on a tray for 2 hours, then transfer them to a freezer bag. Bake them straight from the freezer, just add 2 minutes to the cook time.
Iced cookies can be frozen, but they might "sweat" when thawing, so it's better to freeze them plain.
Zero Waste If you have leftover icing, don't toss it. Put it in a small jar in the fridge for 3 days. You can use it to drizzle over a cake or dip fruit in it. If you have scrap dough after cutting shapes, just roll them into small balls and bake them as "chef's treats" for yourself.
Serving and Pairing Ideas
Presentation is everything for a graduation. You can go from a casual plate to a professional display with just a few tweaks.
Plating Levels
| Level | Presentation | Tweak |
|---|---|---|
| Simple | Placed on a white platter | Pile them loosely for a homey feel |
| Polished | Arranged in rows on a slate board | Add fresh mint leaves for color contrast |
| Restaurant | Individual mini plates with a drizzle | Use a gold rimmed plate and a side of berries |
For a complete spread, I highly recommend pairing these with my Homemade Crystal Clear Iced Tea. The tannins in the tea cut through the richness of the butter and the sweetness of the icing, making the whole experience feel balanced.
Quick Decision Shortcut
- If you want a snappier cookie, bake for 11 minutes.
- If you want brighter colors, use gel paste instead of liquid food coloring.
- If you want softer icing, add an extra teaspoon of heavy cream.
Recipe FAQs
How to prevent these cookies from spreading in the oven?
Keep your butter chilled and cubed. If the fat is too warm, the cookies will flatten into pancakes instead of holding their sharp graduation shapes.
Can I use room temperature butter instead of chilled butter?
No, stick with chilled butter. Cold butter is essential for maintaining the structure of the cookies during the baking process.
How to get vibrant colors in the icing?
Use gel food coloring instead of liquid drops. Gel provides a more intense pigment without thinning the glossy consistency of the powdered sugar mixture.
Is it true that cornstarch is only used for thickening sauces?
No, this is a common misconception. In this recipe, cornstarch softens the flour's proteins to create a more tender crumb; if you enjoyed mastering texture control here, see how we use a similar approach to keep our applesauce muffins moist.
How long can I store these decorated cookies?
Up to 3 days in an airtight container. Store them at room temperature in a cool area to ensure the icing stays set and doesn't bleed.
How much should I charge for a dozen homemade cookies?
Between $12 and $20 per dozen. This range covers the high detail piping and the cost of specialty ingredients like gel coloring.
How to freeze the dough for a future graduation party?
Wrap the rolled dough tightly in plastic wrap and store in a freezer safe bag. Thaw in the refrigerator before cutting and baking at 350°F.
Quick Graduation Cookie Recipe