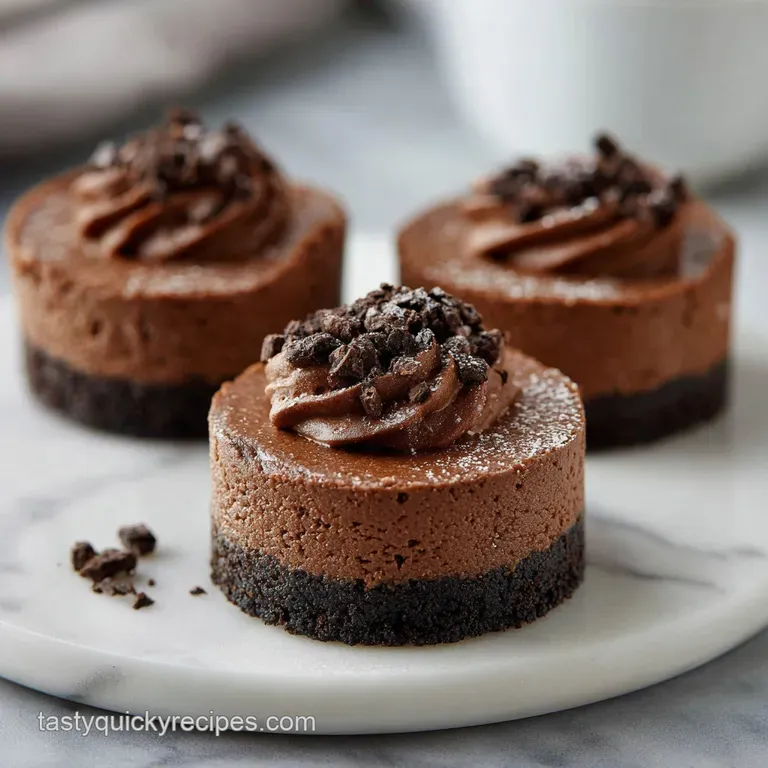
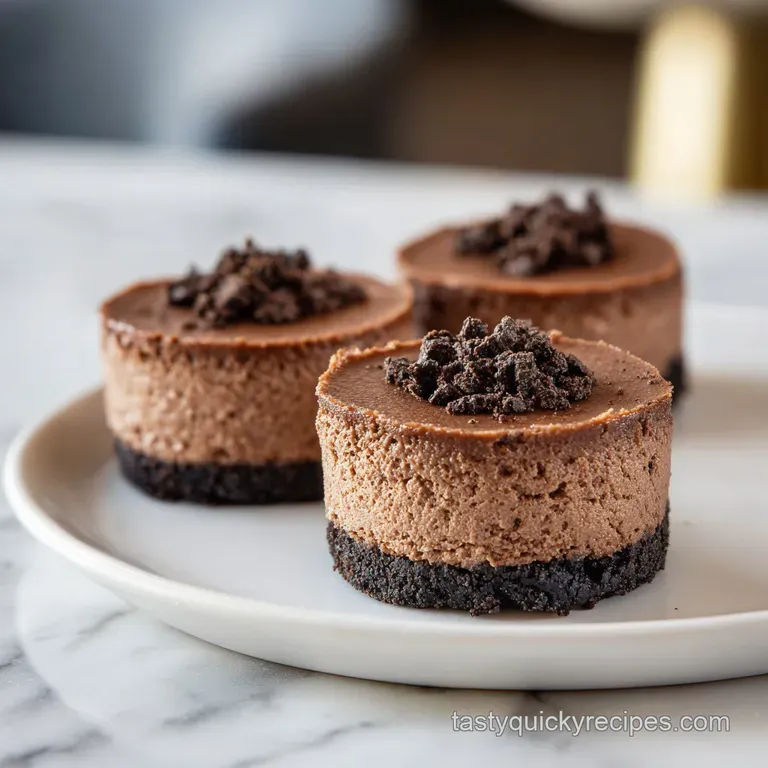
No Bake Mini Triple Chocolate Cheesecakes
- Time:30 minutes active + 4 hours chilling = Total 4 hours 30 mins
- Flavor/Texture Hook: Shattering Oreo crust topped with silky, deep mahogany chocolate cream
- Perfect for: Dinner party finales or a high end treat for chocolate lovers
No bake mini triple chocolate cheesecakes
Imagine this: you've just finished a big dinner, the guests are lingering at the table, and you bring out a platter of these. The deep, dark chocolate looks almost like professional truffles, and as soon as someone takes a bite, they hit that salty sweet Oreo crunch before sinking into a cloud of chocolate cream.
It's that specific kind of magic where something looks incredibly high effort but actually let you relax and enjoy your own party.
I remember the first time I tried a no bake cheesecake for a holiday get together. I skipped the room temperature step for the cream cheese, and the result was a lumpy, curdled mess that looked like cottage cheese.
I almost threw the whole batch out, but that's where I learned the hard way that temperature is everything in a no bake recipe. Now, I treat my cream cheese like a pampered guest, letting it soften completely before it even touches the bowl.
These little bites are designed to be irresistible. We're layering three types of chocolate intensity: the cocoa infused base, the velvety cream cheese filling, and a glossy, buttery ganache on top.
You'll get a dessert that's rich, decadent, and looks like it came from a boutique bakery, all while staying completely stress free in your own kitchen.
Why the Filling Stays Firm
The secret to this recipe isn't a magic powder or a fancy stabilizer, but rather the way we handle the fats and air. Since we aren't using an oven to set the proteins, we rely on a few simple tricks to ensure these don't turn into chocolate soup.
Fat Stabilization: Full fat cream cheese provides a dense structural base that holds its shape when chilled.
Aeration Balance: Whipping the heavy cream separately creates tiny air bubbles that lighten the dense cheese, giving it a silky feel without sacrificing stability.
Temperature Setting: The 4 hour chill time allows the fats in the butter and cream cheese to crystallize, locking the structure in place.
Cocoa Absorption: The Dutch processed cocoa powder acts as a natural thickener, absorbing excess moisture from the cream cheese.
| Servings | Ingredient Adjustments | Pan Size | Chill Time |
|---|---|---|---|
| 6 Mini Cakes | Use 1/2 of all ingredients | 6 muffin cups | 4 hours |
| 12 Mini Cakes | Standard recipe | 12 muffin cups | 4 hours |
| 24 Mini Cakes | Double all ingredients | 24 muffin cups | 4 hours |
The Ingredient Deep Dive
Understanding what each part does helps you avoid those "why did this happen?" moments. For instance, using low-fat cream cheese is a recipe for disaster here because you need the fat to create that specific, luxurious mouthfeel.
| Ingredient | Science Role | Pro Secret |
|---|---|---|
| Full fat Cream Cheese | Structural Base | Must be soft to avoid lumps |
| Heavy Whipping Cream | Volume and Lift | Keep it ice cold for max peaks |
| Dutch processed Cocoa | Flavor and Body | Sift it to prevent bitter clumps |
| Semi sweet Chocolate | Gloss and Set | Chop finely for a smooth melt |
The Building Blocks
When gathering your supplies, focus on the quality of the chocolate. Since there are so few ingredients, a cheap chocolate bar will taste "waxy," whereas a high-quality semi sweet chocolate makes the ganache feel like velvet.
- 1.5 cups (150g) Oreo cookie crumbs Why this? Provides the classic chocolate crunch and salt balance (Substitute: Chocolate wafers)
- 3 tbsp (42g) unsalted butter, melted Why this? Binds crumbs into a solid crust (Substitute: Coconut oil)
- 1 tbsp (8g) granulated sugar Why this? Adds a slight crystalline snap to the base (Substitute: Brown sugar for more molasses flavor)
- 16 oz (450g) full fat cream cheese, softened Why this? The core structural element (Substitute: Mascarpone for a milder, creamier taste)
- 0.5 cup (100g) powdered sugar, sifted Why this? Dissolves instantly for a smooth texture (Substitute: Very fine caster sugar)
- 0.33 cup (30g) unsweetened cocoa powder, Dutch processed Why this? Deep, dark color and rich cocoa taste (Substitute: Natural cocoa, but it will be lighter/tangier)
- 1 tsp (5ml) pure vanilla extract Why this? Rounds out the chocolate bitterness (Substitute: Maple syrup)
- 0.25 tsp (1.5g) fine sea salt Why this? Cuts through the richness (Substitute: Kosher salt)
- 1 cup (240ml) heavy whipping cream, chilled Why this? Creates the light, airy lift (Substitute: Heavy cream with a pinch of cream of tartar)
- 4 oz (115g) semi sweet chocolate, finely chopped Why this? Essential for the glossy top (Substitute: Dark chocolate for a more intense flavor)
- 0.5 cup (120ml) heavy cream Why this? Melts the chocolate into a smooth sauce (Substitute: Coconut cream)
- 1 tbsp (14g) unsalted butter, room temperature Why this? Adds the professional mirror glaze shine (Substitute: Extra chocolate)
Must Have Kitchen Tools
You don't need a professional studio to pull this off, but a few specific tools make the process much smoother. If you don't have a piping bag, a sturdy Ziploc bag with the corner snipped off works perfectly for getting that clean fill.
- 12 cup muffin tin (lined with paper liners)
- Electric hand mixer or stand mixer (like KitchenAid)
- Fine mesh sieve (for sifting cocoa and powdered sugar)
- Silicone spatula (for gentle folding)
- Small microwave safe bowl (for the ganache)
- Small flat bottomed glass (to press the crust)
The Full Process
Right then, let's crack on. The key here is patience, especially during the chilling phase. Don't try to rush the 4 hours, or your ganache will melt right into the filling.
Phase 1: Constructing the Base
- Combine Oreo crumbs, melted butter, and sugar in a bowl until the mixture resembles wet sand.
- Spoon approximately 1.5 tbsp (20g) of the crust mixture into each of the 12 lined muffin cups and press firmly with a small glass until a flat, compact surface forms. Note: This prevents the filling from leaking into the crust.
Phase 2: Whipping the Triple Chocolate Filling
- Beat the softened cream cheese and powdered sugar on medium high speed until the mixture is completely smooth and airy. Note: Ensure no lumps remain here, as they won't disappear later.
- Sift in the cocoa powder and salt, then add vanilla extract. Beat on low until the color is a uniform, deep mahogany.
- In a separate chilled bowl, whip the heavy cream until stiff peaks form. Note: Don't overbeat into butter!
- Gently fold the whipped cream into the chocolate cream cheese mixture using a spatula until no white streaks remain.
- Pipe or spoon the filling evenly over the crusts, smooth the tops, and refrigerate for at least 4 hours.
Phase 3: The Glossy Ganache Finish
- Place chopped chocolate in a bowl and heat the heavy cream in the microwave until it just begins to simmer.
- Pour hot cream over the chocolate, let sit for a moment, then stir in room temperature butter until a glossy ganache forms and pour over the chilled cheesecakes.
Fixing Texture Issues
Even for a pro, things can go sideways. The most common issue is a filling that feels too soft or a ganache that looks grainy. Most of these are solved by managing your temperatures.
Troubleshooting Common Issues
| Issue | Solution | ||
|---|---|---|---|
| Why Your Filling Is Lumpy | Lumps usually happen because the cream cheese was too cold. Once the mixture is beaten, it's hard to remove these. According to Serious Eats, getting your dairy to a con | ||
| Why Your Ganache Is Dull | If your ganache doesn't have that mirror like shine, you likely skipped the room temperature butter or didn't let the cream reach a simmer. The butter is what gives it that professional glow. | ||
| Why Your Crust Is Crumbly | If the crust falls apart, you might not have pressed it firmly enough with the glass, or you didn't use enough melted butter. It should feel like a solid disk, not loose crumbs. | Problem | Root |
Flavor Shifts and Swaps
If you want to move away from the classic profile, this recipe is incredibly flexible. Since the base is so rich, it pairs well with tart fruits or salty accents. For another treat that uses a similar no bake logic, you might love these Oreo Balls recipe for a bite sized alternative.
- Red Accent
- Place a single fresh raspberry on top of the ganache.
- Green Accent
- A tiny sprig of mint leaves adds a fresh, organic look.
- White Accent
- A light dusting of powdered sugar or a small dollop of whipped cream.
- For a Salted Edge
- Sprinkle a pinch of flaky sea salt over the ganache immediately after pouring.
- For a Fruity Core
- Hide a small piece of strawberry in the center of the filling before smoothing the top.
- For a Nutty Crunch
- Mix 1 tbsp of finely crushed hazelnuts into the Oreo crust.
If you love the layered look of this dessert, you should definitely try my Chocolate Ripple Cheesecake for a full sized version.
Freshness and Storage
Because of the high fat content in the cream cheese and ganache, these hold up remarkably well in the fridge. However, they can pick up smells from other foods, so an airtight container is non negotiable.
Fridge and Freezer Life Store these in the refrigerator for up to 5 days. For longer storage, you can freeze them for up to 2 months. To freeze, place them on a parchment lined tray first until solid, then transfer them to a freezer safe container.
Thawing and Reheating Never microwave these! To serve from the freezer, move them to the fridge for about 4 hours. They are best enjoyed chilled, as the texture becomes too soft if they reach room temperature for too long.
Zero Waste Tips If you have leftover Oreo crumbs, don't toss them. Use them as a topping for vanilla ice cream or mix them into a smoothie for a "cookies and cream" vibe. Any leftover ganache is essentially a rich chocolate sauce - warm it up slightly and drizzle it over sliced bananas.
The Best Pairings
Since these are intensely rich, you need something to cut through the fat and sugar. A heavy dessert requires a light or acidic companion to keep your palate refreshed.
The Fresh Contrast Serving these alongside a bowl of fresh blackberries or sliced tart green apples creates a beautiful balance. The acidity of the fruit cleanses the palate, making the next bite of chocolate taste just as intense as the first.
- Coffee
- A strong espresso or a black Americano is the gold standard here. The bitterness of the coffee complements the sweetness of the chocolate.
- Tea
- A fragrant Earl Grey or a peppermint tea provides a refreshing contrast.
- Wine
- A glass of Ruby Port or a sweet dessert wine like Sauternes pairs beautifully with the deep cocoa notes.
Serving Suggestion Place the mini cakes on a white ceramic platter to make the dark chocolate colors pop. Arrange them in a circle with a pile of fresh berries in the center. This creates a visual focal point and encourages guests to help themselves to a fruit piece between bites of the cheesecake.
Recipe FAQs
Why is my chocolate filling lumpy?
Your cream cheese was likely too cold. Once the mixture is beaten, these lumps are very difficult to remove. Ensure your cream cheese is completely softened before mixing.
Why is my chocolate ganache dull instead of glossy?
You likely skipped the room temperature butter or the cream didn't reach a simmer. The butter is essential for creating that professional mirror like shine. Always heat the cream until it just begins to simmer before pouring.
How long should these chill before adding the ganache?
Refrigerate for at least 4 hours. This ensures the filling is firm enough to support the ganache without the layers merging.
Can I use milk chocolate instead of semi sweet chocolate?
Yes, but the final taste will be much sweeter. Semi sweet chocolate provides a balanced bitterness that offsets the sugar in the Oreo crust and cream cheese.
How to create a perfectly flat crust in the muffin cups?
Press the crust mixture firmly with a small glass. This creates a level surface and prevents the cheesecake filling from leaking down the sides.
Is it true these must be baked to set properly?
No, this is a common misconception. These set through refrigeration using the stability of full fat cream cheese and whipped heavy cream.
How to store these to maintain the best texture?
Keep them in an airtight container in the refrigerator. If you enjoyed the rich, velvety chocolate experience here, see how that same intensity works in our rich velvety chocolate brownies.
No Bake Mini Chocolate Cheesecakes

