Chocolate Graduation Cap Cookies: Chewy Caramel Center

- Time:15 minutes active + 32 minutes baking and cooling
- Flavor/Texture Hook: Velvety chocolate with a chewy caramel center
- Perfect for: Graduation parties, dessert platters, or a sweet celebratory gift
- Chocolate Graduation Cap Cookies
- Reasons to Love These Treats
- Ingredient Deep Dive
- Necessary Baking Tools
- Step-by-Step Baking Guide
- Solving Common Baking Issues
- Troubleshooting Common Issues
- Flavor Twists and Swaps
- Scaling the Batch
- Truth About Baking Beliefs
- Freshness and Waste Tips
- Best Party Pairing Ideas
- Recipe FAQs
- 📝 Recipe Card
Chocolate Graduation Cap Cookies
That first scent of cocoa hitting the oven air is just something else. It's that deep, rich aroma that makes the whole house feel cozy, but when you add the visual of a tiny tassel and a chocolate square, it turns into a celebration. I remember the first time I tried making these for my nephew's high school grad party.
I wanted something that looked high effort but didn't require me to be a professional pastry chef for a weekend.
The goal was to create something that didn't just look pretty but actually tasted like a real treat. We've all had those themed cookies that are basically just sugar and food coloring, and honestly, they're a letdown. These are different.
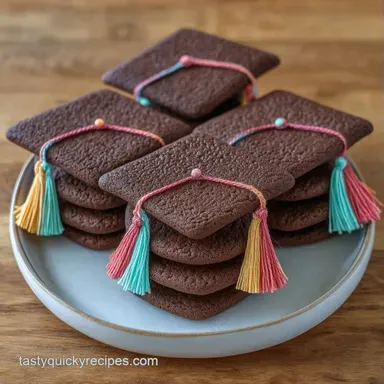
We're talking about a mahogany colored chocolate base that's sturdy enough to hold a candy topper but soft enough to melt in your mouth.
You can expect a cookie that's structured and clean. These Chocolate Graduation Cap Cookies don't spread into amorphous blobs on the pan, which is the secret to keeping that sharp square edge. Between the Rolo center and the melted chocolate top, you're getting layers of textures that make every bite feel like a little reward.
Reasons to Love These Treats
The magic here is all about the balance of structural integrity and flavor. I've found that most "themed" cookies fail because they prioritize the look over the taste, but we're not doing that here.
The Cocoa Ratio: Using a mix of unsweetened cocoa and all purpose flour creates a dough that's dense but not dry. According to Serious Eats, the fat from the butter helps bloom the cocoa, which is why the color is so deep.
The Candy Pillar: The Rolo isn't just for flavor. It acts as a physical support, lifting the chocolate "cap" off the cookie base so it doesn't look flat.
The Oil Trick: Adding a tiny bit of vegetable oil to the melting wafers prevents that dull, matte finish. It gives the top a glossy, polished look that reflects the light.
The Chill Factor: Because the dough is stiff, it holds the shape of the square cutter. You won't get those rounded edges that ruin the "cap" illusion.
| Fresh Base | Shortcut Base | Texture Impact | Best For |
|---|---|---|---|
| Homemade Cocoa Dough | store-bought Chocolate | More chew, richer color | Presentation |
| Freshly Melted Wafers | Pre made Frosting | Sharper edges, better snap | Long term storage |
| Hand cut Tassels | ready-made Sprinkles | Authentic look | Professional feel |
Ingredient Deep Dive
When you're building something this specific, the role of each ingredient matters more than usual. It's not just about sweetness, it's about how the cookie behaves under heat.
| Ingredient | Science Role | Pro Secret |
|---|---|---|
| Unsalted Butter | Fat & Aeration | Keep it soft, not melted, to maintain dough height |
| Cocoa Powder | Flavor & Structure | Sift it to avoid tiny bitter clumps in the dough |
| Rolo Candies | Height & Texture | Press them firmly so the chocolate top doesn't slide |
| Melting Wafers | Setting Agent | Use wafers instead of chips for a velvet smooth finish |
Necessary Baking Tools
You don't need a professional kitchen to pull this off, but a few specific tools make the process much smoother. Trust me, trying to cut squares with a knife is a recipe for frustration.
- Square Cookie Cutter: A 2 inch square cutter is the gold standard here.
- Rolling Pin: Essential for getting that consistent 1/2 inch thickness.
- Kitchen Shears: You'll need these to fringe the sour belts for the tassels.
- Parchment Paper: Don't risk the cookies sticking to the pan.
- Microwave Safe Bowl: For the 30 second burst melting method.
Step-by-step Baking Guide
Right then, let's get into the actual making of these. Take your time with the shaping, as that's where the visual "wow" factor comes from.
Cream the softened butter and sugar. Beat them together until the mixture looks pale and fluffy. Note: This incorporates air, so the cookies aren't like bricks.
Beat in the egg and vanilla. Mix until the batter is smooth and glossy.
Whisk the flour, cocoa powder, baking soda, and salt. Use a separate bowl to ensure the leavening agents are evenly distributed. Note: For the most accurate measure, follow King Arthur Baking's guide on spooning and leveling flour.
Incorporate dry ingredients into wet. Mix until a stiff, mahogany colored dough forms. Don't overmix, or you'll get tough cookies.
Roll the dough. Aim for 1/2 inch (1.3cm) thickness on a floured surface. Note: Too thin and they'll spread; too thick and they won't bake through.
Stamp out 12 squares. Place them on a baking sheet 2 inches apart.
Bake at 350°F (175°C) for 10-12 minutes until set to the touch. Let them cool completely on a wire rack. Note: If you top them while warm, your chocolate will run.
Melt chocolate wafers and vegetable oil. Use 30 second bursts in the microwave, stirring until the gloss is uniform.
Position the Rolo. Place one candy in the center of each cooled square.
Apply the chocolate top. Spoon a generous tablespoon over the candy, smoothing it toward the edges with a spatula to create a flat, square top.
Prepare the tassel. Cut sour belts into thin strips and fringe one end with shears.
Add final details. Press the tassel into the center of the chocolate cap and allow to set. Sprinkle a bit of white sanding sugar on the edges if you want extra sparkle.
Solving Common Baking Issues

Even the best of us hit a snag now and then. Usually, it's a temperature issue or a measurement slip.
Troubleshooting Common Issues
| Issue | Solution |
|---|---|
| Why Your Cookies Spread | If your squares turned into circles, your butter was likely too soft or your oven was too cool. When the butter melts before the flour structure sets, the cookie collapses. |
| Why Your Chocolate Seized | Chocolate seizes when a tiny drop of water gets in, or if it's overheated. It turns from a velvety liquid into a gritty paste. |
| Why the Tassel Won't Stay | If the chocolate has already fully set, the tassel will just slide off. You need to time the placement while the chocolate is still slightly tacky. |
Common Mistakes Checklist
- ✓ Did you cool the cookies completely before adding the Rolo?
- ✓ Did you sift the cocoa powder to avoid lumps?
- ✓ Is your oven actually at 350°F (175°C)?
- ✓ Did you roll the dough to a full 1/2 inch thickness?
- ✓ Did you stir the chocolate every 30 seconds to avoid burning?
Flavor Twists and Swaps
If you want to change the vibe of these Chocolate Graduation Cap Cookies, you can definitely play with the ingredients. The structure remains the same, but the flavor profile can shift.
For a different center, you can swap the Rolo for a miniature peanut butter cup. This creates a salty sweet contrast that's absolutely irresistible. If you're doing a big dessert spread, these pair brilliantly with my Peanut Butter Cookies for a full flavored experience.
You can also swap the yellow sour belts for gold or white ones depending on the school colors. If you want a lighter look, use white chocolate wafers for the top instead of semi sweet.
| Original Ingredient | Substitute | Why It Works |
|---|---|---|
| Semi Sweet Wafers | White Chocolate Wafers | High fat content. Note: Creates a bright contrast but is sweeter |
| Rolo Candies | Mini Peanut Butter Cups | Similar size/shape. Note: Changes flavor to salty sweet |
| Yellow Sour Belts | Gold Fruit Strips | Similar texture. Note: Offers a more natural fruit flavor |
If you're looking for a more adult oriented party, you can add a tiny pinch of espresso powder to the dough. It doesn't make them taste like coffee, but it makes the chocolate taste "more" like chocolate.
Scaling the Batch
When you're baking for a whole graduating class, you'll need to scale up. But be careful, as baking isn't always a linear math problem.
Scaling Down (for a small family celebration): If you only need 6 cookies, halve everything. For the egg, crack one into a bowl, whisk it, and use exactly half. Reduce your bake time by about 20%, as smaller batches sometimes heat up differently in the oven.
Scaling Up (for a big party): If you're doubling or tripling the recipe, don't just multiply the salt and baking soda by 3. I recommend using 1.5x for the leavening agents and salt to avoid a metallic taste.
Work in batches; don't crowd your oven, or the airflow will be blocked, and the cookies won't set properly.
For the chocolate topping, melt the wafers in a larger bowl to avoid having to reheat the chocolate multiple times, which can lead to it becoming too thick.
Truth About Baking Beliefs
There are a few things people always say about cookies that just aren't true. Let's clear the air.
The "Room Temperature" Myth: Some people think "softened butter" means melted. Absolutely not. Melted butter will make these cookies spread like pancakes. You want butter that you can indent with your thumb but that still holds its shape.
The "More Sugar" Myth: You might think adding more sugar makes them sweeter and better, but in this recipe, too much sugar ruins the structural integrity. It increases the spread, meaning you lose that sharp square edge.
The "Over Baking" Myth: Many people wait until the cookies look "done" or brown. For these, you want them set to the touch but still slightly soft. They'll firm up on the wire rack. If they look fully browned in the oven, they'll be too hard once cooled.
Freshness and Waste Tips
To keep these in top shape, storage is key. Because of the chocolate and caramel, they can get sticky if left in a warm room.
Storage Guidelines: Keep them in an airtight container in the fridge for up to 5 days. This keeps the chocolate cap snappy and the Rolo from softening. If you're planning ahead, you can freeze the baked (un decorated) cookies for up to 2 months.
Just thaw them at room temperature before adding the toppings.
Reheating: Honestly, don't reheat these. The chocolate top will melt and the tassel will slide. If they're too cold from the fridge, just let them sit out for 20 minutes before serving.
Zero Waste Tips: If you have scrap dough left over after cutting your squares, don't throw it away! Roll the scraps into small balls and bake them as "tester" cookies. Also, if you have leftover melted chocolate, drizzle it over some fresh strawberries for a quick treat. If you're making a larger dessert platter, a slice of Bacardi Rum Cake on the side adds a sophisticated touch to the spread.
Best Party Pairing Ideas
When serving Chocolate Graduation Cap Cookies, you want a balance of flavors and temperatures. Since these are rich and sweet, pairing them with something acidic or light is the way to go.
A fresh fruit platter with berries and melon cuts through the richness of the cocoa and caramel. I also love serving these with a cold glass of milk or a sparkling cider for a celebratory feel. If you're hosting a brunch style graduation party, a tray of mimosas is a classic pairing that keeps things light.
For a full dessert table, try mixing these with some salty snacks like pretzels or roasted almonds. The contrast between the velvety chocolate and the salt makes the sweets stand out even more. Just remember to keep the cookies on a cool platter so the chocolate doesn't soften under the party lights.
Recipe FAQs
Do I need a special mold to make the graduation cap shape?
No, a mold isn't necessary. Use a square cutter for the cookie base and a spoon to shape the melted chocolate into a flat square on top.
How to prevent the cookies from spreading in the oven?
Ensure your butter is properly softened, not melted. If the butter is too warm before baking, the structure collapses and turns your squares into circles.
What should I do if my melted chocolate seizes?
Start over with a clean, dry bowl. Seizing occurs when water enters the chocolate or it is overheated, creating a gritty paste that cannot be smoothed out.
How to attach the sour belt tassel so it doesn't slide off?
Press the tassel into the chocolate while it is still wet. Timing is critical because the candy will not adhere once the chocolate has fully set.
Is it true that I have to use a double boiler for the chocolate wafers?
No, this is a common misconception. Heat the wafers and oil in 30-second bursts in the microwave, stirring until the gloss is uniform.
How to get the dough to the correct thickness?
Roll the dough to 1/2 inch (1.3cm) on a floured surface. This ensures the cookies are sturdy enough to support the weight of the Rolo and chocolate topping.
Can I use white chocolate instead of semi sweet wafers for the top?
Yes, white chocolate works well for a different look. If you enjoy working with this variety, you may also like these white chocolate bites.
Chocolate Graduation Cap Cookies