Valentines Chocolate Covered Strawberry Recipe
- Time: Active 20 minutes, Passive 30 minutes, Total 50 minutes
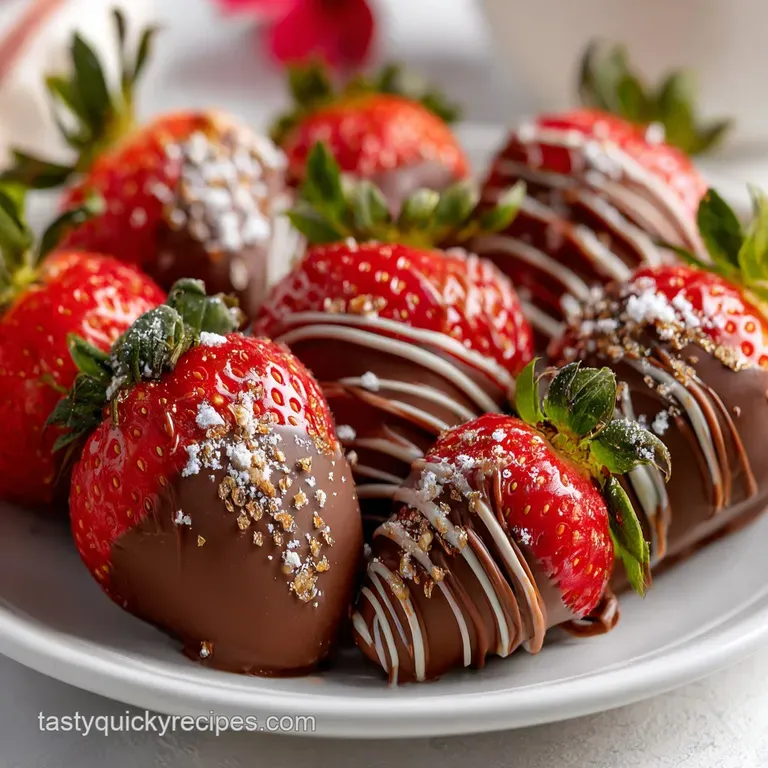
- Flavor/Texture Hook: A velvety dark chocolate snap giving way to a burst of cold, tart berry juice.
- Perfect for: Romantic surprises, Galentine's parties, or a thoughtful homemade gift for someone special.
- The Ultimate Valentines Chocolate Covered Strawberry
- Precise Recipe Specs
- Irresistible Component Selection
- Professional Kitchen Gear
- Why This Works
- Foolproof Dipping Method
- Professional Finishing Secrets
- Creative Design Ideas
- Maximizing Berry Freshness
- Elegant Serving Suggestions
- Clearing Up Doubts
- Recipe FAQs
- 📝 Recipe Card
The Ultimate Valentines Chocolate Covered Strawberry
The scent of melting Ghirardelli dark chocolate is enough to make anyone weak at the knees. There is something truly magical about the way the bitter, rich cocoa hits the sweetness of a fresh berry.
I used to think this was just a "melt and dip" situation, but my first attempt ended in a puddle of greyish chocolate and sweaty fruit. It was a disaster, honestly.
But we learn, don't we? Through a lot of trial and error in my own kitchen, I discovered that the secret to a professional grade valentines chocolate covered strawberry isn't just the quality of the ingredients, it is all in the moisture management.
If your berries are even slightly damp, the chocolate will slide right off like a silk robe on a marble floor.
Today, I’m walking you through exactly how to get that mirror finish gloss and that satisfying shatter when you take a bite. We are talking about treats that look like they came from a high end boutique but were made right on your counter.
Trust me, once you see how easy it is to master the "snap," you will never buy those overpriced pre made boxes again.
Precise Recipe Specs
Before we get our hands dirty, let's look at the numbers. Success in the kitchen often comes down to timing and temperature. I’ve found that working in a cool kitchen helps the chocolate set faster, preventing those annoying "chocolate feet" where the coating pools at the bottom of the berry.
| Feature | Detail |
|---|---|
| Yield | 20 Servings |
| Prep Time | 20 minutes |
| Set Time | 30 minutes |
| Total Time | 50 minutes |
| Calories | 104 kcal per serving |
Irresistible Component Selection
The magic starts with the berries. You want them firm, bright red all the way to the top, and with vibrant green hulls. If they feel soft, they are already too ripe and will release too much juice once they meet the warm chocolate.
- 1 lb fresh strawberries: Look for medium sized berries. Huge ones are often hollow and watery. Why this? Medium berries offer the best chocolate to fruit ratio in every bite.
- 10 oz dark chocolate: I prefer 60% cacao or higher for that sophisticated edge. Why this? Higher cocoa butter content ensures a smoother, more fluid melt.
- 2 tsp coconut oil: The secret weapon for shine. Why this? It thins the chocolate slightly, making it easier to dip and adding gloss.
- 2 oz white chocolate: For those iconic, elegant stripes. Why this? Provides a visual and flavor contrast against the dark base.
- 1 tsp freeze dried raspberries: Crushed into a fine dust. Why this? Adds a concentrated tartness that cuts through the rich sugar.
- 1 tsp toasted pistachios: Finely chopped for a salty crunch. Why this? The green color pops beautifully against the red and brown.
- 0.25 tsp flaky sea salt: Just a pinch to finish. Why this? Salt amplifies the cocoa notes and balances the sweetness.
Professional Kitchen Gear
You don't need a professional pastry kitchen, but a few specific tools make this a whole lot easier. I personally use a set of stainless steel KitchenAid mixing bowls because they conduct heat evenly when sitting over a pot of simmering water.
- Double Boiler or Glass Bowl: To melt the chocolate gently without burning it.
- Parchment Paper: Essential so the berries don't stick to your baking sheet.
- Silicone Spatula: For stirring the chocolate until it is perfectly silky.
- Toothpicks: Helpful for maneuvering the berries if you don't want to hold the stems.
- Piping Bag: Or a simple Ziploc bag with the corner snipped for the white chocolate drizzle.
Why This Works
The chemistry of a valentines chocolate covered strawberry is actually quite fascinating. It's not just about melting; it's about controlling the fat crystals within the cocoa butter.
- Lipid Stabilization: The coconut oil introduces medium chain triglycerides that help keep the chocolate fluid at lower temperatures, preventing premature "seizing."
- Surface Tension: Removing every drop of water from the berry skin allows the fats in the chocolate to bond directly to the fruit’s natural wax.
- Sugar Concentration: Using high-quality dark chocolate with less sugar prevents the coating from becoming grainy or "gritty" on the tongue.
| Component | Science Role | Pro Secret |
|---|---|---|
| Strawberries | Provides structural base | Keep the green tops on; they act as a natural handle. |
| Dark Chocolate | Forms the hard shell | Melt slowly; overheating destroys the tempering and causes streaks. |
| Coconut Oil | Lowers melting point | Adds a professional mirror like sheen that doesn't dull in the fridge. |
Foolproof Dipping Method
Ready to get started? Let’s make something beautiful. Remember, patience is your best friend here. Don't rush the drying process!
- Wash and dry. Rinse the 1 lb fresh strawberries under cold water. Note: This is the most important step.
- Bone dry berries. Pat each berry with a paper towel and let them air dry for 30 minutes. Note: Any moisture will cause the chocolate to seize.
- Prep the station. Line a large baking sheet with parchment paper.
- Chop the chocolate. Finely chop the 10 oz dark chocolate to ensure even melting.
- Melt gently. Place chocolate and 2 tsp coconut oil in a bowl over simmering water. Note: Do not let the bowl touch the water.
- Stir until velvety. Use your spatula to stir until no lumps remain and it looks like liquid silk.
- Hold and dip. Grasp a strawberry by the green hull and dip into the chocolate. Note: Rotate it to cover all sides up to the "shoulders."
- Lift and swirl. Lift the berry, let the excess drip off, then swirl it slightly. Note: This prevents a "foot" of chocolate from forming on the paper.
- Place and set. Gently lay the berry on the parchment paper.
- Add the flair. While still wet, sprinkle with crushed raspberries or pistachios.
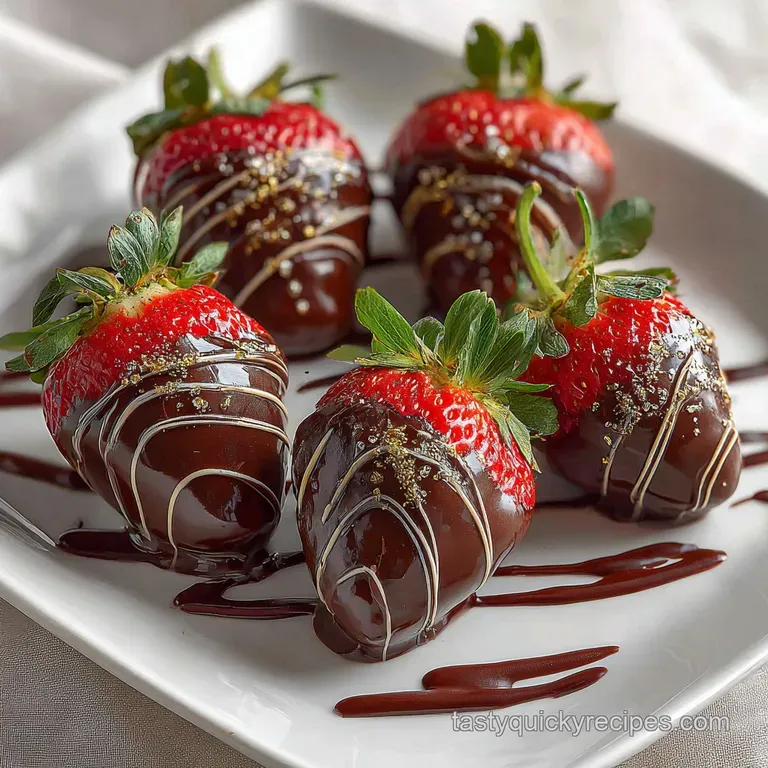
- Drizzle white chocolate. Melt the 2 oz white chocolate, put it in a bag, and zig zag over the set berries.
- Final chill. Refrigerate for 30 minutes until the shells are hard and matte.
Chef's Note: If you want that really professional "striped" look, wait until the dark chocolate has completely set before doing the white chocolate drizzle. If the dark chocolate is still wet, the white will just sink into it instead of sitting on top.
Professional Finishing Secrets
Sometimes things go sideways. I remember my first time using a microwave to melt chocolate I turned my back for twenty seconds and it turned into a crumbly, burnt mess. If you want to avoid my mistakes, keep these tips in mind.
Fixing Seized Chocolate
If a drop of water gets into your chocolate, it will clump up and look like wet sand. Don't panic! You can sometimes save it by whisking in a teaspoon of boiling water or more coconut oil, though it won't be quite as snappy for dipping.
It's usually better to start fresh for berries and save the "seized" chocolate for a sauce or brownies.
Managing Temperature Gaps
If your berries are ice cold from the fridge and your chocolate is hot, the chocolate will set too fast, making it hard to get a smooth coat. I like to let my berries sit at room temperature for about 20 minutes before dipping. This ensures the chocolate flows over the surface perfectly.
Troubleshooting Your Berries
| Problem | Cause | Fix |
|---|---|---|
| Chocolate sliding off | Berries were wet or cold | Dry thoroughly; bring berries to room temperature. |
| Dull, grey streaks | Chocolate was overheated | Melt over lower heat; avoid the microwave if possible. |
| Sticky condensation | Temperature shock | Don't put warm berries straight into a freezing fridge. |
Creative Design Ideas
Once you have the basics down, you can really play with the presentation. This is where your personal style shines. For a complete holiday spread, I love pairing these with my Valentines Charcuterie Board recipe to give people a mix of sweet and savory options.
Designing a Chocolate Covered Strawberry Bouquet Idea
You can turn these into a stunning edible arrangement! Simply skewer the bottom of the dipped berries with long bamboo sticks. Tuck them into a vase filled with floral foam, hiding the foam with some tissue paper. It looks like a million bucks and is way more impressive than a standard box.
Swapping for a Vegan Treat
If you are catering to dietary needs, this recipe is surprisingly easy to adapt. Just ensure your dark chocolate is dairy-free (many high-quality dark chocolates are naturally vegan). The coconut oil is already plant based, so you are good to go!
| Original Ingredient | Substitute | Why It Works |
|---|---|---|
| Semi sweet Chocolate | Vegan Dark Chocolate | Maintains the rich flavor without the dairy solids. |
| White Chocolate | Cacao Butter & Agave | Mimics the creamy texture. Note: Harder to work with; sets faster. |
| Pistachios | Toasted Coconut Shavings | Provides crunch and a tropical note for those with nut allergies. |
Maximizing Berry Freshness
One of the biggest questions I get is how to store these without them getting "sweaty." The truth is, strawberries are mostly water. Once you dip them, they start to release moisture.
- Fridge Life: They are best eaten within 6 to 12 hours. You can keep them in the fridge for up to 2 days, but the chocolate may start to pull away from the fruit.
- Zero Waste: If you have leftover melted chocolate, don't toss it! Dip some pretzels or dried apricots. If you have leftover strawberry stems, toss them into a pitcher of water for a subtle, refreshing infusion.
- Freezing: I don't recommend freezing whole chocolate covered strawberries. When they thaw, the berry turns to mush, and the chocolate cracks. If you must freeze them, eat them while they are still frozen like a little fruit popsicle!
Elegant Serving Suggestions
Presentation is everything, especially for a valentines chocolate covered strawberry. I like to serve mine on a marble slab or a vintage silver tray. The cold marble keeps the chocolate from softening if the room is warm.
If you are planning a whole day of romance, these berries make a fantastic dessert after a Valentines Brunch recipe. The lightness of the fruit is a nice change of pace from heavier baked goods. You could also serve them alongside a glass of dry sparkling wine the bubbles cut right through the richness of the dark chocolate.
- For the Romantic
- Double dip in dark and white chocolate for a "tuxedo" look.
- For the Adventurous
- Add a tiny pinch of chili powder to the dark chocolate melt for a "Mexican hot chocolate" kick.
- For the Kids
- Use colorful sprinkles instead of pistachios for a fun, festive pop.
Clearing Up Doubts
Let's debunk a few things before I set you loose in your kitchen. There is a lot of bad advice out there!
Myths about chocolate dipping: "You need a microwave for speed." Actually, the microwave is the easiest way to burn chocolate. A double boiler gives you total control and keeps the chocolate fluid for much longer. "Adding water thins chocolate." No! Water is the enemy.
It causes the sugar and cocoa to bond and clump (seize). Only use fats like coconut oil or butter to thin it out. "Store them in an airtight container." This is a recipe for soggy berries. The trapped moisture has nowhere to go. Store them uncovered or loosely draped with a paper towel.
- 1. 32° Celsius
- The ideal temperature for your melted chocolate. If you have a kitchen thermometer, use it!
- 2. 10 minutes
- How long the berries should sit at room temperature after washing before you even think about dipping them.
- 3. 45 degree angle
- The perfect angle to hold the berry when dipping to get that nice, even "V" shape at the top near the leaves.
Stovetop vs Oven for Topping Prep
While the chocolate is always a stovetop job, you might wonder about those pistachio toppings.
| Method | Best For | Result |
|---|---|---|
| Stovetop Pan | Toasting pistachios | Fast, allows you to toss them frequently to avoid burning. |
| Oven (Low Temp) | Drying berries | If you're in a humid climate, 10 mins at 50°C can help remove surface moisture. |
Making a homemade chocolate covered strawberries valentine treat is all about the love you put into the details. Use the 0.25 tsp flaky sea salt it seems small, but it's the difference between a "good" strawberry and one that people will talk about for weeks. Now, go grab your berries and get dipping!
It's time to make something irresistible.

Recipe FAQs
How to make Valentines chocolate covered strawberries?
Wash and thoroughly dry the strawberries first. Pat them completely dry with paper towels and let them air dry for about 30 minutes to ensure no surface moisture. Melt your chocolate gently with a little coconut oil for shine, dip the dry berries, let excess drip off, and place on parchment paper to set.
Drizzle with white chocolate once the dark has hardened.
How to make chocolate covered strawberries for Valentine's Day?
Start by ensuring your strawberries are perfectly dry. Any water will cause the chocolate to seize. Wash and pat them completely dry, then let them air dry for at least 30 minutes.
Melt good quality dark chocolate with a touch of coconut oil, dip the berries, let them set on parchment paper, and then add decorative drizzles of white chocolate once hardened.
Can I use frozen strawberries for chocolate covered strawberries?
No, stick with fresh. Frozen berries release too much moisture and tend to get mushy once thawed, which can make the chocolate slide off or crack.
Why does my chocolate for strawberries seize up?
A tiny drop of water is usually the culprit. Even a small amount of moisture can cause the sugar and cocoa solids in the chocolate to clump together, making it unusable for dipping. Avoid any water contact when melting your chocolate, and ensure your berries are completely dry.
How do I get a glossy finish on my chocolate covered strawberries?
Add a small amount of coconut oil or cocoa butter. These fats help to thin the chocolate slightly and create a beautiful, mirror like shine when it sets. If you enjoyed mastering the surface texture here, you might appreciate how similar principles of fat balance are key in our White Trash Snack Mix with White Chocolate: The Easiest No-Bake Sweet Treat.
How long do chocolate covered strawberries last?
They are best eaten within 6-12 hours for optimal texture. While they can last up to 2 days in the refrigerator, the berries may release moisture, causing the chocolate shell to soften or weep. Avoid storing them in an airtight container, as this traps condensation.
Can I decorate chocolate covered strawberries with sprinkles?
Yes, sprinkles are a fun and easy decoration! Apply them immediately after dipping the strawberry while the chocolate is still wet. For a different kind of festive treat, you might also like our Festive Holiday Cookie: Sparkling Sugar Recipe, which uses vibrant colors and a delightful crunch.
Valentines Chocolate Strawberries

Ingredients:
Instructions:
Nutrition Facts:
| Calories | 104 kcal |
|---|---|
| Protein | 1.1 g |
| Fat | 5.8 g |
| Carbs | 12.1 g |
| Fiber | 1.4 g |
| Sugar | 9.2 g |
| Sodium | 6 mg |
