Sugar Swirl Cookies: Buttery and Crisp
- Time: Active 50 minutes, Passive 10 minutes, Total 60 minutes
- Flavor/Texture Hook: Velvety buttery crumb with a clean, sugary snap
- Perfect for: Holiday gift boxes, birthday parties, or a rainy afternoon bake
- Create Magical Spirals with Sugar Swirl Cookies
- Key Specs for Foolproof Results
- The Ingredients for Irresistible Dough
- Essential Tools for Perfect Slices
- Detailed Steps for Magical Cookies
- Solving Common Spiral Dough Problems
- Creative Variations for Custom Treats
- Storing Your Sweets for Freshness
- Perfect Pairings for Your Dessert
- Recipe FAQs
- 📝 Recipe Card
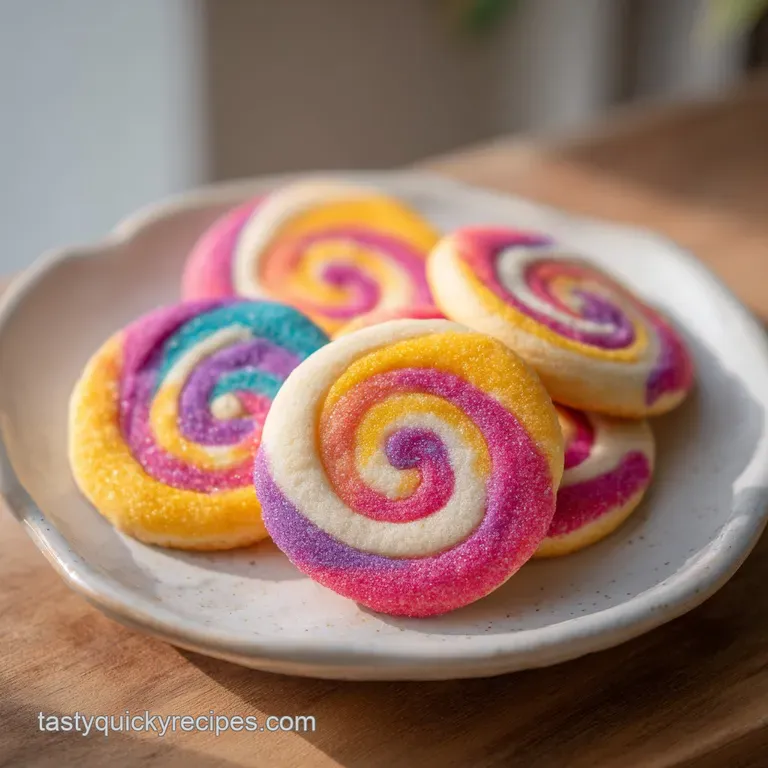
Create Magical Spirals with Sugar Swirl Cookies
Have you ever wondered why some cookies look like they were painted by an artist while others turn into a blurry, melted mess in the oven? The secret isn't actually in your rolling technique, but in the thermal memory of the butter.
I remember standing in my kitchen three years ago, surrounded by scraps of pink and white dough that looked more like a marble floor than a neat spiral. I was trying to roll the dough while it was too warm, and the layers just fused together into a sad, beige blob.
It was a total mess until I realized that the dough needs to be treated almost like a piece of structural art. These Sugar Swirl Cookies are all about the contrast not just in the vibrant colors, but in the way the crisp edges give way to a soft, melt in-the mouth center.
When you pull these out of the oven, the aroma of toasted sugar and high-quality vanilla fills the room, and the visual "wow" factor is enough to make anyone think you spent hours at a professional culinary school.
We aren't just making a snack here; we are crafting something irresistible that people will hesitate to eat because it looks so beautiful, only to realize it tastes even better than it looks.
You'll get that satisfying shatter from the outer edge, followed by a velvety texture that only comes from the perfect ratio of fats to flour. Let's get into how we make this magical transformation happen without the usual kitchen stress.
Key Specs for Foolproof Results
Moisture Control: Using a single large egg provides just enough protein to bind the dough without adding excess water that would cause the cookies to puff up and lose their shape.
Structural Support: Cornstarch acts as a tenderizing agent that interferes with gluten development, ensuring the "swirl" remains delicate rather than bread like.
Thermal Stability: The flash chill step in the freezer locks the butter in place, preventing the layers from melting into each other during the crucial first three minutes of baking.
Aeration Limits: By creaming the butter and sugar only until velvety rather than fluffy, we avoid trapping too much air, which prevents the cookies from distorting or "doming" in the oven.
| Method | Prep Time | Texture | Best For |
|---|---|---|---|
| Fresh Dough (This Recipe) | 50 minutes | Crisp, buttery, and distinct layers | Gifting, parties, high end presentation |
| store-bought Tube | 5 minutes | Soft, greasy, colors often bleed | Last minute snacks, kids' quick play |
| Refrigerated Shortcut | 15 minutes | Chewy but layers are often fuzzy | Casual weeknight treats |
Choosing the fresh method is the only way to achieve that professional, sharp spiral that makes these Sugar Swirl Cookies so iconic. While store-bought options save time, they lack the structural integrity provided by the cornstarch and the precise flour to fat ratio we use here.
The shortcut doughs often use oils that don't firm up the same way in the freezer, leading to a "smeared" look once you start slicing the log.
The Ingredients for Irresistible Dough
When it comes to the components of this recipe, quality is everything. Use the best butter you can find, as it represents the bulk of the flavor profile.
| Component | Role in Recipe | Pro Secret |
|---|---|---|
| Unsalted Butter | Provides fat for the "melt in-mouth" feel | Keep it cool (60°F) to prevent over creaming |
| Cornstarch | Softens the flour's proteins | Sift it with the flour to avoid clumps |
| Gel Food Coloring | Provides intense, stable color | Use gel, not liquid, to keep dough consistency |
| Granulated Sugar | Sweetens and creates crisp edges | Don't reduce the amount; it's vital for structure |
Each of these items plays a specific role in ensuring your Sugar Swirl Cookies come out looking like they belong in a bakery window. Using a high-quality vanilla extract is also a non negotiable for that deep, nostalgic flavor.
- 225g Unsalted Butter: Slightly softened but still cool to the touch. Why this? Cool butter prevents the dough from becoming too greasy during the rolling process. (Substitute: Salted butter, but omit the extra salt).
- 200g Granulated Sugar: Standard white sugar for a clean snap. Why this? Sugar is a liquefier in the oven; this specific amount ensures the perfect spread. (Substitute: Caster sugar for a finer crumb).
- 1 Large Egg: Room temperature is best for emulsification. Why this? A cold egg can cause the cool butter to seize and clump. (Substitute: 3 tbsp Aquafaba for a similar bind).
- 1 tsp Vanilla Extract: The backbone of the cookie's aroma. Why this? Vanilla rounds out the sweetness of the sugar. (Substitute: Almond extract for a wedding cake flavor).
- 360g All Purpose Flour: Provides the necessary structure. Why this? AP flour has the right protein content for a cookie that isn't too tough. (Substitute: 1:1 gluten-free flour blend).
- 20g Cornstarch: Our secret weapon for tenderness. Why this? It creates a "short" texture that breaks cleanly when bitten. (Substitute: Arrowroot powder).
- 0.5 tsp Salt: To balance the sugar. Why this? Without salt, the cookies taste flat and one dimensional. (Substitute: Fine sea salt).
- 2 tsp Gel Food Coloring: For the vibrant swirl. Why this? Gel is concentrated and won't thin out your dough like liquid drops. (Substitute: Natural beet powder for a muted red).
Essential Tools for Perfect Slices
To get those razor sharp edges on your Sugar Swirl Cookies, you don't need a kitchen full of gadgets, but you do need the right ones. A stand mixer with a paddle attachment is my preferred choice because it incorporates the ingredients without whipping in too much air.
If you use a hand mixer, be very careful not to over mix once the flour goes in, or you'll end up with a tough cookie.
You'll also want two large sheets of parchment paper. This is the ultimate pro tip for rolling out dough without adding extra flour. If you keep adding flour to your counter to stop the sticking, the dough gets dry and starts to crack.
By rolling between parchment, you keep the moisture levels exactly where they need to be. Finally,, a sharp, non serrated knife is vital. A serrated blade will "saw" through the dough and smear the colors, while a smooth, sharp blade will click right through for a clean spiral.
Detailed Steps for Magical Cookies
- Cream the Base: In a stand mixer with a paddle attachment, cream the 225g butter and 200g sugar on medium speed until pale and velvety. Note: This should take about 2 minutes; avoid making it fluffy like a cake batter.
- Emulsify the Liquids: Add the egg and vanilla extract to the butter mixture, mixing until just combined. Note: Stop as soon as the yellow streaks of egg disappear into the butter.
- Incorporate Dry Goods: Sift in the 360g flour, 20g cornstarch, and 0.5 tsp salt. Mix on low speed until the dough begins to clump and feels like soft modeling clay.
- Split and Color: Divide the dough into two equal portions. Leave one plain and knead the 2 tsp gel food coloring into the second portion until the color is perfectly even and vibrant.
- Roll the Rectangles: Roll each portion between two sheets of parchment paper into 9x12 inch rectangles, approximately 1/4 inch thick. Note: Try to get the edges as straight as possible for a cleaner log.
- Stack the Layers: Remove the top parchment layers and flip the colored dough directly onto the plain dough. Peel off the remaining parchment and roll the dough tightly into a log until no air gaps remain between the layers.
- The Flash Chill: Flash chill the dough log in the freezer for 20 minutes to stabilize the butter molecules. Note: Do not skip this; it is what keeps the cookies circular when you slice them.
- Prep and Slice: Preheat oven to 350°F (175°C). Slice the log into 1/4 inch rounds using a sharp non serrated knife and place on baking sheets until the spirals are clearly visible and separated.
- The Final Bake: Bake for 10 minutes until the edges are set but not browned. Cool completely on a wire rack.
Solving Common Spiral Dough Problems
Why your dough is cracking during the roll
If you find that the dough is snapping or crumbling as you try to roll it into a log, it's usually a temperature or hydration issue. If the dough is too cold, the butter is too brittle to bend. If you just took it out of the fridge, let it sit for 5 minutes.
However, more often than not, it's because too much flour was added during the mixing stage. If you didn't measure your flour by weight (grams), you might have accidentally packed too much into a measuring cup.
Another reason for cracking is rolling the dough too thin. At 1/4 inch, the dough has enough "body" to hold together. If you go much thinner, it loses its structural integrity. You can sometimes fix a cracking dough by lightly misting it with a tiny amount of water, but it's better to just work quickly while the butter is still pliable. For more tips on managing dough consistency, you might find my guide on Peanut Butter Cookies helpful, as it covers similar spread issues.
| Problem | Root Cause | Solution |
|---|---|---|
| Colors Bleeding | Used liquid food coloring | Switch to gel coloring for stability |
| Flat, Oval Cookies | Dough was too soft when sliced | Freeze the log for exactly 20 minutes before cutting |
| Dry, Sandy Texture | Too much flour or over baked | Weigh flour in grams and pull from oven at 10 mins |
Checklist for Success
- ✓ Weigh all ingredients using a digital scale for 100% accuracy
- ✓ Use room temperature eggs to ensure a smooth, emulsified batter
- ✓ Roll the dough between parchment paper to avoid adding excess flour
- ✓ Keep the freezer time to exactly 20 minutes too long and it's too hard to slice
- ✓ Use a sharp, straight edge knife and wipe it clean between every few slices
Creative Variations for Custom Treats
While the classic red and white or green and white spirals are perfect for the holidays, you can get incredibly creative with this base dough. One of my favorite "adult" versions is the Espresso Swirl.
Simply replace the food coloring with 1 tablespoon of instant espresso powder dissolved in a tiny drop of vanilla. It creates a sophisticated tan and cream spiral that smells like a high end coffee shop.
If you want a bit more texture, you can roll the finished log in sparkling sanding sugar or crushed nuts before slicing. This adds a "crunchy" rim to every cookie that looks stunning. For a more rustic, chunky alternative with a totally different vibe, you might want to look into the Laura Bush Cowboy Cookies which offer a completely different, loaded texture profile.
| Plating Level | Presentation Tweak | Visual Effect |
|---|---|---|
| Simple | Served on a warm ceramic plate | Homey, inviting, and classic |
| Polished | Stacked in threes with a silk ribbon | Perfect for gifting or bake sales |
| Restaurant | Served with a side of white chocolate ganache | High end dessert experience |
Storing Your Sweets for Freshness
The beauty of these Sugar Swirl Cookies is that they actually hold up quite well thanks to the sugar content acting as a natural preservative. You can keep them in an airtight container at room temperature for up to 5 days.
If you find they've lost a bit of their "snap," just pop them into a 300°F oven for 2 minutes to recrisp the edges.
For long term storage, these are a dream. You can freeze the baked cookies for up to 3 months just make sure to layer them with parchment paper so the beautiful spirals don't get scratched. Even better, you can freeze the raw dough log for up to 2 months.
When the craving hits, just let the log thaw for 10 minutes on the counter, slice, and bake as directed. This is a great way to reduce waste; just slice off exactly what you need and keep the rest of the log in the freezer.
Perfect Pairings for Your Dessert
Since these cookies are essentially a high end shortbread, they pair beautifully with beverages that cut through the richness of the butter. A cold glass of whole milk is the classic choice, but if you're serving these at a dinner party, a crisp Prosecco or a dessert wine like a Moscato d'Asti works wonders.
The bubbles scrub the palate, making every bite of the cookie feel as fresh as the first one.
If you are looking for a more decadent spread, serve these alongside a bowl of fresh berries and a dollop of lightly sweetened whipped cream. The simplicity of the fruit highlights the vanilla notes in the dough.
Honestly, they are so visually striking that they don't need much help just a clean plate and a good cup of coffee are enough to make these the star of any afternoon. My favorite way to eat them? Standing in the kitchen, still slightly warm from the tray, when the edges are at their absolute crispiest.
Trust me, once you master the "flash chill" trick, you'll never go back to boring, single color cookies again.

Recipe FAQs
Is it true I must keep the butter at room temperature for hours before mixing?
No, this is a common misconception. Your butter should be slightly softened but still cool to the touch to ensure the proper structure, as over softened butter leads to spreading.
How to ensure the swirl pattern stays defined without bleeding colors?
Flash chill the dough log in the freezer for 20 minutes before slicing. This stabilizes the butter molecules, which keeps the layers distinct and prevents them from smearing under the knife.
Can I bake these at a higher temperature to save time?
No, stick to 350°F (175°C). Higher heat will brown the edges before the center sets, ruining the delicate look and texture of the swirl. If you enjoyed mastering thin layer precision here, you will find the same attention to temperature is vital for complex layered desserts.
How to store these cookies so they stay crisp for days?
Keep them in an airtight container at room temperature. The sugar content acts as a natural preservative, keeping them fresh for up to 5 days; if they soften, bake at 300°F for 2 minutes to recrisp.
How to achieve the soft modeling clay texture in the dough?
Sift the flour, cornstarch, and salt before mixing on low speed. Stop as soon as the dough begins to clump to avoid over working the gluten, which keeps the final cookie tender rather than tough.
Should I use a serrated knife to slice the dough log?
No, always use a sharp, non-serrated knife. A serrated edge will tear the delicate dough layers and destroy the swirl pattern you worked hard to roll.
How to tell if the cookies are finished baking?
Look for set edges that have not turned brown. Because you only bake them for 10 minutes, the visual cue is a matte surface rather than a change in color.
Sugar Swirl Cookies
Ingredients:
Instructions:
Nutrition Facts:
| Calories | 161 calories |
|---|---|
| Protein | 1.8 g |
| Fat | 7.8 g |
| Carbs | 20.5 g |
| Fiber | 0.4 g |
| Sugar | 8.3 g |
| Sodium | 48.5 mg |
