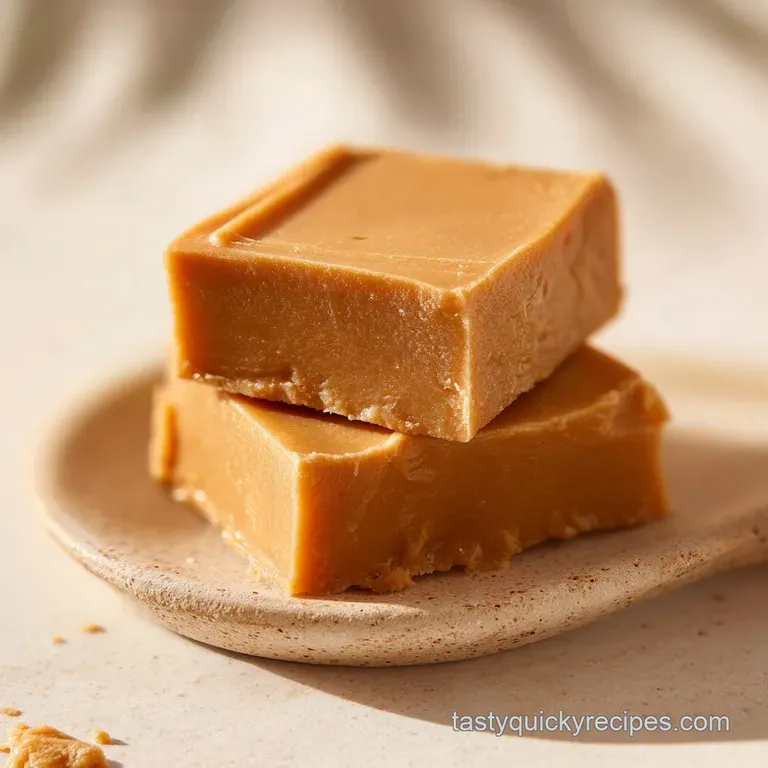
Peanut Butter Fudge: Silky and Creamy
- Time: Active 5 minutes, Passive 2 hours, Total 2 hours 5 mins
- Flavor/Texture Hook: Silky, nutty, and melt in-your mouth fudgy
- Perfect for: Holiday gifting, last minute party platters, and beginner bakers
- Essential Specs For Success
- Gathering Premium Ingredient Components
- Selecting Proper Kitchen Tools
- Mastering Every Single Preparation Step
- Solving Common Texture Mishaps
- Expanding Flavor Profiles Naturally
- Preserving Freshness And Storing Correctly
- Presentation Ideas For Special Occasions
- Recipe FAQs
- 📝 Recipe Card
Essential Specs For Success
Understanding the "why" behind this method makes the process feel much more intuitive. Instead of focusing on evaporation and sugar concentration like traditional fudge, we are working with fat based stabilization.
It’s a much more forgiving way to cook, especially when you want consistent results every single time.
- Matte Surface Achievement: By incorporating white chocolate chips at the very end, we introduce cocoa butter and lecithin. These components act as a structural net, grabbing onto the peanut butter oils and preventing them from seeping out, which gives us that professional matte look.
- Emulsification Synergy: The sweetened condensed milk provides a pre dissolved sugar base. Since the sugar is already suspended in liquid, you don't have to worry about those gritty "sand" textures that happen when sugar doesn't melt properly in old school recipes.
- Heat Management: Keeping the temperature at medium low ensures we don't break the emulsion of the peanut butter. If it gets too hot, the oils separate, and you end up with a greasy mess. We want "fluid," not "bubbling."
| Method Type | Total Time | Texture Outcome | Skill Level |
|---|---|---|---|
| Stovetop Shortcut | 10 minutes | Silky and dense | Beginner |
| Traditional Boil | 45 minutes | Crumbly and crystalline | Advanced |
| Microwave Version | 8 minutes | Soft and slightly oily | Beginner |
Choosing the stovetop method gives you the most control over the heat, ensuring that your Peanut Butter Fudge doesn't seize or separate during the melting process. It is the gold standard for achieving that irresistible "snap" followed by a creamy finish.
Gathering Premium Ingredient Components
The quality of your ingredients directly dictates the final flavor of your dessert. Since there are so few elements in this recipe, each one has to pull its weight. Using a high-quality creamy peanut butter (510g) is non negotiable here.
Natural varieties that require stirring can sometimes be too oily for this specific ratio, so a standard emulsified brand works best for structural integrity.
| Ingredient | Science Role | Pro Secret |
|---|---|---|
| White Chocolate (340g) | Structural Stabilizer | Use chips with cocoa butter listed first for a cleaner melt. |
| Condensed Milk (397g) | Smooth Sweetener | Do not use evaporated milk; it lacks the sugar density needed to set. |
| Vanilla Extract (4g) | Flavor Bridge | Add it after removing from heat to keep the floral notes from evaporating. |
For the best results, ensure your salt (1.5g) is finely ground. It might seem like a tiny amount, but salt is the secret weapon that cuts through the intense sweetness of the white chocolate and peanut butter, making the whole experience much more balanced.
Ingredient List & Substitutes
- Creamy Peanut Butter (510g): The heart of the dish. Why this? Provides the fat base and primary flavor profile.
- Substitute: Almond butter (same amount). Note: Result will be slightly more fibrous and less "creamy."
- Sweetened Condensed Milk (397g): The binder. Why this? Offers instant sweetness and thick texture without boiling.
- Substitute: Coconut condensed milk. Note: Adds a distinct tropical flavor but sets similarly.
- White Chocolate Chips (340g): The setting agent. Why this? Provides cocoa butter for a firm, sliceable finish.
- Substitute: Milk chocolate chips. Note: Changes the color and makes it much richer/sweeter.
- Vanilla Extract (4g): The aromatic enhancer. Why this? Rounds out the nuttiness with a classic dessert scent.
- Substitute: Almond extract (use half the amount). Note: Gives a very "marzipan" style flavor.
- Salt (1.5g): The flavor balancer. Why this? Essential for highlighting the roasted nut notes.
- Substitute: Sea salt flakes. Note: Use as a topping for a crunchy texture contrast.
Selecting Proper Kitchen Tools
You don't need a pantry full of specialized gear, but having the right basics makes the 10 minutes of work feel effortless. A heavy bottomed saucepan is your best friend here. Thin pans have "hot spots" that can scorch the condensed milk in seconds, ruining the delicate flavor of the fudge.
A flexible silicone spatula is also a must have. You'll need to scrape the bottom and corners of the pan constantly to ensure every bit of the mixture is heating evenly. If you love the combo of peanut butter and chocolate as much as I do, you absolutely need to try this Buckeyes recipe once you've mastered this fudge.
Finally,, make sure your 8x8 inch (20cm) square pan is ready before you even turn on the stove. This fudge starts to set quickly once the chocolate chips hit the warm base, so you don't want to be fumbling with parchment paper while the mixture is thickening in the pot.
Mastering Every Single Preparation Step

- Line an 8x8 inch square baking pan with parchment paper, leaving an overhang on the sides for easy removal. Note: This "sling" method makes it much easier to lift the whole block out for clean slicing later.
- In a medium heavy bottomed saucepan over medium low heat, combine the 510g of peanut butter and 397g of sweetened condensed milk.
- Stir the mixture constantly until the ingredients are fluid and well emulsified.
- Monitor the texture carefully; it should look like thick, shiny silk but must not reach a boil.
- Remove the pan from the heat immediately to prevent the fats from separating.
- Fold in the 4g of vanilla extract, 1.5g of salt, and 340g of white chocolate chips.
- Continue to stir until the residual heat has completely melted the chips and the mixture transforms into a thick, matte paste.
- Transfer the mixture to the prepared pan, smoothing the top with a silicone spatula until it is perfectly level.
- Tap the pan firmly on the counter three times to release any trapped air bubbles.
- Chill in the refrigerator for at least 2 hours until the center is firm to the touch before slicing into 24 squares.
Solving Common Texture Mishaps
Even with a foolproof recipe, the environment in your kitchen can occasionally throw a curveball. Most issues with this Peanut Butter Fudge stem from temperature control. If the mixture looks oily or "broken," it usually means the heat was a bit too high during the initial melting phase.
If you find that your fudge is too soft to cut even after two hours in the fridge, it might be due to the humidity or the specific brand of peanut butter used. Don't panic another hour of chilling often does the trick, or you can pop it into the freezer for 20 minutes to give it that final push toward firmness.
| Problem | Root Cause | Solution |
|---|---|---|
| Oily surface | Overheated peanut butter | Stir in 1 tablespoon of cold condensed milk off heat to re emulsify. |
| Gritty texture | Scorched milk at bottom | Pour through a fine mesh sieve before adding chocolate chips. |
| Soft/Sticky | High humidity or low-fat PB | Increase white chocolate chips by 50g in the next batch. |
Common Mistakes Checklist
- ✓ Never let the mixture reach a rolling boil (this causes the oils to separate permanently).
- ✓ Don't skip the parchment paper; this fudge is dense and will stick to the pan otherwise.
- ✓ Always add the vanilla after removing from heat to preserve its delicate flavor profile.
- ✓ Resist the urge to cut the fudge early; the internal structure needs a full 2 hours to stabilize.
- ✓ Ensure the white chocolate chips are fresh; old chips can sometimes resist melting smoothly.
Expanding Flavor Profiles Naturally
Once you have the base recipe down, it is incredibly easy to customize this. For another decadent treat, try my Peanut Butter Pie which uses similar flavor profiles in a light, mousse like format. If you want to change things up here, though, think about texture.
Adding a half cup of roasted peanuts or even some crushed pretzels into the final "matte paste" stage adds a wonderful crunch that contrasts with the silky fudge. You can also swirl in some dark chocolate for a marbled effect that looks absolutely stunning on a holiday dessert table.
Decision Shortcut
- If you want a crunchier bite, fold in 100g of chopped roasted peanuts during the final stir.
- If you want a less sweet version, increase the salt to 2g and use a "dark" white chocolate or a higher cocoa butter percentage.
- If you want a festive look, sprinkle sea salt flakes or colorful sprinkles on top before the fudge sets.
Scaling Guidelines
- Halving (12 servings): Use a standard loaf pan instead of the 8x8. All ingredients divide perfectly by two. Keep the chill time the same.
- Doubling (48 servings): Use a 9x13 inch (23x33cm) pan. Work in a larger pot and be extra careful with heat distribution. The chill time may increase to 3-4 hours due to the increased mass.
Preserving Freshness And Storing Correctly
This fudge is surprisingly hardy, which makes it an excellent candidate for gifting. Because of the high sugar and fat content, it doesn't spoil quickly, but it can lose its ideal texture if left out in a warm room for too long.
For the best experience, keep it in an airtight container with layers of parchment paper between the squares.
Fridge Storage: The fudge stays perfectly fresh in the refrigerator for up to 2 weeks. The cool temperature keeps the structure firm and the flavors bright.
Freezer Storage: You can freeze this Peanut Butter Fudge for up to 3 months. Wrap the whole block or individual squares tightly in plastic wrap, then place them in a freezer bag. To serve, let them thaw in the fridge overnight.
Zero Waste Tip: If you end up with "scraps" from trimming the edges to make perfect squares, don't toss them! Chop those bits up and stir them into vanilla ice cream or use them as a topping for brownies. They add an incredible punch of flavor to other desserts.
Presentation Ideas For Special Occasions
When it comes to serving, the way you cut the fudge makes all the difference. For those sharp, clean edges you see in professional bakeries, use a long, sharp knife dipped in hot water and wiped dry between every single cut. This prevents the fudge from sticking to the blade and dragging, which can create ragged edges.
Myth: Searing the peanut butter adds flavor. Actually, overheating peanut butter just makes it bitter and causes the natural oils to separate. You want to warm it just enough to make it move, not "cook" it.
Myth: You need a candy thermometer for fudge. While traditional recipes require precise temperature stages (like "soft ball"), this modern version uses the saturation of sugar in condensed milk and the cooling properties of cocoa butter to bypass that complexity entirely.
For a beautiful presentation, try placing individual squares into small gold or silver paper candy liners. It makes them feel like high end truffles and keeps people's fingers clean while they enjoy your creation.
Whether you're serving this at a wedding shower or just keeping a stash in the fridge for late night cravings, the result is always the same: a magical, irresistible bite that everyone will assume took way more effort than it actually did. Enjoy the foolproof process and the velvety rewards!

Recipe FAQs
How to make fudge quickly?
Combine your peanut butter and sweetened condensed milk over medium low heat. Stir constantly until fluid, remove from heat to fold in the vanilla, salt, and white chocolate chips, then chill for the required 2 hours.
What ingredients are in peanut butter fudge?
Use only creamy peanut butter, sweetened condensed milk, vanilla extract, salt, and white chocolate chips. These five components create the signature dense, matte texture of this traditional fudge.
How to make fudge set quickly?
Place the pan in the coldest part of your refrigerator for the full 2 hours. If you enjoyed the creamy texture control we use to set our puddings, you will see how that same chilling principle stabilizes this fudge's structure.
What are the common mistakes when making fudge?
Avoid letting the mixture reach a rolling boil during the initial heating phase. High heat causes the peanut butter oils to separate, which ruins the emulsification and prevents the fudge from ever setting properly.
Is it true I must boil the mixture to get a firm set?
No, this is a common misconception. Boiling actually damages the fats in the peanut butter; the mixture should only be heated until fluid and well emulsified over medium low heat.
Why is my fudge sticking to the pan?
Forgetting to use parchment paper is the primary cause of sticking. Always line your 8x8 inch pan and leave an overhang on the sides so you can lift the entire block out once it has chilled.
Should I add the vanilla while the mixture is on the heat?
No, add the vanilla only after removing the pan from the heat. Adding it too early causes the delicate aroma and flavor compounds to evaporate, leaving you with a muted final taste.
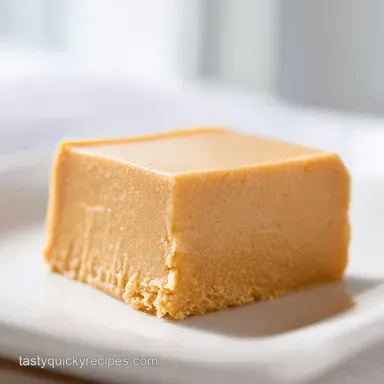
Easy Peanut Butter Fudge
Ingredients:
Instructions:
Nutrition Facts:
| Calories | 254 kcal |
|---|---|
| Protein | 6.8g |
| Fat | 16.3g |
| Carbs | 21.6g |
| Fiber | 1.3g |
| Sugar | 19.3g |
| Sodium | 135mg |
