Peanut Butter Blossom Cookies: the Ultimate Classic
- Baking Nostalgia: The Ultimate Peanut Butter Blossom Cookies Recipe
- Achieving the Perfect Soft-Chewy Texture: Why This Formulation Wins
- Essential Components and Ingredient Deep Dive
- Step-by-Step Guide to Baking Peanut Butter Blossoms
- Troubleshooting and Expert Tips for Cookie Perfection
- Extending Freshness: Storing and Freezing Dough and Baked Cookies
- Creative Ways to Serve These Classic Peanut Butter Treats
- Recipe FAQs
- 📝 Recipe Card
Baking Nostalgia: The Ultimate Peanut Butter Blossom Cookies Recipe
That sweet, slightly salty aroma hitting you? That is pure, unadulterated bliss. The satisfying contrast in texture a soft, chewy, slightly crumbly peanut butter base meeting that smooth, instantly melting chocolate is absolutely unbeatable.
Forget complicated layer cakes or fussy cut-outs. This classic Peanut Butter Blossom Cookies recipe is the ultimate pantry raid dessert. They’re fast, remarkably easy, and universally adored, making them my absolute favorite for holiday emergencies or just a Tuesday afternoon craving. You need this in your life.
I’ve baked hundreds of batches, tweaking every variable, and finally nailed the formula for the softest centers and the perfect spread. Let’s stop making dry, brick like versions right now and make the ultimate batch of chewy Peanut Butter Blossom Cookies.
Achieving the Perfect Soft Chewy Texture: Why This Formulation Wins
When tackling classic recipes, the goal isn't just following instructions; it's understanding the why behind the steps. The best Peanut Blossoms are famously soft and stay that way for days. If yours are too dry, trust me, we are fixing that today.
This is the secret sauce to the softest Peanut Butter Blossoms you will ever make.
The Enduring Appeal of This Classic Cookie Jar Staple
There is something deeply comforting about these little mounds of joy. They scream childhood parties and traditional Christmas cookies lineups, even if you bake them in July. The simplicity is the genius here; they look fancy because of the signature cracked chocolate top, but they are deceptively easy to execute. It’s a true staple, perfect alongside a plate of Snickerdoodle Cookies Recipe: Tangy, Chewy Perfectly Crinkled .
Setting Up for Success: Equipment Checklist
If you're making Peanut Butter Blossom Cookies Easy style, good equipment helps. You don’t need a fancy machine, but consistency is critical. The most important tool is the cookie scoop. Using a 1.5 inch scoop ensures all your dough balls are the same size, which means they bake evenly.
No one wants one burnt cookie and one raw cookie on the same sheet.
The Role of Specific Sugars in Maintaining Moisture
We use a combination of granulated and light brown sugar for a reason, my friend. Granulated sugar promotes spread and helps crisp the edges when they roll in the extra sugar. But brown sugar is the hero of moisture .
It contains molasses, which is naturally hygroscopic, meaning it attracts and holds water, keeping the center tender and chewy long after they cool.
Science Behind the Iconic Cracked Top
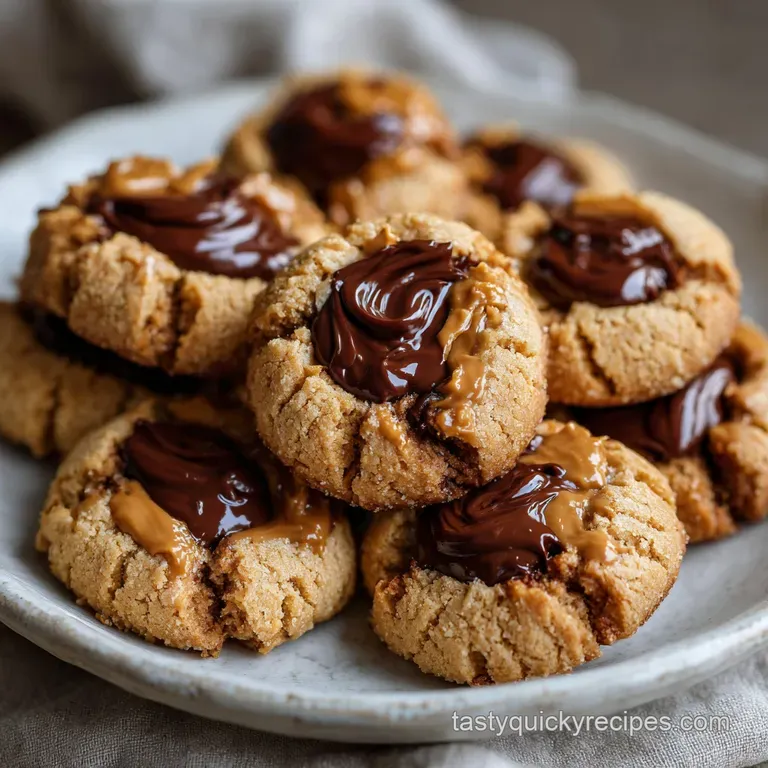
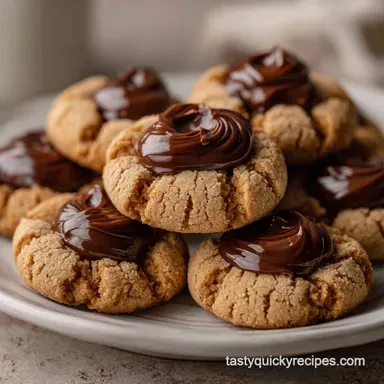
That signature "blossom" shape is all about temperature shock and physics. When the cookie comes out of the hot oven, the starches are still relaxed and pliable. Pressing the cold chocolate kiss into the piping hot center immediately melts the base of the chocolate, forcing the warm, soft cookie dough to crinkle and rise slightly around it.
This is how you achieve that perfect look, confirming you’ve made beautiful Peanut Butter Blossom Cookies .
Fat Ratios: Preventing Crumbliness in Peanut Butter Dough
Peanut butter itself is relatively dry compared to butter. If you don’t have the right ratio of standard butter to peanut butter, you end up with a brittle, crumbly mess that falls apart before it gets to your mouth.
Our recipe uses a high amount of peanut butter for flavor but ensures enough actual butter is present to maintain structure and moisture. Always use room temperature fats so they cream together perfectly, trapping air for a lighter cookie.
Essential Components and Ingredient Deep Dive
Choosing the Right Peanut Butter: Creamy vs. Natural Options
Please listen to me, because this is where I made my colossal mistake early on: Do not use natural, oil-separated peanut butter. I love the healthy stuff, but it ruins this recipe.
The oil separates too easily and lacks the stabilizers needed to keep the dough structure intact, leading to a dry, greasy disaster. Stick to standard, processed smooth varieties like Skippy or Jif for the best chewy peanut butter cookies .
| Ingredient | Standard Requirement | Recommended Substitute |
|---|---|---|
| Unsalted Butter | Softened, real dairy | Vegetable Shortening or Vegan Baking Stick |
| Peanut Butter | Smooth, commercial | Smooth Almond Butter (Texture change likely) |
| Egg | Large, room temperature | No easy substitution , but flax egg can work (Texture change) |
| AP Flour | Spooned and leveled | 1:1 gluten-free Baking Blend (Must contain xanthan gum) |
| Chocolate Kisses | Standard Milk Chocolate | Small Rolo candies or mini Reese's Peanut Butter Cups |
Clarifying Your Chocolate Choices (Kisses, Hugs, or Squares?)
The Peanut Butter Blossom Cookies Hershey company made famous traditionally feature the classic milk chocolate Kisses. They are the perfect size and melt beautifully.
However, if you prefer dark chocolate, or if Kisses are hard to find, feel free to use small dark chocolate squares or even Rolo candies (though the caramel will affect the melt). Always unwrap them first! Waiting until the cookies are out of the oven wastes precious seconds.
Flour and Leavening Agents: Accurate Measurement is Key
Accuracy here prevents spreading. The biggest error home bakers make is scooping flour directly from the bag, which compacts it and adds way too much. Use the spoon and sweep method for the flour and ensure your baking soda is fresh.
Flat, brittle Blossom Cookies are almost always a sign of compacted flour or old leavening agents.
Quick Swaps: Making the Dough dairy-free
If you need to make these dairy-free, swapping the butter is straightforward. Use a high-quality solid vegetable shortening (like Crisco) or a plant based baking stick. The shortening works wonderfully to provide that soft crumb without altering the classic flavor too much.
Chef's Note: If you swap the butter for shortening, you might need to reduce the chill time slightly, as shortening melts at a higher temperature and may result in a tougher dough if over chilled.
step-by-step Guide to Baking Peanut Butter Blossoms

This recipe is structured for success. Pay close attention to the creaming and the chilling phases. This is the difference between good and great Peanut Butter Blossoms Recipe results.
Phase 1: Creaming the Foundation (Butter, Peanut Butter, and Sugar)
Start by creaming your softened butter, peanut butter, granulated sugar, and brown sugar together in your mixer. Beat this mixture on medium speed for a solid 3 to 4 minutes.
You are looking for a visible change: the mixture should lighten in color and volume, looking pale and fluffy, almost like thick velvet. This trapping of air is essential for a tender cookie. Once fluffy, beat in the egg and vanilla just until they disappear into the batter.
Phase 2: Incorporating Dry Ingredients and Forming the Dough Balls
Reduce your mixer speed to low before adding the combined dry ingredients (flour, salt, baking soda). Mix only until you see the last streak of flour vanish. Stop immediately. Overmixing develops gluten, which makes tough, hard cookies.
The dough should be soft but hold its shape easily when pressed. Now, chill the dough for a minimum of 30 minutes to solidify the fats. This prevents the dough from melting into puddles on the baking sheet.
The Crystal Sugar Roll Technique for Maximum Crunch
Pour your remaining granulated sugar into a small, shallow bowl. Using your 1.5 inch scoop, portion the chilled dough, and roll it quickly between your palms until smooth. Give each ball a good, generous roll in the sugar.
The coating provides a beautiful sparkle and a delightful crystalline crunch that contrasts beautifully with the soft center of the baked cookie. Place them 2 inches apart on your prepared parchment lined sheet.
Phase 3: The Critical Chocolate Placement Timing
Bake the cookies for 9 to 12 minutes at 375°F (190°C). When they emerge, the edges should be lightly set and golden, but the center should still look slightly pale and puffy. This is your window!
Take the sheet out and immediately press one unwrapped chocolate kiss firmly into the center of each cookie. You should hear a soft, satisfying squish . Let them sit on the hot tray for 5 minutes before moving them to a cooling rack.
This crucial resting time allows the chocolate to melt properly and the cookie to set its shape.
Troubleshooting and Expert Tips for Cookie Perfection
Preventing Dough from Spreading Too Thinly During Baking
The primary culprits are warm dough or inaccurate flour measurement. If your kitchen is hot, I suggest rolling all the dough balls, coating them in sugar, and then placing the entire sheet back in the freezer for 10 minutes before baking.
Cold dough holds its form longer, giving the leavening agents time to lift the cookie before the fat melts. This is key to successful Peanut Butter Blossom Cookies Easy baking.
The Ideal Internal Temperature for Soft Centers
We aren't aiming for fully golden brown here; that means dry. The perfect Peanut Blossoms are done when the rim of the cookie is set and barely beginning to tan. The internal temp should be around 200°F (93°C), but visually, just look for the centers to stop looking wet and glossy.
They will set completely on the cooling rack, maintaining that fantastic soft chew.
What to Do If Your Chocolate Topping Cracks
Don't panic! If the chocolate cracks when you press it in, that just means you pressed hard enough and that the chocolate is melting beautifully into the warm cookie surface. This is totally normal and part of the rustic, classic look of the Peanut Butter Blossom Cookies .
If they crack excessively, it means your cookies are slightly overbaked and already setting too firmly, but they will still taste amazing.
Extending Freshness: Storing and Freezing Dough and Baked Cookies
Flash Freezing the Dough Balls for Future Baking
One of the great things about this dough is how well it freezes. Scoop and roll all your dough balls and coat them in sugar as instructed. Place them on a tray and flash freeze them for an hour until solid. Then transfer the solid balls to a labeled, zip-top freezer bag. They keep perfectly for up to 3 months.
When ready to bake, place the frozen dough directly onto a sheet (no need to thaw) and add 2 to 4 minutes to the baking time.
Maximizing Shelf Life for Fully Baked Blossoms
Once your Chewy Peanut Butter Cookies have completely cooled and the chocolate is set (this can take up to an hour), store them in an airtight container at room temperature.
They stay beautifully soft for 5 to 7 days, though let’s be real, they rarely last past the first 24 hours in my house. Do not store them in the fridge; it will dry them out and make the chocolate hard and dull.
Creative Ways to Serve These Classic Peanut Butter Treats
These cookies are perfect straight out of the tin, but we can always spice things up, right? When thinking of variations, consider how this soft texture contrasts with something crunchier, like my Chocolate Chip Cookies: The Ultimate Chewy, Caramel Edged Recipe .
Seasonal Variations and Flavor Enhancements
For the festive season, these make a wonderful addition to your Christmas Cookies: Best Non-Spreading Cut-Out Recipe platter. Try dusting the final cooled cookies with a touch of powdered sugar just before serving for a snowy effect. Another fun twist is using white chocolate Hugs instead of Kisses, or adding a teaspoon of espresso powder to the dough for a mocha undertone. These delightful Peanut Butter Blossom Cookies truly shine year round!

Recipe FAQs
Why are my cookies dry or crumbly after baking?
This is typically caused by over measuring the flour or over baking the dough. Ensure you use the "spoon and level" method when measuring flour to avoid compaction, which adds excess dry ingredient.
Remember that these cookies should look slightly underdone when removed from the oven, as they firm up significantly while cooling.
Can I use natural or chunky peanut butter instead of creamy, conventional peanut butter?
No, it is highly recommended that you stick to conventional, stabilized creamy peanut butter (like Jif or Skippy) for this recipe. Natural or oil-separated peanut butter has a higher fat content which will disrupt the cookie structure, resulting in a flat, greasy cookie that spreads too much.
Chunky peanut butter also affects the texture negatively.
How do I prevent the chocolate kisses from melting completely or sliding off the cookies?
The key is precise timing: remove the cookies from the oven and immediately press the kiss firmly into the center of the hot cookie. The residual heat from the baked cookie is just enough to slightly melt the bottom of the kiss for secure adhesion, but not so much that the chocolate puddles.
Wait at least 15 minutes for the chocolate to set before moving them.
What is the best way to store Peanut Butter Blossoms, and how long do they last?
Store fully cooled cookies in an airtight container at room temperature for up to one week. For extra softness and to prevent drying out, you can place half a slice of fresh sandwich bread inside the container; the cookies absorb moisture from the bread.
Do not store them in the refrigerator, as this tends to dry out the peanut butter base.
Can I freeze the dough, or should I freeze the fully baked cookies?
Both methods are effective. To freeze the dough, roll the balls (but do not roll them in sugar yet) and place them on a tray until solid, then transfer them to a freezer bag for up to three months.
Baked cookies can also be frozen, well wrapped, for about 6 8 weeks, but ensure the chocolate kisses are completely set before freezing.
I don't have granulated sugar. Can I use brown sugar or sanding sugar for rolling the balls?
While sanding sugar can be used to give an increased sparkle, granulated sugar provides the best crunch and texture balance. Brown sugar should be avoided entirely for rolling, as its high moisture content will dissolve quickly upon contact with the warm dough, failing to create the desirable crispy sugar crust.
How can I adapt this recipe to be suitable for a gluten-free diet?
The peanut butter base naturally lends itself well to gluten-free modification. Simply substitute the standard all-purpose flour with a high-quality 1:1 gluten-free baking blend that already contains xanthan gum. No further adjustments to the wet ingredients should be needed for excellent results.
Easy Peanut Butter Blossom Cookies
Ingredients:
Instructions:
Nutrition Facts:
| Calories | 106 kcal |
|---|---|
| Protein | 2.0 g |
| Fat | 6.0 g |
| Carbs | 13.0 g |
