Easy Dump and Go Side Dish with Garlic Potatoes
- Time: Active 10 minutes, Passive 35 minutes, Total 45 minutes
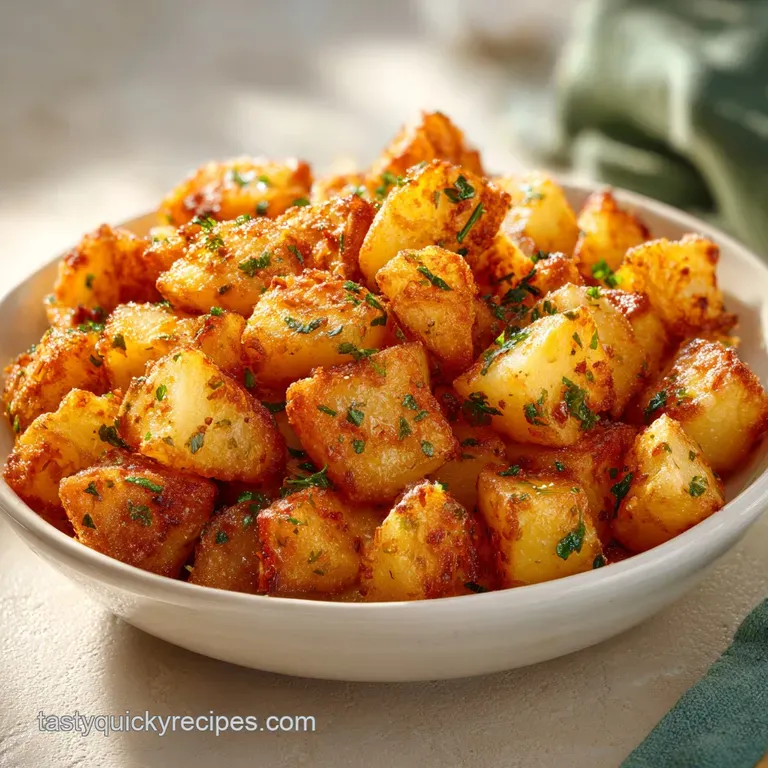
- Flavor/Texture Hook: Shatteringly crispy edges with a velvety, buttery center
- Perfect for: Busy weeknight dinners or a crowd-pleasing Sunday roast side
- The Perfect Easy Dump and Go Side Dish with Garlic Potatoes
- Why These Cubes Get That Shatteringly Crisp Exterior
- Breaking Down the Essential Elements of Potato Perfection
- Finding the Minimal Tools for Maximum Flavor Results
- Sizzling Steps for the Ultimate Garlic Potato Roast
- Solving Common Issues with Your Roasted Potato Batch
- Adjusting Your Recipe for Different Group Sizes
- Debunking Myths About Perfectly Roasted Garlic Potatoes
- Smart Storage and Minimal Waste Kitchen Tips
- Best Ways to Serve and Enjoy Your Potatoes
- Recipe FAQs
- 📝 Recipe Card
The Perfect Easy Dump and Go Side Dish with Garlic Potatoes
Picture this: it’s 6:00 PM on a Tuesday, the kids are asking when dinner is ready for the fifth time, and you’re juggling a mountain of laundry while trying to figure out what pairs with that roast chicken. You need something fast, flavorful, and reliable. That’s exactly when I reach for this recipe.
Discover the ultimate Easy Dump and Go Side Dish with Garlic Potatoes, a single recipe that's sure to impress without leaving you with a sink full of soaking bowls.
I remember the first time I tried to make "simple" roasted potatoes. I followed a fancy recipe that had me par boiling them, then drying them with a hair dryer (yes, really), and then roasting them in duck fat. They were good, sure, but the kitchen looked like a disaster zone.
On a random Wednesday, I decided to just throw everything on a tray and see what happened. The result? These cubes had that crunch I craved, and the garlic didn't just sit on top - it infused every bite. It’s been our family’s go to ever since.
What I love most about this dish is how the kitchen smells while it's roasting. The aroma of fresh garlic and olive oil begins to waft through the house after about 15 minutes, and suddenly, everyone is at the kitchen table waiting.
It’s the kind of side dish that feels like a hug, yet it’s simple enough for any home cook to master on their first try. Let's get into why this method actually beats the more complicated ones.
Why These Cubes Get That Shatteringly Crisp Exterior
- Surface Area Optimization: Cutting the potatoes into half inch (1.25 cm) cubes creates more flat surfaces that touch the hot pan, leading to more golden crust.
- Dual Garlic Punch: Using both fresh minced garlic and garlic powder ensures a deep, layered flavor where the powder coats the starch and the fresh bits roast into savory nuggets.
- Parchment Insulation: The paper creates a slight barrier that prevents the bottom of the potato from burning while still allowing the oil to sizzle and fry the skin.
- Steam Escape: Spreading the potatoes into a single layer prevents them from "crowding" and steaming each other, which is the number one cause of sogginess.
| Potato Thickness | Oven Temperature | Cook Time | Visual Finish Cue |
|---|---|---|---|
| 1/2 inch cubes (1.25 cm) | 200°C (400°F) | 30-35 minutes | Deep golden edges and puffed centers |
| 1 inch chunks (2.5 cm) | 200°C (400°F) | 45-50 minutes | Fork tender with light browning |
| Wedge style | 200°C (400°F) | 35-40 minutes | Skin starts to blister and curl |
There is a real logic to why we don't crowd the pan. If the potatoes are too close together, the moisture they release has nowhere to go but back into the neighboring potato. By giving them breathing room, that moisture evaporates instantly, leaving behind only the crisp starches and the fat.
This is the secret to getting that crunch without using a deep fryer.
Breaking Down the Essential Elements of Potato Perfection
When we talk about the components of this Easy Dump and Go Side Dish with Garlic Potatoes, it’s not just about the spuds. It’s about how the fat and the aromatics work together under high heat. I’ve tried various oils, but nothing carries the garlic flavor quite like a good extra virgin olive oil.
It has a high enough smoke point for a 200°C (400°F) oven, and the fruity notes pair beautifully with the earthiness of the Yukon Golds.
| Ingredient | Science Role | Pro Secret |
|---|---|---|
| Yukon Gold Potatoes | High starch, medium moisture | They hold their shape while the inside turns into a buttery mash. |
| Minced Fresh Garlic | Flavor infusion | Don't mince too fine; larger bits won't burn as easily in the high heat. |
| Garlic Powder | Texture and grip | It sticks to the oil coated potato better than fresh garlic alone. |
| Sea Salt | Moisture extraction | Drawing out surface moisture early helps the skin crisp up faster. |
The choice of potato is actually the most important part of the whole operation. While Red potatoes are great for holding their shape in a salad, Yukon Golds have a unique starch structure that becomes incredibly creamy when roasted.
If you use Russets, you’ll get a fluffier interior, but they tend to break apart more easily when you’re tossing them on the tray. Stick with the golds or reds for the best "dump and go" experience.
Finding the Minimal Tools for Maximum Flavor Results
You don't need a high end kitchen to make this work. In fact, I’ve made these in a tiny camper van oven and they turned out just as good as they do in my home kitchen. The key piece of equipment is a large rimmed baking sheet.
You want something sturdy that won't warp when it hits the 200°C heat. If the pan warps, the oil pools in the corners, and you end up with some potatoes that are greasy and others that are dry.
I always suggest using parchment paper. Not only does it make cleanup a dream (you literally just fold the paper and throw it away), but it also prevents the potatoes from sticking.
I’ve tried silicone mats, but they don't seem to allow the potatoes to get quite as crispy because they don't conduct heat the same way a metal pan lined with paper does. A simple spatula or even just your clean hands is all you need for the tossing.
If you find yourself cooking for a larger crowd, don't try to cram 4 lbs of potatoes onto one sheet. Grab a second sheet and split them up. It might seem like more work, but the results are vastly superior. Juggling two trays is better than serving a pile of mushy potatoes to your guests.
Trust me, I’ve made that mistake before at a Thanksgiving dinner, and I still haven't lived it down.
Sizzling Steps for the Ultimate Garlic Potato Roast
- Preheat your oven to 200°C (400°F) and line a large rimmed baking sheet with parchment paper. Note: This ensures the heat is stable before the potatoes even enter the oven.
- Place the 2 lbs of cubed Yukon Gold or Red potatoes (1/2 inch pieces) directly onto the prepared baking sheet.
- Drizzle the 3 tbsp of extra virgin olive oil over the potatoes. Note: Ensure the oil is evenly distributed for maximum sizzle.
- Sprinkle the 4 cloves of minced garlic, 1 tsp garlic powder, 1 tsp sea salt, and 1/2 tsp cracked black pepper over the top.
- Toss the ingredients directly on the tray using your hands or a spatula until every cube is evenly coated. Note: Using your hands helps you feel if any pieces are still dry.
- Spread the potatoes into a single layer, ensuring they do not overlap to allow for proper crisping. until you see plenty of space between the cubes.
- Roast for 30–35 minutes until the potatoes are deep golden brown and crispy.
- Halfway through the cooking time, shake the pan vigorously to flip the potatoes. until you hear a distinct clinking sound.
- Remove from the oven and garnish with the 1 tbsp of fresh chopped parsley before serving.
While the potatoes are roasting, I often find myself making a quick dipping sauce. If you want a little something extra, you should try my Garlic Parmesan Sauce which takes about 15 minutes and adds a massive punch of flavor. It’s also a great way to use up any leftover garlic you might have lying around on the counter.
Solving Common Issues with Your Roasted Potato Batch
One of the biggest frustrations home cooks face is the "soggy potato syndrome." You followed the recipe, you used the oil, but they came out limp. Usually, this is because the potatoes weren't dry enough before they hit the oil.
If you wash your potatoes after cubing them (which I sometimes do to remove excess starch), you must pat them bone dry with a kitchen towel. Any water left on the surface will turn into steam in the oven, and steam is the enemy of the crunch.
Another issue is the garlic burning. Fresh garlic is delicate. If you mince it into a paste, it will likely burn and turn bitter before the potatoes are done. By keeping the pieces slightly larger (about the size of a grain of rice), they roast slowly and become sweet and mellow.
If you notice the garlic browning too fast halfway through, you can loosely tent the tray with foil for the last 10 minutes, though this may slightly soften the potatoes.
Why Your Potatoes Are Sticking
If you aren't using parchment paper and find your potatoes are glued to the metal, it’s usually because you tried to flip them too early. Potatoes have a natural "release" point. When the crust forms and the starches caramelize, they will naturally lift off the pan.
If you're struggling to flip them at the 15 minute mark, give them another 5 minutes. They’ll tell you when they’re ready.
| Problem | Root Cause | Solution |
|---|---|---|
| Greasy but not crisp | Oven temperature too low | Ensure oven is fully preheated to 200°C (400°F). |
| Burnt garlic bits | Garlic minced too fine | Use a rough chop or add fresh garlic halfway through. |
| Uneven browning | Overcrowded baking sheet | Use a larger pan or split between two sheets. |
Common Mistakes Checklist
- ✓ Pat potatoes completely dry after washing to prevent steaming.
- ✓ Ensure the oven reaches 200°C before the tray goes in.
- ✓ Use a heavy duty rimmed baking sheet to prevent warping.
- ✓ Don't skip the "shake" at the 15-20 minute mark for even color.
- ✓ Use fresh garlic for aroma and powder for full coverage.
Adjusting Your Recipe for Different Group Sizes
If you’re cooking for a smaller household, you can easily scale this down. For just two people, use 1 lb (approx 450g) of potatoes. You’ll still want to use a large tray, though! Giving a small amount of potatoes a lot of space actually makes them even crispier.
When scaling down, keep the oven temperature the same, but start checking for doneness about 5 minutes earlier than the recipe suggests.
Scaling up for a crowd requires a bit more care. For 4 lbs of potatoes, don't just double the oil and dump it all on one tray. You need two separate baking sheets. If you put two trays in the oven at once, swap their positions (top rack to bottom rack) halfway through to ensure even heat distribution.
Most home ovens have "hot spots," and rotating the pans is the best way to combat that.
Chef's Note: When doubling the recipe, I usually only increase the salt by 1.5x instead of 2x. You can always add more salt at the end, but you can't take it away!
Debunking Myths About Perfectly Roasted Garlic Potatoes
There's a common belief that you must soak potatoes in cold water for hours to get them crispy. While soaking does remove surface starch (which can help in deep frying), for oven roasting, it’s often overkill. If you're using Yukon Golds, the starch to sugar ratio is already ideal for browning.
As long as your oven is hot and your pan isn't crowded, you'll get a great crust without the extra two hour wait.
Another myth is that "oil is oil." Many people try to use butter for roasting because of the flavor, but butter contains water and milk solids that burn at 200°C. If you want that buttery taste, toss the potatoes in a tablespoon of melted butter after they come out of the oven.
For the actual roasting, stick to a high-quality oil like extra virgin olive or avocado oil to ensure they don't smoke out your kitchen.
Finally, some say you should leave the skins off for the best texture. I disagree! The skin of a Yukon Gold or Red potato is incredibly thin and provides a structural "snap" that makes the dish more interesting. Plus, that’s where a lot of the nutrients live. Just give them a good scrub, and you're good to go.
Smart Storage and Minimal Waste Kitchen Tips
If you happen to have leftovers (which is rare in my house), they store quite well. Put them in an airtight container in the fridge for up to 4 days. Whatever you do, do not use the microwave to reheat them! The microwave will turn your beautiful crispy cubes into sad, rubbery lumps.
Instead, toss them back onto a baking sheet or into an air fryer at 190°C (375°F) for about 5 minutes until they sizzle again.
For zero waste cooking, don't toss the tiny "shards" of potato that break off during chopping. Those little bits become the crispest, saltiest parts of the dish I call them "potato croutons." Also, if you have parsley stems left over, don't throw them away.
Finely mince them and add them to a soup base or a stock. They have just as much flavor as the leaves.
Best Ways to Serve and Enjoy Your Potatoes
This Easy Dump and Go Side Dish with Garlic Potatoes is incredibly versatile. It sits perfectly next to a medium rare steak, but it’s also hearty enough to be the base of a "breakfast bowl" the next morning with a fried egg on top.
The earthy garlic notes mean it plays well with almost any protein, from grilled salmon to a hearty meatloaf.
If you're looking for a complete meal idea, these potatoes are a match made in heaven for a creamy chicken potato soup. You can even toss a few of these roasted cubes into the soup right before serving for a bit of textural contrast. Sometimes, I just serve them on a big platter with a side of spicy mayo and call it dinner. There’s something so satisfying about a simple, well executed potato that doesn't need a lot of fuss.
| Method | Time | Result | Best For |
|---|---|---|---|
| Standard Oven | 35 minutes | Even browning, classic texture | Large family dinners |
| Air Fryer | 20 minutes | Extra crunchy, very fast | Small batches or quick lunches |
| Stovetop (Cast Iron) | 25 minutes | Deep sear, requires more oil | Achieving a "diner style" crust |
No matter how you choose to serve them, the key is to eat them while they're hot. The second they come out of the oven, they are at their peak "shatter" stage. Call everyone to the table, sprinkle that fresh parsley, and watch them disappear.
It’s the ultimate reward for a minimal effort dish that tastes like you spent hours in the kitchen. Happy roasting!

Recipe FAQs
What pairs well with garlic potatoes?
Roasted proteins make the best partners. These potatoes complement savory mains perfectly, especially our honey garlic chicken for a complete weeknight meal.
What to make with potatoes easily and quickly?
Roast them directly on a sheet pan. Preheat your oven to 400°F (200°C), toss 2 lbs of cubed potatoes with olive oil, minced garlic, garlic powder, salt, and pepper, then roast for 30 35 minutes.
What is a good side dish with potatoes?
Light, crunchy greens or roasted vegetables work best. A simple side provides a great textural contrast to the soft, crispy skinned potato cubes.
What are the three ingredients in a potato side dish?
Potatoes, olive oil, and garlic form the essential flavor base. While we use a few seasonings like salt and pepper, these three core components define the dish's flavor and texture.
Is it true I must boil potatoes before roasting?
No, this is a common misconception. For this dump and-go method, simply pat your 1/2 inch cubed potatoes completely dry and roast them at 400°F (200°C) to achieve perfect golden brown results without the extra step.
How to ensure the potatoes don't get soggy?
Spread the cubes in a single layer without overlapping. This allows hot air to circulate around every side, ensuring the potatoes roast rather than steam, and be sure to shake the pan halfway through the 30 35 minute cooking time.
How to keep the garlic from burning?
Toss the garlic directly with the oil and potatoes before roasting. The olive oil coats the minced garlic and protects it while the potatoes develop their crisp, deep golden brown exterior at 400°F (200°C).
Easy Garlic Potatoes
Ingredients:
Instructions:
Nutrition Facts:
| Calories | 222 kcal |
|---|---|
| Protein | 4.1 g |
| Fat | 8.4 g |
| Carbs | 33.8 g |
| Fiber | 4.0 g |
| Sugar | 1.5 g |
| Sodium | 472 mg |
