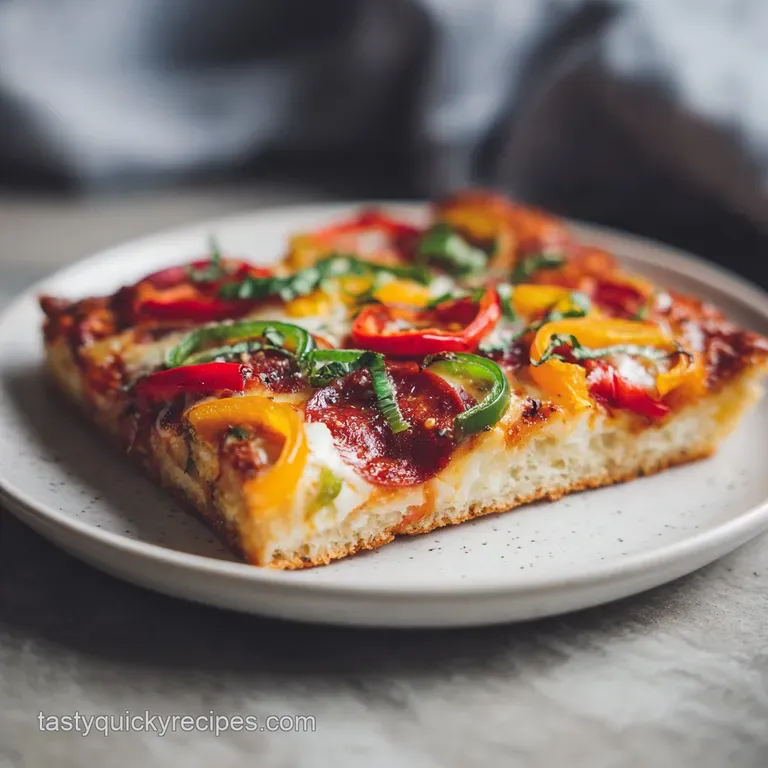
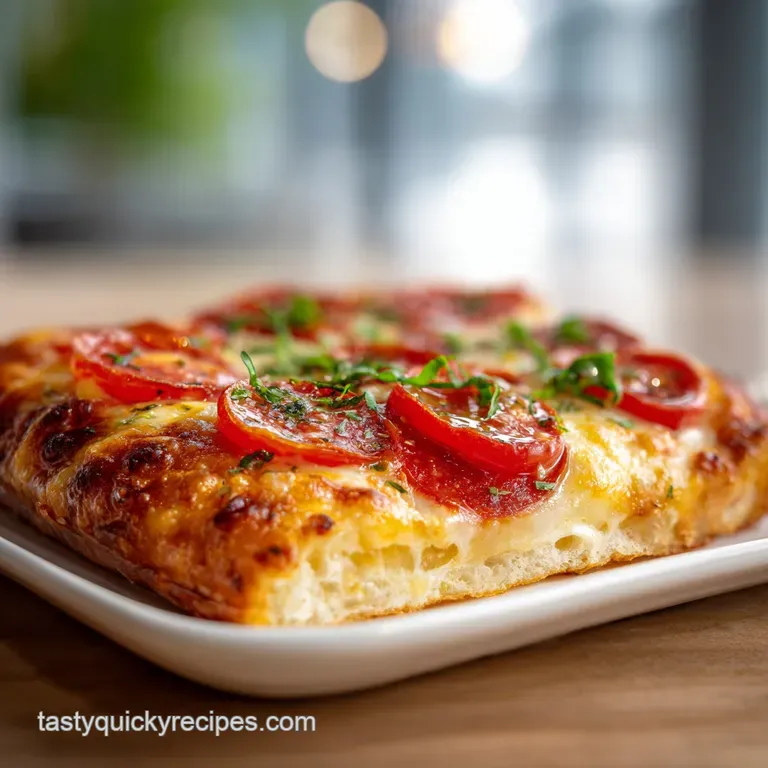
Double Stuffed Sheet Pan Pizza: Crispy and Cheesy
- Time: Active 45 mins, Passive 100 mins, Total 145 mins
- Flavor/Texture Hook: Shatteringly crisp bottom with a velvety ricotta mozzarella core.
- Perfect for: Juggling a hungry family or hosting a game day crowd.
- Mastering the Crispy Double Stuffed Sheet Pan Pizza
- The Reason Standard Dough Fails a Stuffed Crust
- Essential Metrics for This Massive Sheet Pan Pizza
- Selecting High Protein Components for the Perfect Crust
- Minimalist Tools for Your Heavy Duty Pizza Night
- Executing the Perfect Pinch and Tuck Crust Assembly
- Smart Solutions for Common Stuffed Crust Pizza Issues
- Creative Flavor Profiles for Your Stuffed Dough Creations
- Preserving That Shatteringly Crisp Crust for the Next Day
- Ideal Side Dishes to Balance This Hearty Italian Feast
- CRITICAL: Very High in Sodium
- Recipe FAQs
- 📝 Recipe Card
Mastering the Crispy Double Stuffed Sheet Pan Pizza
If you’ve ever bitten into a stuffed pizza and had it weep lukewarm water all over your hands, you know the heartbreak of unstrained ricotta. I remember the first time I tried making a double stuffed sheet pan pizza for a Friday night movie marathon.
I was so excited about the "double" part that I didn't think about the physics of trapping all that moisture between two layers of dough. The result was a soggy, sad rectangle that tasted more like wet bread than a pizzeria masterpiece.
I learned the hard way that the hero of this dish isn't actually the pepperoni it’s the humble ricotta cheese, but only if you treat it with respect.
The secret to a successful double stuffed sheet pan pizza lies in the "dry" filling. We're using 225g of whole milk ricotta, but you absolutely have to strain it. When you let it sit in a mesh sieve for even 20 minutes, you’ll see a surprising amount of yellow whey collect at the bottom.
That liquid is the enemy of a crisp crust. By removing it, the ricotta transforms into a thick, velvety spread that holds its shape even under the intense 230°C heat of the oven.
It creates a creamy barrier that protects the bottom dough from getting mushy while the top layer of mozzarella melts into a gooey pool of perfection.
We are going for a crust that offers a loud, audible shatter when you slice into it. We achieve this by using 750g of high protein bread flour and a par baking technique that ensures the bottom is fully set before the heavy fillings go on.
It’s a bit of extra effort, but when you're juggling a busy kitchen and hungry kids, having a reliable method that doesn't result in a gummy middle is a total life saver. Trust me, once you see those "cup and char" pepperoni slices curling up into little bowls of savory oil on top of a perfectly sealed dough, you'll never go back to the standard delivery stuff again.
The Reason Standard Dough Fails a Stuffed Crust
Most home cooks struggle with stuffed pizzas because of what I call the "Steam Trap." When you place raw dough over a wet filling and stick it in the oven, the moisture in the cheese turns into steam. This steam has nowhere to go because the top layer of dough acts like a lid.
The result is a middle layer that stays gummy and raw while the outside burns.
The Pressure Seal: The "pinch and tuck" method creates an airtight environment where the cheese doesn't just melt, it emulsifies into the dough. By anchoring the top layer under the base, we force the internal air to expand, which actually helps lift the top crust and prevents it from sitting heavily on the cheese.
The Oil Fry Effect: Using a generous 45ml of extra virgin olive oil on the pan doesn't just prevent sticking; it essentially fries the bottom of the dough during the par bake.
This creates a rigid, waterproof "crust shield" that can support the weight of 450g of mozzarella without bowing or soaking up liquid.
| Method | Texture | Prep Time | Best For |
|---|---|---|---|
| Direct Bake | Soft, chewy, potentially gummy | 120 mins | Thin crust only |
| Par Bake (This Recipe) | Shatteringly crisp, rigid base | 145 mins | Heavy stuffed fillings |
| Shortcut (store-bought) | Bready, uniform, less flavor | 40 mins | Last minute emergencies |
Choosing the par bake method is what separates a professional grade sheet pan pizza from a cafeteria style tray bake. The extra 5 to 8 minutes in the oven before the toppings go on allows the starches in the flour to gelatinize and set, ensuring that even the very center of the 13x18 inch pan is fully cooked and crunchy.
Essential Metrics for This Massive Sheet Pan Pizza
When you're dealing with a dough weight of over 1.2 kilograms, precision is your best friend. I've found that using a kitchen scale for the 750g of bread flour is the only way to ensure the hydration stays at that perfect 70% mark.
If your dough is too dry, it won't stretch to the corners of the sheet pan; if it's too wet, the "pinch and tuck" seal will slide apart like a bad DIY project.
| Component | Science Role | Pro Secret |
|---|---|---|
| Bread Flour (750g) | High protein (12%+) creates the "skeleton" to hold heavy cheese. | Use "00" flour if you want a softer, more delicate shatter. |
| Active Yeast (10g) | Fermentation produces CO2 for a pillowy, airy crumb. | Bloom in 35°C water to "wake up" the yeast without killing it. |
| Sea Salt (15g) | Tightens gluten strands and controls the rate of fermentation. | Never pour salt directly onto dry yeast; it can stunt the rise. |
Getting the temperature of your 525ml of water right is another "don't skip" moment. I aim for exactly 35°C. It should feel like lukewarm bathwater. If it’s cold, the dough will take four hours to rise instead of two; if it’s too hot, you’ll kill the yeast and end up with a giant, dense cracker.
Selecting High Protein Components for the Perfect Crust
For this recipe, we are using bread flour specifically because it contains more gluten forming proteins than all purpose flour. This is critical when you are stretching the dough across a large 13x18 inch rimmed baking sheet.
You need that elasticity so the dough doesn't tear while you're trying to anchor the top layer.
- 750g Bread Flour: Provides the structural strength needed for a double layer build.
- Substitute: All purpose flour. Why this? It works, but the crust will be softer and more prone to tearing.
- 525ml Lukewarm Water: Hydrates the flour and activates the yeast.
- Substitute: Room temp pale ale. Why this? Adds a deep, malty complexity to the dough's flavor profile.
- 450g Mozzarella: Use low moisture, whole milk blocks for the best melt and stretch.
- Substitute: Provolone. Why this? Offers a sharper, tangier flavor but with a similar melting point.
- 225g Ricotta Cheese: The "creamy core" that differentiates this from a standard pizza.
- Substitute: Whipped cream cheese. Why this? Denser and tangier, but holds up incredibly well under heat.
- 150g Cup and Char Pepperoni: The thin edges crisp up into little flavor bombs.
- Substitute: Salami slices. Why this? Richer fat content, though it won't "cup" like specific pepperoni.
Chef's Tip: If you can find "low moisture" mozzarella in a block, grate it yourself. The pre shredded bags are coated in potato starch to prevent clumping, which interferes with that velvety, cheese pull melt we're after.
Minimalist Tools for Your Heavy Duty Pizza Night
You don't need a fancy wood fired oven to make a world class double stuffed sheet pan pizza. In fact, some of my best batches have come out of a standard apartment oven using nothing but a sturdy 13x18 inch rimmed baking sheet.
The metal of the pan is a great conductor of heat, which is exactly what we need for that crispy bottom.
- 13x18 Inch Rimmed Baking Sheet: Also known as a "half sheet" pan. It provides the necessary boundaries for the dough to climb and crisp.
- Mesh Sieve: Essential for straining the 225g of ricotta. Don't skip this unless you want a soggy pizza.
- Large Mixing Bowl: You'll need plenty of space for the 750g of flour to expand.
- Bench Scraper (Optional): Great for dividing the dough into the 60/40 portions and cleaning the floury counter later.
If you don't have a stand mixer, don't sweat it. Kneading this dough by hand for 8 to 10 minutes is actually quite therapeutic. It’s a great way to feel the transition from a shaggy mass to a smooth, elastic ball of potential.
You'll know it's ready when you poke it and it springs back like a memory foam mattress. If it stays indented, keep kneading.
Executing the Perfect Pinch and Tuck Crust Assembly
- Hydrate the yeast. In a large bowl, whisk the 525ml lukewarm water and 10g active dry yeast until dissolved.
- Form the mass. Gradually add 750g bread flour and 15g sea salt, mixing with a sturdy spoon until a shaggy mass forms and no dry flour remains.
- Knead for strength. Knead by hand on a floured surface for 8 to 10 minutes until the dough is smooth, elastic, and tacky but not sticky.
- Divide and rise. Split the dough: one portion at 60% of the weight (base) and 40% (top). Place in oiled bowls, cover, and let rise for 120 minutes until doubled in size.
- Prep the pan. Preheat your oven to 230°C. Coat your 13x18 inch sheet pan with 45ml olive oil. Stretch the larger dough portion to the edges.
- Par bake the base. Bake the bottom crust for 5 to 8 minutes until it looks dry and just slightly puffed. Note: This prevents the "Steam Trap" effect.
- Apply the creamy layer. Mix the 225g strained ricotta with 5g oregano and 2g red pepper flakes. Spread evenly over the par baked base, leaving a 1 inch border.
- Add the mozzarella. Pile 450g of shredded mozzarella over the ricotta, staying within that border.
- Seal the architecture. Roll out the smaller dough portion and drape it over the cheese. Pinch the edges of the top dough and tuck them under the base dough's perimeter to lock it in.
- Finish and bake. Spread 250ml pizza sauce on top, add 150g pepperoni and 50g Parmesan. Bake for 20 to 25 minutes until the crust is mahogany colored and pepperoni is charred. Garnish with fresh basil.
Smart Solutions for Common Stuffed Crust Pizza Issues
Working with two layers of dough can be tricky. One of the most frustrating moments is when the dough "bounces back" while you're trying to stretch it. This is usually just the gluten being too tight. If this happens, simply walk away for 10 minutes. Cover it with a kitchen towel and let it relax.
When you come back, the protein strands will have loosened, and it will stretch like a dream.
Solving the Dreaded Soggy Bottom Problem
If your pizza is crispy on the edges but soft in the middle, it’s usually due to a lack of heat from the bottom of the oven. Most home ovens are hotter at the top. I solve this by placing my sheet pan on the lowest rack possible for the first 15 minutes of the bake, then moving it to the top rack for the final 5 to 10 minutes to char the pepperoni.
Stopping the Cheese Leak
If cheese is bubbling out of the sides, your "pinch and tuck" seal wasn't tight enough. Make sure you are really wedging that top dough under the bottom layer. It’s also helpful to poke a few tiny steam vents in the top dough with a toothpick before adding the sauce; this lets internal pressure escape without blowing out the sides.
| Problem | Root Cause | Solution |
|---|---|---|
| Middle dough is gummy | Too much moisture in ricotta | Strain ricotta for at least 20 mins through a mesh sieve. |
| Crust is tough/chewy | Under hydrated dough | Ensure you use exactly 525ml water for 750g flour. |
| Top burns too fast | Oven rack is too high | Move pan to the middle or lower rack and tent with foil if needed. |
Common Mistakes Checklist:
- ✓ Pat your pepperoni dry with a paper towel if it looks greasy (prevents oil pools).
- ✓ Let the dough rise in a warm, draft free spot (near the preheating oven is perfect).
- ✓ Don't skip the par bake; it's the only way to get a rigid bottom.
- ✓ Wait at least 5 minutes before slicing to let the cheese "set" so it doesn't all slide out.
- ✓ Use a pizza stone or a preheated baking steel underneath the sheet pan for an even crispier result.
Creative Flavor Profiles for Your Stuffed Dough Creations
Once you’ve mastered the base recipe, the variations are endless. If you're a meat lover, you can add cooked, crumbled Italian sausage or crispy bacon bits inside with the ricotta. Just remember that anything you put inside needs to be fully cooked and relatively dry.
Wet vegetables like mushrooms or spinach should be sautéed and squeezed dry before being added to the stuffing.
If you are looking for a quicker alternative on a weeknight, you might enjoy my French bread pizza recipe, which gives you that crispy crust satisfaction in a fraction of the time. But for a weekend project, sticking with the double stuffed method is worth every minute.
For a vegetarian version, try swapping the pepperoni for thin slices of zucchini and bell peppers on top. Inside, you can mix the ricotta with some lemon zest and fresh thyme to brighten up the heavy cheese. If you have leftover roast turkey or stuffing around the holidays, this technique is also perfect for creating Thanksgiving pizza ideas that your family will actually be excited to eat.
Preserving That Shatteringly Crisp Crust for the Next Day
This pizza makes a massive 10 servings, so unless you're feeding a small army, you'll likely have leftovers. The goal is to keep that crust from turning into a sponge.
Storage: Store leftover slices in an airtight container in the fridge for up to 3 days. To prevent the sauce from soaking into the top crust, I like to place a piece of parchment paper between stacked slices.
Freezing: You can freeze individual slices for up to 2 months. Wrap them tightly in plastic wrap and then a layer of aluminum foil. To reheat from frozen, don't thaw them just put them straight into a 190°C oven for 15 to 20 minutes.
Zero Waste Tip: Don't throw away those fresh basil stems! You can simmer them in a bit of olive oil to create a fragrant basil oil that's delicious drizzled over the pizza right before serving.
Also, the whey drained from the ricotta is packed with protein; you can use it in place of water for your next batch of bread dough or even add it to a smoothie.
Ideal Side Dishes to Balance This Hearty Italian Feast
Because a double stuffed sheet pan pizza is so rich and cheese heavy, you want to serve it with something bright and acidic to cut through the fat. A simple arugula salad with a lemon tahini dressing or a classic Caesar with plenty of black pepper works wonders.
It refreshes the palate between those gooey, cheesy bites.
If you're serving this as part of a larger spread, it pairs beautifully with a homemade corn casserole — the sweetness of the corn balances the salty pepperoni and savory sauce. For a more traditional route, a plate of roasted broccolini with garlic and chili flakes provides a nice charred bitterness that complements the mahogany colored crust.
Whatever you choose to serve it with, the pizza is the star. When you pull it out of the oven and hear that sizzle of the pepperoni oil bubbling against the Parmesan, you’ll know you’ve created something special.
It’s the kind of meal that brings everyone to the table, juggling their plates and reaching for that "one last slice." Enjoy the process, don't fear the kneading, and always, always strain your ricotta!

CRITICAL: Very High in Sodium
1185 mg 1185 mg of sodium per serving (52% 52% of daily value)
The American Heart Association recommends limiting sodium intake to no more than 2,300mg per day, with an ideal limit of 1,500mg per day for most adults.
Tips to Reduce Sodium in Your Pizza
-
Reduce Added Salt-25%
Lower the amount of sea salt added to the dough. Try reducing it by half to start, as much of the sodium will come from other ingredients.
-
Opt for Lower Sodium Cheese-15%
Choose low-sodium mozzarella and reduce the amount of Parmesan cheese used. You can also explore ricotta varieties with less sodium.
-
Select Lower Sodium Pepperoni-25%
Look for reduced sodium pepperoni options. If unavailable, consider using a smaller portion or a less processed meat topping.
-
Choose No-Salt Added Pizza Sauce-20%
Use a pizza sauce with no added salt or a low-sodium alternative. This can significantly cut down on hidden sodium.
-
Boost Flavor with Herbs & Spices
Continue to use dried oregano and red pepper flakes to enhance flavor. Consider adding fresh garlic or onion powder to the sauce for extra zest.
Recipe FAQs
Why is my bottom crust soggy?
You likely skipped the par-bake step. Baking the base for 5-8 minutes before adding the cheese creates a structural barrier that prevents the ricotta moisture from penetrating the dough.
Is it true I can use any cheese for the filling?
No, this is a common misconception. You must use the specific ratio of low-moisture mozzarella and strained ricotta to ensure the filling stays creamy without turning the internal dough into a soggy mess.
How to ensure the pizza stays sealed while baking?
Use the pinch and-tuck method to create a pressurized seal. By anchoring the top dough layer underneath the bottom crust's perimeter, you trap the steam inside, allowing the mozzarella to melt into a velvety core.
How to prevent the ricotta from leaking?
Strain the ricotta through a mesh sieve before mixing. Removing the excess whey ensures the filling is dense enough to hold its shape during the 25-minute bake at 450°F.
Can I speed up the two-hour rise time?
How to tell when the pizza is finished baking?
Look for a deep mahogany crust color and bubbling cheese. Since this is a thicker stuffed style, visual cues are more reliable than timing alone to ensure the center is fully heated.
How to handle the dough if it keeps snapping back?
Let the dough rest for 10 minutes covered in the pan before final stretching. This relaxes the gluten strands, allowing you to reach the edges of the 13x18 inch sheet pan without tearing.
Double Stuffed Sheet Pan Pizza
Ingredients:
Instructions:
Nutrition Facts:
| Calories | 598 kcal |
|---|---|
| Protein | 25.8g |
| Fat | 26.4g |
| Carbs | 58.2g |
| Fiber | 2.6g |
| Sugar | 2.1g |
| Sodium | 1185mg |
