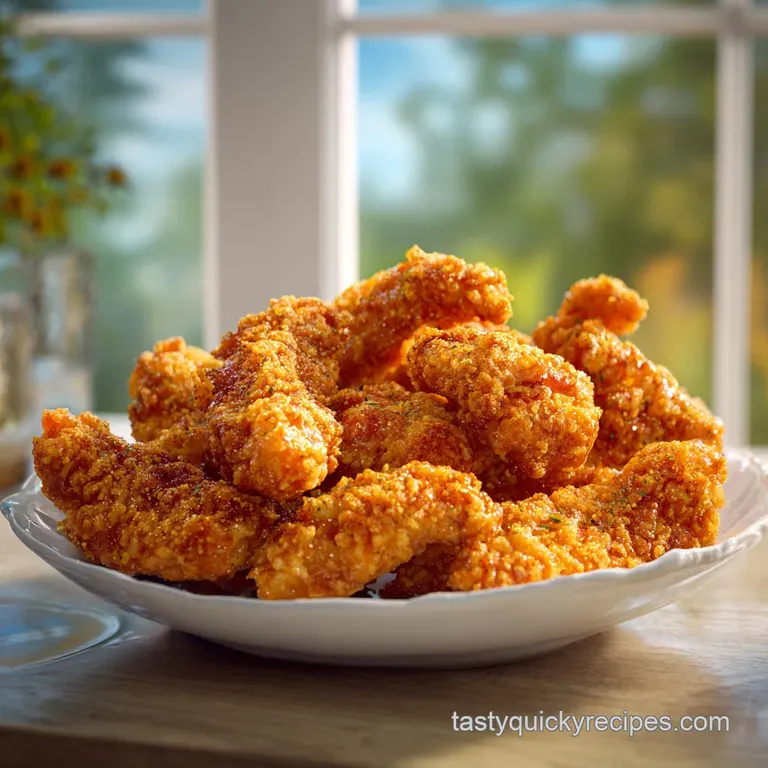
Shatter Crisp Chicken Tenders Recipe
- Time: Active 45 minutes, Passive 12 minutes, Total 57 minutes
- Flavor/Texture Hook: Shatter crisp exterior with a tangy, spiced, velvety interior
- Perfect for: High energy family dinners or a weekend snack that beats any drive thru
- Master This Easy Chicken Tenders Recipe
- Winning Features Of This Dish
- Essential Recipe Facts And Figures
- Necessary Ingredients For Success
- Kitchen Tools For The Job
- Executing The Cooking Process
- Fixing Common Cooking Mistakes
- Scaling This Recipe Up
- Fun Ways To Change Flavor
- Chicken Coating Logic
- Debunking Kitchen Myths
- Storing And Reheating Your Leftovers
- Serving Your Dish Beautifully
- High in Sodium
- Recipe FAQs
- 📝 Recipe Card
Master This Easy Chicken Tenders Recipe
The first time I really nailed this chicken tenders recipe, the sound of that first bite was so loud my husband actually looked up from his phone. It wasn't a dull "crunch" but a genuine, glassy "shatter" that you usually only get from professional high pressure fryers.
I'd spent years struggling with breading that slid off like a wet coat or crusts that felt more like soggy cardboard than gold standard poultry.
The secret turned out to be a bit of kitchen science and a lot of patience. We've all been there, rushing the process and throwing cold chicken into lukewarm oil, but once I started using a buttermilk brine and a specific starch to flour ratio, everything changed.
Now, this is the only way we do "fried" chicken at home, especially since we figured out how to get that same effect using an air fryer or a hot oven.
We're going to walk through how to make these properly, including the little tricks I picked up after several "disaster" batches. From the way you spray the oil to the temperature of the chicken before it hits the pan, every small step contributes to that final, glorious sizzle.
Trust me, once you see how easy it is to get this level of texture, you'll never look at a frozen bag of strips the same way again.
Winning Features Of This Dish
Acidic Tenderizing: The lactic acid in buttermilk breaks down protein fibers, ensuring the meat never turns rubbery or dry during the over high heat cook.
The Starch Bridge: Cornstarch creates a tighter molecular bond than flour alone, which prevents moisture from the chicken from softening the crust.
Leavening Lift: Baking powder reacts with the buttermilk's acidity to create tiny CO2 bubbles, making the breading airy and crispy rather than dense.
Double Dredge Synergy: The "shaggy" bits created by dripping buttermilk into the flour mix provide more surface area for the heat to crisp up.
| Thickness | Internal Temp | Rest Time | Visual Cue |
|---|---|---|---|
| 0.5 inch | 165°F | 3 minutes | Juices run clear when pressed |
| 0.75 inch | 165°F | 4 minutes | Coating is deep golden brown |
| 1.0 inch | 165°F | 5 minutes | Meat is opaque and white throughout |
Getting the internal temperature right is just as important as the crust. While we all love that golden brown look, you don't want to pull them out too early only to find a pink center. If you've ever mastered a Roasted Chicken Thighs recipe, you know that resting is the final, non negotiable step to keeping the juices where they belong.
Essential Recipe Facts And Figures
| Component | Science Role | Pro Secret |
|---|---|---|
| Buttermilk | Protein breakdown | Use full fat for better fat soluble spice distribution |
| Cornstarch | Moisture barrier | It lowers the gluten percentage, preventing a "bread like" crust |
| Baking Powder | Aeration | It creates micro craters in the breading that trap heat |
| Smoked Paprika | Color development | It provides a deep hue before the chicken overcooks |
Selecting the right ingredients is the difference between a "good" meal and one your family asks for every week. While some people skip the starch, it’s the primary reason this breading stays attached and crispy even after it cools down slightly.
Necessary Ingredients For Success
- 1.5 lbs chicken tenderloins: These are the naturally tender strip of meat under the breast.
- 1 cup buttermilk: Why this? The acidity tenderizes and helps the flour adhere perfectly to the meat. (Substitute: 1 cup milk + 1 tbsp lemon juice)
- 1 tsp garlic powder: (Substitute: Onion powder for a milder savory note)
- 1 tsp smoked paprika: (Substitute: Sweet paprika or a pinch of chili powder)
- 0.5 tsp kosher salt: (Substitute: Sea salt)
- 0.5 tsp black pepper: (Substitute: White pepper for a sharper, cleaner bite)
- 1.5 cups all purpose flour: Why this? Provides the structural base for the thick, craggy breading we want. (Substitute: Cup for-cup gluten-free flour blend)
- 0.5 cup cornstarch: Why this? This is the secret to the shatter crisp texture that flour alone lacks. (Substitute: Potato starch or arrowroot powder)
- 1 tsp baking powder: (Substitute: Skip if necessary, but the crust will be denser)
- 2 tsp garlic powder (for coating): (Substitute: Granulated garlic)
- 2 tsp onion powder: (Substitute: Dried chives, crushed into a powder)
- 1 tsp cayenne pepper: (Substitute: Smoked paprika for zero heat)
- 2 tbsp over high heat oil spray: Why this? Evenly coats the flour to ensure it browns instead of staying dusty. (Substitute: Avocado oil or grapeseed oil)
Kitchen Tools For The Job
You don't need a professional fryer for this, but a few specific tools make the process much less messy. I always use a set of wide, shallow bowls for my "dredging station." This prevents the flour from flying everywhere and gives you enough room to move the chicken around without breaking the tenderloins.
A wire cooling rack set over a baking sheet is another essential. If you put hot chicken directly onto a flat plate, the steam coming off the meat will settle into the bottom of the crust, turning it into a soggy mess within minutes. The rack allows air to circulate around the entire tender, keeping every side crispy.
Executing The Cooking Process
Preparing Your Chicken Protein
Place the 1.5 lbs chicken tenderloins in a large bowl and pour over 1 cup buttermilk. Add 1 tsp garlic powder, 1 tsp smoked paprika, 0.5 tsp kosher salt, and 0.5 tsp black pepper. Stir to coat. Note: Brining for at least 30 minutes makes a massive difference in juiciness.
The Efficient Double Dredge
In a separate shallow dish, whisk 1.5 cups all purpose flour, 0.5 cup cornstarch, 1 tsp baking powder, 2 tsp garlic powder, 2 tsp onion powder, and 1 tsp cayenne pepper. Drizzle 2 tablespoons of the buttermilk brine into the flour and mix with a fork to create small clumps.
Note: These clumps become the "extra crunchy" bits on the crust.
Coating The Tenders
Take one tenderloin from the brine, let the excess liquid drip off, and press it firmly into the flour mixture. Flip and press again, ensuring the flour is packed into every crevice. Repeat for all 1.5 lbs chicken tenderloins.
Using The Air Fryer
Preheat your air fryer to 400°F (200°C). Arrange the chicken in a single layer, ensuring they do not touch. Note: Overcrowding leads to steaming instead of crisping.
Applying The Oil
Generously spray the top of the chicken with 1 tbsp of the over high heat oil spray. Ensure there are no visible dry white flour spots.
The First Cook
Air fry for 6 minutes. You should hear a steady sizzle and see the edges turning brown.
Flipping The Chicken
Carefully flip each tender using tongs. Spray the other side with the remaining 1 tbsp of oil spray.
The Final Crisp
Cook for another 5 to 6 minutes until the coating is deeply golden and feels firm to the touch.
Checking For Total Doneness
Verify the internal temperature has reached 165°F using a meat thermometer. The chicken should be opaque and steaming in the center.
The Resting Phase
Transfer the chicken to a wire rack and let it rest for 3 minutes before serving. This allows the juices to redistribute so they don't leak out when you bite in.
Fixing Common Cooking Mistakes
Maintaining A Crispy Crust
The most common heartbreak is a crust that looks great but feels soft. This usually happens because of trapped steam or insufficient oil coverage during the air frying process. If the flour doesn't get "wet" with oil, it won't fry; it will just bake into a dry, chalky layer.
Keeping The Breading Attached
If your breading peels off like a loose skin, it’s usually because the chicken was too wet or the flour wasn't pressed in hard enough. That buttermilk soak creates a "glue," but it needs the pressure of your hands to really bond with the flour and cornstarch.
| Problem | Root Cause | Solution |
|---|---|---|
| Floury white spots | Insufficient oil spray | Spray spots again halfway through cooking |
| Breading falling off | Meat was too cold/wet | Press the flour firmly into the meat with your palms |
| Rubbery texture | Overcooking the meat | Use a thermometer and pull at exactly 165°F |
Right then, let's talk about how to prevent these issues before they start. It's much easier to follow a few simple rules than to try and save a batch of soggy chicken.
- ✓ Pat the chicken dry only before the buttermilk soak, never after.
- ✓ Always use a wire rack for resting to prevent a "sweaty" bottom crust.
- ✓ Ensure the air fryer is fully preheated for at least 5 minutes.
- ✓ Don't skip the cornstarch; it’s the structural integrity of the crunch.
- ✓ Spray every single inch of white flour with oil for a golden finish.
Scaling This Recipe Up
When I’m making this for a big family gathering, I usually double the batch. The trick here is to not double the cayenne pepper or salt linearly 1.5x is usually plenty, or it can become overwhelming. For the buttermilk and flour, you can go ahead and double those 1:1.
If you are cooking for a crowd, work in batches. Never try to squeeze 3 lbs of chicken into one air fryer basket. The air needs to circulate freely. You can keep the first batch warm in a 200°F (90°C) oven on that wire rack while the second batch cooks. For larger amounts of scraps, you can even simmer them down with vegetables to make a base for a Chicken Stock recipe.
Fun Ways To Change Flavor
One of my favorite variations is the "Hot Honey" version. Just whisk together some honey, a splash of hot sauce, and a pinch of salt, then drizzle it over the tenders the second they come out of the air fryer. The heat of the chicken thins the honey so it seeps into the nooks and crannies of that craggy crust.
If you want something a bit more savory, you can try a version similar to my Parmesan Crusted Chicken recipe by adding a half cup of grated parmesan to the flour mix. Just be careful, as cheese can burn faster than flour, so you might need to drop the temperature by 25°F and cook for a minute or two longer.
Chicken Coating Logic
| Method | Time | Texture | Best For |
|---|---|---|---|
| Air Fryer | 12 minutes | Shatter crisp | Maximum crunch, less fat |
| Oven Baked | 18 minutes | Firm and crunchy | Large batches for crowds |
| Deep Fried | 6 minutes | Bubbled and rich | Traditional indulgence |
Debunking Kitchen Myths
A lot of people think you need to let the breaded chicken sit in the fridge for an hour to "set" the coating. In my experience, this actually makes the breading more likely to fall off because the moisture from the chicken starts to dissolve the flour layer, creating a slippery paste.
It's much better to dredge and drop them straight into the heat.
Another myth is that "healthy" chicken tenders have to be dry. By using the buttermilk soak, we are adding almost no extra fat compared to oil, but we are adding a massive amount of moisture and flavor. You don't need a deep fryer to get a juicy interior; you just need to understand how acid interacts with protein.
Storing And Reheating Your Leftovers
If you happen to have leftovers which is rare in my house store them in an airtight container in the fridge for up to 3 days. To freeze, lay the cooked and cooled tenders on a baking sheet until solid, then transfer to a freezer bag for up to 2 months.
The only way to reheat these is in the air fryer or oven at 370°F (185°C) for about 4-5 minutes. Please, for the love of all things crispy, stay away from the microwave. It will turn that beautiful shatter crust into a gummy, sad version of its former self.
For zero waste, you can chop up leftover cold tenders and toss them into a wrap or over a salad the next day.
Serving Your Dish Beautifully
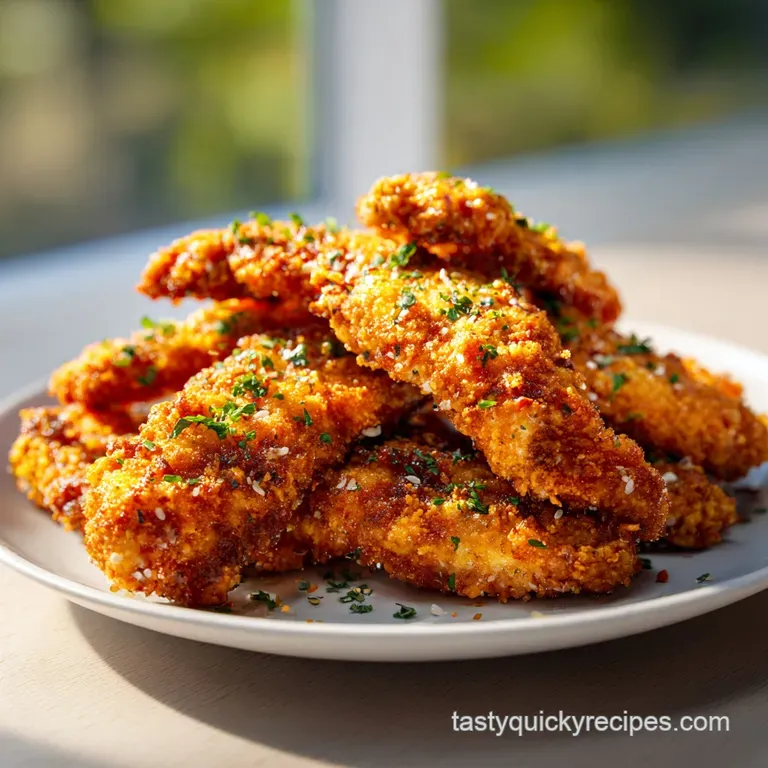
I love serving these on a big wooden board with a few small bowls of different sauces. It feels more like a "gastropub" meal than a quick weeknight dinner. A little sprinkle of fresh parsley or even just some extra cracked black pepper on top makes them look professional.
If you're serving these for kids, the "classic" platter with some carrot sticks and a big pile of fries is always a winner. But for the adults, I like to serve them alongside a crisp slaw with a vinegary dressing.
The acidity of the slaw cuts through the richness of the breading perfectly, making every bite feel balanced and fresh.

High in Sodium
845 mg mg of sodium per serving (37% % of daily value)
The American Heart Association recommends limiting sodium intake to 2,300mg per day for overall health.
Tips to Reduce Sodium in Your Chicken Tenderloins
-
Reduce Added Salt-25%
Eliminate or significantly reduce the 0.5 tsp of kosher salt. Taste the buttermilk mixture before adding any salt and adjust accordingly. You can always add a pinch after cooking if needed.
-
Consider Low-Sodium Buttermilk-10%
While buttermilk isn't inherently high in sodium, some brands add salt. Check the nutrition label and choose a brand with the lowest sodium content or consider making your own buttermilk substitute with milk and lemon juice or vinegar to control the sodium.
-
Skip Optional Salt After Cooking-5%
Resist the urge to add any extra salt after the chicken is cooked. The spices already provide a good amount of flavor.
-
Spice It Up!
Experiment with other herbs and spices like oregano, thyme, rosemary, or different types of chili powder to enhance the flavor without adding sodium. Focus on building flavor with non-sodium ingredients.
Recipe FAQs
Which is the best way to cook chicken tenders?
Air frying is highly recommended. It provides the shatteringly crisp texture of deep frying with significantly less oil and time. The high, circulating heat cooks the exterior quickly while the buttermilk brine keeps the interior juicy.
What is the best thing to marinate chicken tenders in?
Buttermilk is the best choice for marinating. The lactic acid in buttermilk tenderizes the chicken proteins, preventing toughness, and the thickness ensures the coating adheres properly later.
What is the secret to juicy chicken tenders?
The secret is the buttermilk brine and temperature control. Brining introduces moisture and acid to break down fibers, while pulling the chicken exactly at 165°F ensures it doesn't lose internal moisture.
Is it better to bake or fry chicken tenders?
Air frying is superior to baking for texture. While baking is less hands-on, it often results in a drier crust; air frying mimics the crispness achieved through frying much more effectively.
How do I ensure the breading sticks and doesn't fall off?
Press the flour mixture firmly onto the wet chicken using your hands. You must create physical contact between the coating and the meat after the buttermilk soak; simply dredging lightly won't create a stable bond.
Why do my tenders taste bland even with spices?
You likely need to season both the buttermilk and the flour heavily. Flavor must be built in layers; ensure you are using kosher salt in the brine and a strong seasoning blend in your dry dredge.
Can I use this same technique if I decide to pan-fry instead of air fry?
Yes, but adjust the oil temperature and manage batches carefully. When pan-frying, maintain the oil temperature around 350°F and only cook 4-5 tenders at a time to avoid dropping the oil temperature, which causes sogginess.
Crispy Chicken Tenders Recipe

Ingredients:
Instructions:
Nutrition Facts:
| Calories | 442 kcal |
|---|---|
| Protein | 42.8 g |
| Fat | 9.8 g |
| Carbs | 41.2 g |
| Fiber | 1.8 g |
| Sugar | 1.4 g |
| Sodium | 845 mg |
