School Snack with Granola and Honey

- Time: Active 10 minutes, Passive 15 minutes, Total 25 minutes
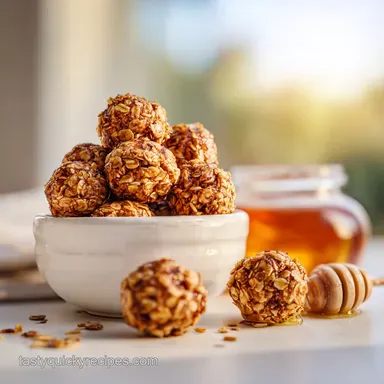
- Flavor/Texture Hook: Toasty, honey kissed, and shatter crisp coconut
- Perfect for: Busy mornings, school lunches, or pre workout fueling
- Wholesome School Snack with Granola and Honey
- Principles of Structural Integrity
- Oven Versus Chilled Comparison
- Anatomy of Energizing Ingredients
- The Required Tool Kit
- Precision Baking Step by Step
- Correcting Common Texture Errors
- Customizing Your Flavor Profile
- Scaling Your Weekly Prep
- Myth Busting Snack Facts
- Maintaining Peak Freshness
- Creative Serving Inspirations
- Recipe FAQs
- 📝 Recipe Card
Wholesome School Snack with Granola and Honey
Have you ever opened a lunchbox only to find a sad pile of loose oats where a granola bar used to be? I've been there, scraping crumbs off the bottom of a backpack while my kids looked on with "really, mom?" expressions.
That’s exactly why I became obsessed with finding the perfect balance for a School Snack with Granola and Honey that actually holds its shape.
This isn't your standard grocery store bar that's basically just a disguised candy bar. We are building something energizing and wholesome that smells like a dream when it hits the oven.
The secret lies in how the honey interacts with the almond butter to create a "glue" that doesn't just coat the oats but actually fuses them together during the short bake.
Expect a kitchen filled with the aroma of toasted cinnamon and warm vanilla. It’s the kind of scent that makes waking up a little easier. We’re going for a texture that is tacky enough to hold, yet provides a satisfying snap from the toasted coconut.
Let's get into the mechanics of making these bites foolproof.
Principles of Structural Integrity
Creating a reliable School Snack with Granola and Honey requires understanding how various elements bond under heat. It’s not just about mixing things in a bowl; it’s about creating a stable matrix of fiber and natural sugars.
- Hygroscopic Bonding: Honey is naturally hygroscopic, meaning it attracts and holds moisture, which prevents the bites from becoming brittle and dry.
- Starch Gelatinization: As the Old-Fashioned oats heat up, the starches begin to break down and become sticky, helping them adhere to the liquid binder.
- Maillard Reaction: This chemical reaction between amino acids and reducing sugars creates that deep, nutty flavor and golden hue during the 15 minutes in the oven.
- Lipid Emulsification: The fats in the almond butter and flaxseed combine with the honey to create a smooth, velvety binder that coats every single oat.
Understanding these small shifts helps you realize why we don't just toss things together. For instance, the technique of pressing the mixture firmly into the pan is similar to what I use in my High Protein Snack recipe, where compression is key to preventing a crumbly disaster.
Chef Tip
Toast your oats and coconut on a dry sheet pan for 5 minutes at 325°F before mixing them with the wet ingredients. This removes residual moisture and deepens the toasted flavor profile significantly.
Oven Versus Chilled Comparison
Choosing between a baked snack and a no bake version depends entirely on your desired shelf life and texture preference. While both use similar ingredients, the heat changes the structural destiny of the oats.
| Method | Time | Texture | Best For |
|---|---|---|---|
| Baked | 25 minutes | Toasty, firm, golden | Long term school lunches |
| No Bake | 10 minutes | Soft, chewy, fudgy | Immediate home snacking |
| Hybrid | 15 minutes | Chewy edges, soft center | Picky eaters who hate "crunch" |
Regardless of the method, the goal is always a snack that feels energizing and keeps you moving through the morning. If you find yourself craving something more indulgent for a weekend treat, you might want to look at my White Trash Snack recipe for a different kind of sweet mix.
Anatomy of Energizing Ingredients
Every component in this School Snack with Granola and Honey serves a functional purpose. We aren't just adding fillers; we are selecting elements that provide a slow release of energy to keep the "morning slump" at bay.
| Ingredient | Science Role | Pro Secret |
|---|---|---|
| Old-Fashioned Oats | Complex Polysaccharides | Use rolled oats, never "instant," for better structural "teeth." |
| Raw Honey | Liquid Invert Sugar | Lightly grease your measuring cup with oil so the honey slides right out. |
| Ground Flaxseed | Mucilage Binder | Flax acts as a secondary "glue" when it hits the wet ingredients. |
| Almond Butter | Healthy Lipid Base | Use "drippy" natural butter to ensure even distribution without clumps. |
The interaction between the sea salt and the honey is also vital. The salt doesn't just make it "salty"; it suppresses bitterness and makes the nutty notes of the almond butter sing.
The Required Tool Kit
You don't need a high end laboratory to get these right, but a few specific items make the process much smoother. Using a standard 8x8-inch baking pan is non negotiable for achieving the correct thickness and even baking.
- Large Mixing Bowl: Plenty of space to toss the oats without them flying over the rim.
- Silicone Spatula: Essential for scraping every last drop of the honey almond butter binder.
- Parchment Paper: Leave an overhang (a "sling") so you can lift the entire block out after cooling.
- Heavy Bottomed Glass: I use this to press the mixture into the pan with extreme force this is the secret to bars that don't fall apart.
Precision Baking step-by-step

Ready to bake? Follow these steps closely. The order of operations matters because we want the dry ingredients thoroughly coated before the "sticky" elements start to set.
- Prep the environment. Preheat your oven to 325°F (165°C) and line an 8x8-inch pan with parchment paper. Note: Using 325°F instead of 350°F prevents the honey from burning before the oats toast.
- Combine dry base. In your large bowl, whisk together 3 cups Old-Fashioned rolled oats, 1/2 cup ground flaxseed, 1 tsp cinnamon, and 1/2 tsp sea salt.
- Prepare the binder. In a small microwave safe bowl, combine 1/2 cup raw honey and 1/2 cup natural creamy almond butter. Heat for 20-30 seconds.
- Emulsify wet ingredients. Stir the warm honey and almond butter until the mixture is glossy and completely smooth. Stir in 1 tsp vanilla extract.
- Merge the elements. Pour the warm binder over the dry oats. Use a spatula to fold the mixture until every oat flake looks wet and tacky.
- Add the texture. Fold in 1/2 cup mini dark chocolate chips and 1/4 cup shredded coconut. Note: Mini chips distribute better than large ones, ensuring chocolate in every bite.
- Compress the mixture. Transfer to the pan. Use the bottom of a heavy glass to press down until the surface is flat and tightly packed.
- Execute the bake. Place in the oven for 15 minutes until the edges turn a soft amber brown.
- The critical rest. Let the pan cool completely on a wire rack for at least 1 hour. Do not slice while warm or they will shatter.
Chef Tip
Freeze your mini chocolate chips for 10 minutes before adding them to the warm oat mixture. This prevents them from melting completely, keeping those distinct "pockets" of chocolate intact.
Correcting Common Texture Errors
The biggest heartbreak in the kitchen is a recipe that tastes great but has the wrong "mouthfeel." Usually, it's a simple fix involving temperature or pressure.
The Crumbly Mess Problem
If your bites are falling apart, the oats likely didn't have enough "glue" or weren't pressed hard enough. If the oats look dry after mixing, add one tablespoon of honey at a time until they glisten.
The Sticky Bottom Issue
Honey based snacks love to cling to pans. If you didn't use parchment paper, you might struggle to get them out. If they are stuck, pop the pan back in a warm oven for 2 minutes to soften the sugars, then slide a thin spatula underneath.
| Problem | Root Cause | Solution |
|---|---|---|
| Bites are too soft | Underbaked or too much honey | Bake for 3-5 more minutes until edges are darker. |
| Chocolate melted away | Mixture was too hot | Let the oat mixture cool for 5 mins before adding chips. |
| Oats feel "dusty" | Insufficient binding | Increase almond butter by 2 tbsp next time. |
Common Mistakes Checklist: ✓ Using "Instant" oats instead of "Old-Fashioned" (results in a mushy texture). ✓ Skipping the sea salt (the flavors will taste flat and overly sweet). ✓ Cutting the bars while they are still lukewarm (guarantees they will crumble).
✓ Over baking (honey turns bitter if it goes too dark). ✓ Not pressing the mixture into the corners of the pan.
Customizing Your Flavor Profile
Once you've mastered the base of this School Snack with Granola and Honey, you can start playing with the mix ins. Just keep the dry to wet ratios the same to ensure they still hold together.
| Original Ingredient | Substitute | Why It Works |
|---|---|---|
| Almond Butter | Sunflower Seed Butter | Keeps the recipe nut free for schools. Note: Adds a slightly earthy/green tint. |
| Raw Honey | Maple Syrup (Grade A) | Use slightly less (1/3 cup) as it's thinner. Note: Results in a crispier, less chewy bar. |
| Chocolate Chips | Dried Cranberries | Adds a tart, chewy contrast. Note: Chop them small so they don't disrupt the bond. |
Decision Shortcut
- If you want a Nut Free version, use SunButter and pumpkin seeds.
- If you want a Tropical version, swap chocolate for dried mango and extra coconut.
- If you want a Protein Boost, replace 1/4 cup of oats with a scoop of collagen peptides.
Scaling Your Weekly Prep
This recipe scales beautifully because the math is straightforward. If you're doing meal prep for a whole family, I highly recommend doubling the batch and using a standard 9x13-inch baking sheet.
Scaling Down (½ Batch): Use a small loaf pan (9x5 inches). Reduce the baking time by about 3 minutes as the smaller mass heats up faster. Use half an egg if you find it's too dry, but with honey and nut butter, you can usually just eyeball the half measurements.
Scaling Up (2x Batch): When doubling, use a 9x13 pan. Do not double the salt or cinnamon exactly use 1.5x the amount to avoid overpowering the oats. You’ll need to press even harder to ensure the center of the larger pan is as compact as the edges.
Myth Busting Snack Facts
There's a lot of noise about what makes a snack "healthy" or "stable," so let's clear up some common kitchen misconceptions I used to believe myself.
- Myth 1: "Honey is just sugar, so any syrup works the same." This is false. Honey has a unique viscosity and moisture attracting property that maple syrup or agave doesn't share. Using maple syrup alone often results in a bar that shatters because it lacks that "tacky" pull.
- Myth 2: "The more oats you add, the heartier the bar." Actually, overdoing the oats ruins the ratio. If there isn't enough binder to coat every grain, you end up with dry patches that lead to structural failure. Stick to the 3 cup limit for this amount of honey.
Maintaining Peak Freshness
Storage is where many people go wrong. Because these contain natural fats from the almond butter, they can go rancid if left in a hot car or a sunny window for too long.
Storage Guidelines:Fridge: Keep them in an airtight container for up to 2 weeks. The cold keeps the honey firm and the texture snappy. Freezer: These freeze like a dream. Wrap individual bars in parchment paper and store in a freezer bag for up to 3 months.
You can even eat them straight from the freezer for a chilly morning treat.
Zero Waste Tips: Don't throw away the honey jar when it's "empty." Pour a little warm almond milk inside, shake it up, and use that honey water to start your morning oatmeal. If you have leftover "granola dust" from the bottom of the pan after slicing, save it!
It’s an energizing topping for yogurt or a smoothie bowl.
Creative Serving Inspirations
While these are designed as a grab and-go School Snack with Granola and Honey, they can be part of a larger morning ritual. I love crumbling a bar over a bowl of Greek yogurt with a few fresh berries it turns a simple snack into a layered, textural experience.
For a fun after school surprise, you can dip the bottom of the bars into melted dark chocolate and let them set in the fridge. It adds a velvety layer that feels like a gourmet treat while still being packed with those wholesome oats and seeds.
No matter how you serve them, the goal is always to wake up your taste buds and fuel your day with something you actually made with your own two hands. Enjoy the process!

Recipe FAQs
What snacks can you make with granola?
Granola is versatile, making it great for bars, clusters, and as a topping. You can mix it with binders like honey and almond butter to form chewy bars, or simply enjoy it by the handful as a quick snack, similar to our Whole 30 Snack with Almonds and Sea Salt.
Is granola with honey healthy?
Yes, in moderation, especially when made with whole oats and natural sweeteners like honey. Honey provides energy and has some antioxidant properties, but it is still a sugar, so portion control is key. The combination offers fiber, healthy fats, and a touch of sweetness.
What's a good snack with honey?
Almost anything benefits from a touch of honey! Consider pairing it with nuts, seeds, yogurt, or fruits for a naturally sweet boost. It's also a fantastic binder for homemade granola bars and energy bites, creating a chewy, delicious snack.
What is the best binder for granola bites?
A combination of nut butter and honey works best for creating firm, chewy granola bites. The nut butter provides fat and protein for binding, while honey adds sweetness and moisture. If you enjoyed mastering the binding technique here, see how similar principles create texture in our Butter Toffee Pretzels Recipe: The Best No-Corn Syrup Snack.
Can I make granola snacks ahead of time?
Absolutely. These snacks hold up very well when stored properly. Keep them in an airtight container at room temperature for a few days, or refrigerate them for longer freshness, extending their shelf life for school lunches or busy mornings.
Are these granola snacks suitable for lunchboxes?
Yes, they are ideal for lunchboxes. Their firm texture means they won't crumble into a mess, and the natural energy from oats and honey can provide a great mid-day boost. They are a wholesome alternative to pre-packaged, processed snacks.
How can I make my granola snacks healthier?
Focus on whole ingredients and natural sweeteners. Using rolled oats, unsweetened nut butters, and limiting added sugars are key. You can also boost nutrition by adding seeds, dried fruit, or even a bit of dark chocolate for an antioxidant kick, much like in our Healthy Dessert with Dark Chocolate No-Bake.
School Snack Granola Honey
Ingredients:
Instructions:
Nutrition Facts:
| Calories | 130 kcal |
|---|---|
| Protein | 3.2 g |
| Fat | 6.2 g |
| Carbs | 17.1 g |
| Fiber | 1.8 g |
| Sugar | 8.2 g |
| Sodium | 52 mg |
