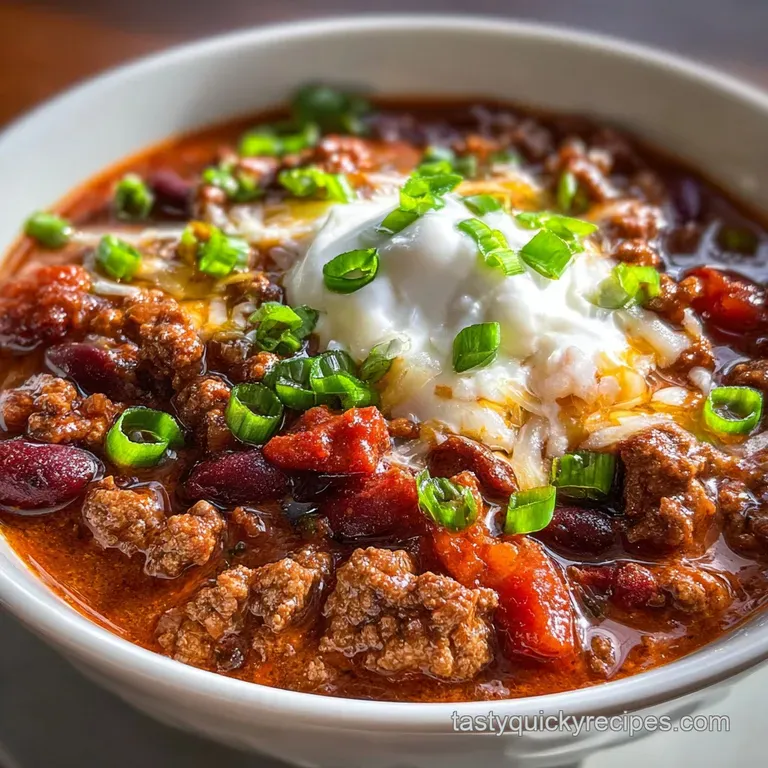
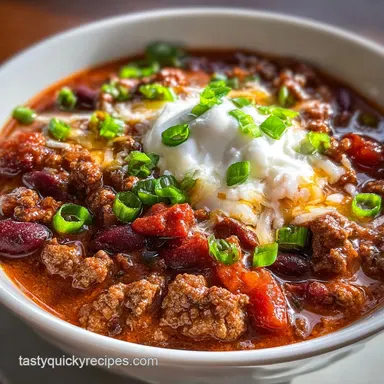
Crockpot Chili: Rich and Thick

- Time: Active 20 minutes, Passive 6 hours, Total 6 hours 20 minutes
- Flavor/Texture Hook: Smoldering heat with velvety beans and crumbly, savory beef.
- Perfect for: Juggling a busy Saturday or feeding a crowd during the big game.
- Master the Art of Crockpot Chili
- Key Techniques for Better Flavor
- Essential Recipe Specs and Details
- Gathering Elements and Smart Swaps
- Necessary Equipment and Preparation Tools
- Bringing It All Together
- Pro Tips and Pitfalls
- Make It Your Own
- Best Leftover Storage Practices
- Serve and Enjoy Your Meal
- Myths About Slow Cooking
- High in Sodium ⚠️
- Recipe FAQs
- 📝 Recipe Card
Master the Art of Crockpot Chili
Is there anything better than walking through the door after a long day and being hit with that savory, spiced aroma? It's that specific, heavy scent of cumin and slow simmered beef that tells your brain it's finally time to relax.
I used to think you could just dump everything into the pot and walk away, but honestly, that's how you end up with "soup" instead of a proper, thick chili.
We’ve all been there. You spend all day waiting, only to find a watery mess where the meat tastes like boiled cardboard. I spent a few years tweaking my process, and I’ve learned that two or three extra steps at the beginning make the difference between a "fine" dinner and a meal that has everyone asking for the recipe.
We are talking about deep, dark color and a sauce that clings to the back of a spoon.
In this guide, I'm sharing exactly how to get that steakhouse quality at home while sticking to a budget. We're using the 80/20 ground beef because fat equals flavor, and we’re utilizing a few smart acid hits at the end to wake up the heavy flavors.
Trust me, once you try this method, you'll never go back to the dump and go style again.
Key Techniques for Better Flavor
The secret to a great result isn't just the ingredients, it's how you treat them before the lid goes on. Most people skip the sear because they're in a hurry, but that's a mistake I once made that I'll never repeat.
That browning isn't just for color, it creates a chemical foundation that the slow cooker simply can't replicate on its own.
The Science of Why it Works
- Maillard Reaction
- Searing the beef at high heat creates new flavor compounds through the rearrangement of amino acids and sugars.
- Capsaicin Solubility
- Chili spices are fat soluble, meaning their heat and flavor intensify when toasted in oil rather than just simmering in water.
- Collagen Conversion
- A steady 6 hours of low heat transforms tough connective tissues into gelatin, creating a velvety mouthfeel.
Before you start chopping, it's helpful to know exactly what kind of texture you're aiming for. Different cook times and heat settings can change the consistency of the meat and the thickness of the sauce.
| Cooking Heat | Time Requirement | Meat Texture | Sauce Consistency |
|---|---|---|---|
| Low Setting | 6 hours to 8 hours | Ultra tender, integrated | Thick and cohesive |
| High Setting | 3 hours to 4 hours | Firm, distinct chunks | Slightly thinner |
| Stovetop Finish | Add 20 minutes | Dense and crumbly | Maximum reduction |
Getting that thick, rich consistency requires patience, but it also depends on the ingredients you choose. While we’re focusing on a slow cooker method here, the principles of layering flavors are similar to what you'd find in a traditional Chili Recipe - that uses a heavy pot on the stove. Using the right components ensures the dish doesn't turn into a thin stew over the long haul.
Component Analysis
| Ingredient | Science Role | Pro Secret |
|---|---|---|
| 80/20 Ground Beef | Fat provides the vehicle for spice flavors. | Brown it until it’s nearly crispy for better texture. |
| Tomato Paste | Acts as a natural thickener and umami booster. | Fry it with the garlic to remove the "tinny" raw taste. |
| Bone Broth | Adds gelatin for a silkier, richer mouthfeel. | Use a high-quality broth to avoid excess salt. |
| Apple Cider Vinegar | Cuts through the heavy fat and brightens dull notes. | Always add this at the very end of cooking. |
Essential Recipe Specs and Details
When you're juggling a busy schedule, knowing the numbers matters. This recipe makes a solid 8 servings, which is perfect for a big family or for those of us who live for leftovers. The 20 minutes of prep is mostly just dicing the onion and getting that beef browned in the skillet.
Once it's in the pot, you've got a full 6 hours to handle whatever else life throws at you.
If you are cooking for a smaller crowd, don't worry about the volume. This recipe freezes beautifully, and having a container of this in the freezer is like a gift to your future self. Just make sure you use the 80/20 beef; leaner blends like 93/7 tend to get grainy and dry during the long simmer.
We want that fat to emulsify into the tomato base for a truly flavorful table experience.
Gathering Elements and Smart Swaps
You probably have most of these spices in your pantry already. The 3 tbsp of chili powder is the base, but the smoked paprika is what adds that "simmered over a campfire" vibe. If you don't have smoked paprika, regular paprika works, but you'll lose that subtle earthiness.
For the beans, I love the mix of 30 oz kidney and 15 oz black beans because they offer different sizes and textures.
| Original Ingredient | Substitute | Why It Works |
|---|---|---|
| 2 lbs Ground Beef | Ground Turkey (9% fat) | Similar texture. Note: Needs extra oil to prevent drying out. |
| Beef Bone Broth | Vegetable Stock | Maintains liquid volume. Note: Lacks the deep meaty richness of beef. |
| Kidney Beans | Pinto Beans | Same creamy interior. Note: Pinto beans are softer and may break down more. |
| Apple Cider Vinegar | Lime Juice | Provides necessary acidity. Note: Adds a citrus note instead of apple wood sweetness. |
Choosing the right liquid is just as vital as the meat itself. While water is an option, it's a missed opportunity for flavor. I always reach for the bone broth because it has more body. If you’re looking for something even more intense, you might try the base style of a Crockpot Beef Recipe where the meat really takes center stage with herbs and garlic.
Necessary Equipment and Preparation Tools
You don't need a kitchen full of gadgets, but two things are non negotiable: a heavy skillet and a reliable slow cooker. I use a 6 quart Crock Pot, which handles this volume perfectly without bubbling over.
A cast iron skillet (like a Lodge) is my favorite for browning the beef because it holds heat so well, giving you those crispy brown bits we’re after.
A good sharp knife is also a must for dicing that large yellow onion and the 4 cloves of garlic. If you’re using a wooden spoon to stir, make sure it’s sturdy. The mixture gets thick as the tomato paste and crushed tomatoes meld together.
Right then, once you have your gear ready, the process is actually quite fast and flavorful.
Bringing It All Together
1. The over High heat Sear
Start by heating 1 tbsp neutral oil in your skillet over medium high heat. Add the 2 lbs ground beef and break it into large chunks. Note: Don't over manage it; let it sit for 3 minutes to develop a dark crust. Continue cooking until it's fully browned and no pink remains.
2. Sauté and Bloom
Push the meat to the edges and drop in the diced yellow onion. Cook for 5 minutes until translucent and soft. Add the 4 cloves of minced garlic, 3 tbsp chili powder, 1 tbsp smoked paprika, 2 tsp cumin, 1 tsp oregano, 1 tsp salt, and 1/2 tsp cayenne.
Stir for 60 seconds until the spices smell toasted and fragrant.
3. The Paste Trick
Clear a small spot in the center of the pan and add the 6 oz tomato paste. Let it fry for 2 minutes, stirring it into the meat and onions once it turns a shade darker. Note: This removes the raw metallic taste from the paste.
4. Deglaze the Pan
Pour in 1/2 cup of the beef bone broth. Use your spatula to scrape up all the brown bits stuck to the bottom of the pan. These bits are pure flavor gold.
5. Load the Pot
Transfer the meat mixture into the slow cooker. Add the 30 oz kidney beans, 15 oz black beans, 28 oz crushed tomatoes, the remaining bone broth, and 1 tbsp Worcestershire sauce.
6. The Slow Simmer
Cover and set to low. Let it cook for 6 hours until the sauce is thick and the beans are tender. Resist the urge to open the lid; every time you peek, you lose about 15 minutes of heat.
7. The Final Brightening
Stir in 1 tbsp apple cider vinegar just before serving. Taste and add a pinch more salt if needed. This little hit of acid cuts through the richness and makes the spices pop.
8. Rest and Set
Switch the setting to "Warm" and let it sit for 10 minutes. This allows the liquid to settle so the chili isn't splashing when you bowl it up.
Pro Tips and Pitfalls
Even with a slow cooker, things can go sideways if you're not careful. The most common issue I see is people adding too much liquid. Remember, the vegetables and meat will release their own juices as they cook, and there's no evaporation in a sealed Crockpot Chili. If you start with a soup, you'll end with a soup.
Fixing Lack of Flavor Depth
If your result tastes "flat," it's usually an acid or salt issue. The 1 tbsp of apple cider vinegar in the recipe is there to fix this, but sometimes you need a tiny bit more. Another culprit is old spices; if your chili powder has been in the cabinet since the last Olympics, it’s probably lost its punch.
| Problem | Root Cause | Solution |
|---|---|---|
| Greasy surface | High fat content in beef | Skim with a wide spoon or use a paper towel to blot. |
| Mushy beans | Cooked too long on high | Add beans halfway through or stick to the 6 hour low setting. |
| Bitter aftertaste | Burned garlic or spices | Add a teaspoon of brown sugar to balance the bitterness. |
Common Mistakes Checklist
- ✓ Pat the ground beef dry with paper towels before browning (moisture prevents a good sear).
- ✓ Never dump the beans in without rinsing them first (the canning liquid adds a weird starchy metallic taste).
- ✓ Avoid the "High" setting if you have the time; "Low" produces a much better meat texture.
- ✓ Don't skip the Worcestershire sauce; it provides the savory depth that salt alone cannot.
- ✓ Wait until the end to add the vinegar so the brightness doesn't cook off.
Make It Your Own
The beauty of this base is how flexible it is. If you’re looking for a vegetarian crockpot chili, you can swap the beef for a mix of chopped mushrooms and extra beans. Just be sure to sauté the mushrooms thoroughly to get that meaty texture.
For those who want more heat, dicing a fresh jalapeño or adding a teaspoon of chipotle in adobo will give it a smoky, spicy kick that lingers.
If you’re watching your budget, you can stretch this recipe by adding a cup of corn or some diced bell peppers. These add volume without much cost. And for the "no beans" crowd, simply double the meat and add an extra 14 oz of crushed tomatoes to keep the moisture levels right.
It becomes a dense, meat heavy "chili con carne" style that's perfect for topping hot dogs or baked potatoes.
Texture and Spice Variations
- For a thicker sauce: Mash half a cup of the kidney beans against the side of the pot 30 minutes before finishing.
- For more smoke: Use a "Chipotle" chili powder instead of the standard blend.
- For a hint of sweetness: Add 1 tbsp of cocoa powder with the other spices; it deepens the color and rounds out the heat.
Best Leftover Storage Practices
Chili is famous for being better the next day. As it cools, the starches in the beans and the fats in the beef continue to meld, creating a more harmonious flavor profile. I usually divide the leftovers into individual glass containers for easy lunches throughout the week. It stays fresh in the fridge for up to 4 days.
For long term storage, use freezer safe bags. Lay them flat so they freeze into "bricks" which save a ton of space. It will stay good for about 3 months. To reheat, thaw it in the fridge overnight and then warm it up on the stove.
You might need to add a splash of water or broth as it will have thickened significantly in the cold.
Zero Waste Tip: If you have just a small amount of chili left, don't toss it! It makes an incredible "Chili Mac" when stirred into some elbow pasta, or you can use it as a base for a taco salad the next day.
Even the leftover onion scraps can be saved in a freezer bag for your next batch of homemade broth.
Serve and Enjoy Your Meal
When it's time to hit the table, the toppings are just as important as the chili itself. I'm a firm believer in a "toppings bar" approach. Cold sour cream is the perfect contrast to the hot, spicy beef, and a handful of sharp cheddar cheese provides that salty, melty goodness we all crave.
Don't forget something crunchy corn chips or crackers add that necessary texture.
If you want to go the extra mile, serve this with a side of honey cornbread. The sweetness of the bread against the smoky, savory chili is a classic for a reason. Whether you're serving it in a bowl or over a bed of rice, this Crockpot Chili is meant to be shared.
It’s a humble, hearty meal that reminds everyone why home cooking is worth the effort.
Myths About Slow Cooking
One common myth is that the slow cooker "destroys" nutrients. While some heat sensitive vitamins might decrease, the long, gentle heat actually makes certain minerals and antioxidants, like the lycopene in our 28 oz crushed tomatoes, easier for your body to absorb.
It's a trade off that results in a very nutritious, fiber rich meal.
Another misconception is that you don't need to brown the meat because the slow cooker will "cook it anyway." While technically true, you're missing out on the Maillard reaction. Without that initial sear, the meat stays gray and lacks that characteristic "beefy" punch.
Taking those 10 minutes at the skillet is the single biggest upgrade you can give your slow cooked meals. Trust me, your taste buds will know the difference.

High in Sodium ⚠️
985 mg mg of sodium per serving (43% % of daily value)
The American Heart Association recommends limiting sodium intake to about 2,300mg per day for overall cardiovascular health.
Tips to Reduce Sodium in Your Chili:
-
Low-Sodium Broth-30%
Swap regular beef bone broth with a low-sodium or sodium free version. This simple substitution can significantly reduce the overall sodium content without compromising the flavor.
-
No-Salt Added Beans/Tomatoes-20%
Opt for no-salt added canned kidney beans, black beans, and crushed tomatoes. Rinsing canned beans is helpful, but using no-salt added varieties is far more effective.
-
Reduce Added Salt-15%
Cut the amount of added kosher salt in half, or eliminate it entirely. Taste the chili before adding any salt, as other ingredients already contain some sodium. You can always add more to taste, but can't take it away!
-
Low-Sodium Worcestershire-10%
Choose a low-sodium Worcestershire sauce or reduce the amount used by half. Alternatively, experiment with a splash of balsamic vinegar for a similar depth of flavor with less sodium.
-
Spice It Up!
Enhance the flavor with sodium free herbs and spices! Consider adding more chili powder, smoked paprika, cumin, oregano, and cayenne pepper to boost the taste without adding sodium.
Recipe FAQs
Do you cook meat before putting in a crockpot for chili?
Yes, always brown your meat first. Searing the beef develops deep flavor through the Maillard reaction, creating richer, more complex notes that a slow cooker alone cannot achieve. This step also helps render some fat, contributing to a better texture in the final dish.
What's the best liquid for slow cooker chili?
Beef bone broth is ideal for its depth of flavor and gelatin content. It adds a richer, silkier mouthfeel to the chili compared to water or plain stock. If bone broth isn't available, a robust beef stock is the next best option.
What is the secret to really good chili?
The secret lies in layering flavors and textures before slow cooking. This includes browning the meat thoroughly, sautéing aromatics, and blooming spices to release their full potential. A final touch of acidity, like apple cider vinegar, wakes up all the rich flavors.
Can I put raw ground beef in a crockpot for chili?
No, putting raw ground beef directly into the crockpot will result in a less flavorful and texturally inferior chili. Browning the meat first is crucial for developing deep, savory notes and achieving a desirable crumbly texture, much like the foundation of a great Ground Beef Recipe with Garlic and Herbs: Steakhouse Quality Skillet Meal.
How long does crockpot chili typically cook?
On the low setting, crockpot chili usually cooks for 6 to 8 hours. This extended period allows the flavors to meld beautifully and the meat and beans to become tender. Cooking on high is possible, but it typically takes 3 to 4 hours and can result in a slightly firmer meat texture.
What makes crockpot chili watery?
A watery chili often results from adding too much liquid initially or skipping the initial browning step. The meat and vegetables release moisture as they cook, and a sealed slow cooker prevents evaporation.
Ensure you start with a thicker base and consider mashing some beans towards the end of cooking to thicken it further.
Can I add raw vegetables to crockpot chili?
Yes, you can add raw vegetables like onions and bell peppers early in the cooking process. For softer vegetables like onions and peppers, adding them at the beginning allows them to break down and meld into the chili's sauce. Root vegetables or denser options may benefit from being pre-sautéed slightly for better texture, similar to how we prepare them for a hearty Crockpot Beef Recipe with Garlic and Herbs - Velvety & Herb Crust to ensure even cooking.
Crockpot Chili
Ingredients:
Instructions:
Nutrition Facts:
| Calories | 474 kcal |
|---|---|
| Protein | 28.8 g |
| Fat | 18.4 g |
| Carbs | 33.2 g |
| Fiber | 8.1 g |
| Sugar | 6.4 g |
| Sodium | 985 mg |
