Corn Casserole: Velvety Center

- Time: Active 10 minutes, Passive 45 minutes, Total 55 minutes
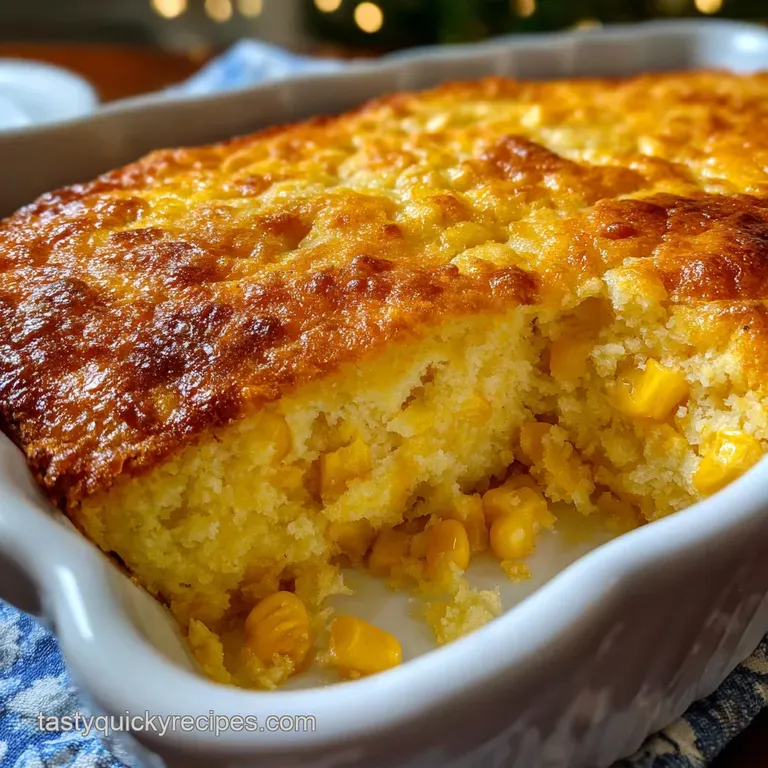
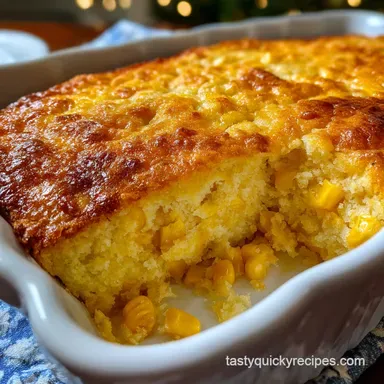
- Flavor/Texture Hook: Golden crusted edges with a buttery, velvety center
- Perfect for: Midday family gatherings or high energy meal prep
- Creating the Heartiest Homemade Corn Casserole
- Memories of Golden Sweet Corn
- The Physics of the Custard
- Fast Prep and Steady Heat
- Budget Elements for Maximum Flavor
- Simple Tools for Perfect Results
- Bringing the Golden Casserole Together
- Fixing Sogginess and Dense Centers
- Spicy Variations and Cheese Swaps
- Adjusting for Crowds or Small Meals
- Debunking Common Corn Myths
- Keeping Your Leftovers Fresh
- Serving a Crowd with Style
- Corn Casserole FAQs
- 📝 Recipe Card
Creating the Heartiest Homemade Corn Casserole
The first time I pulled a hot tray of this out of the oven, the aroma of toasted corn and melting butter filled my entire kitchen. I remember peering through the oven glass, watching the edges turn a deep, golden brown while the center did that slight "jiggle" that tells you the custard is just set.
It wasn't just a side dish, it felt like the kind of fueling, hearty food that could power you through a long afternoon of yard work or a hectic family gathering.
I used to think you needed expensive fresh produce and hours of prep to get this kind of result, but I was wrong. I once tried making a fancy version with hand shucked corn and a homemade roux, and honestly, it lacked that nostalgic, comforting density that we all crave.
This specific method uses smart shortcuts to achieve a texture that is both fluffy and satisfying without breaking the bank or taking all morning to prepare. It is a staple in my house because it never fails to deliver that punch of energy when we need it most.
Whether you call it a corn pudding or a deen corn casserole, the goal is the same: a dish that stands up on the plate and doesn't turn into a watery mess. We are going for a texture that is substantial and savory, avoiding the overly sweet profile of a dessert.
This is about real, midday fuel that leaves everyone feeling energized and full.
Memories of Golden Sweet Corn
This dish is often the star of the show during a holiday lunch, but I love it as a midweek energy boost. The combination of cream style corn and whole kernels creates a textural contrast that keeps every bite interesting. You get the snap of the grain against the silky backdrop of the sour cream and eggs.
It is a recipe that reminds me of big family potlucks where the casserole dish is scraped clean within minutes.
When people talk about a paula deen corn casserole, they are usually looking for that rich, buttery mouthfeel that defines Southern comfort. I've taken that inspiration and focused on making it practical for a busy home cook.
We are using a box of Jiffy mix as our starch base because it provides a consistent rise and that specific cornmeal "grit" that homemade flour blends often miss. It's about being budget smart while hitting high-quality flavor notes.
The beauty of this recipe lies in its simplicity. You don't need to be a chef to get this right, but you do need to understand how the ingredients interact. We are building a structure that supports the heavy corn kernels so they don't all sink to the bottom.
By the time we're done, you'll have a dish that looks as good as it tastes, with a mahogany colored crust that shatters slightly when you dive in with a spoon.
The Physics of the Custard
Starch Suspension: The cornmeal in the muffin mix absorbs the liquid from the cream style corn, creating a reinforced matrix that holds the whole kernels in place.
Protein Coagulation: The eggs act as the "glue" during the bake, transforming the liquid dairy and corn juices into a semi solid, velvety custard that won't weep on the plate.
Fat Emulsification: Melted butter and sour cream combine to coat the cornmeal particles, preventing excess gluten development and ensuring a tender, moist crumb rather than a tough bread.
| Recipe Style | Prep Time | Texture Result | Best Use Case |
|---|---|---|---|
| Shortcut Mix | 10 minutes | Dense, velvety | Midday fuel / Potluck |
| From Scratch | 40 minutes | Airy, cake like | Formal dinner side |
| Slow Cooker | 5 minutes | Extra moist | Set and forget meals |
If you are looking for more ways to use these flavors in a different format, you might really enjoy my Mexican Street Corn Dip recipe which uses similar ingredients but in a snackable, creamy style.
Fast Prep and Steady Heat
This recipe is designed to be efficient. We aren't wasting time on complex techniques. The focus is on a 350°F environment that allows the center to set without burning the exterior. I always suggest using a standard 9x13 inch baking dish to ensure the heat penetrates the middle evenly.
If the layer is too thick, the outside gets dry before the inside is firm.
| Component | Science Role | Pro Secret |
|---|---|---|
| Sour Cream | Acidic tenderizer | Use full fat for a richer, more energized feel |
| Jiffy Mix | Structural base | Sift it first to remove lumps for a silken texture |
| Beaten Eggs | Binding agent | Room temp eggs emulsify faster into the butter |
Choosing the right pan is half the battle. A ceramic or glass dish works best here because they hold heat steadily, which is vital for a custard based bake. I’ve tried using thin metal pans before, but they tend to scorch the bottom. Stick to the heavy stuff for that perfect golden finish.
Budget Elements for Maximum Flavor
Building a satisfying meal shouldn't cost a fortune. I rely on pantry staples for this corn casserole because they provide the most consistent results. If you have extra veggies in the fridge, this is a great place to hide them, but the core ingredients below are what create that signature hearty texture.
- 1 box (8.5 oz) Jiffy Corn Muffin Mix: Why this? It provides the perfect balance of sweet and savory starch. (Substitute: 1.5 cups homemade cornmeal and flour blend)
- 1 can (15.25 oz) Whole kernel corn, drained: Why this? Adds essential "snap" and texture to the velvety base. (Substitute: 2 cups thawed frozen corn)
- 1 can (14.75 oz) Cream style corn: Why this? Acts as the primary liquid and flavor base. (Substitute: 1.5 cups pureed corn with a splash of milk)
- 1 cup (240g) Sour cream: Why this? Adds tang and moisture that prevents a dry bake. (Substitute: 1 cup plain Greek yogurt)
- 1/2 cup (113g) Unsalted butter, melted: Why this? Provides the fat needed for a rich, satisfying mouthfeel. (Substitute: 1/2 cup melted margarine)
- 1 cup (113g) Sharp cheddar cheese: Why this? Sharpness cuts through the sweetness of the corn. (Substitute: 1 cup Monterey Jack)
- 2 large eggs, beaten: Why this? Essential for setting the custard structure. (Substitute: 1/4 cup extra sour cream per egg, though it will be softer)
- 1/2 tsp sea salt & 1/4 tsp pepper: Why this? Balances the natural sugars in the corn.
Using the deen corn casserole approach means we don't skimp on the fats, which is why the butter and sour cream are non negotiable for that energized feeling after lunch. If you're planning a full spread, this pairs beautifully with a Broccoli Casserole recipe for a balanced, veggie forward midday meal.
Simple Tools for Perfect Results
You don't need a stand mixer for this. In fact, a stand mixer might overwork the batter and make it tough. A large mixing bowl and a sturdy spatula are your best friends here. I prefer a silicone spatula so I can scrape every last bit of the cream style corn out of the bowl.
You'll also need a 9x13 inch baking dish. If you only have an 8x8, you'll need to increase the bake time by at least 15 minutes, but be careful the center might stay soggy while the edges get too dark.
A standard 12 inch cast iron skillet is another fantastic option if you want a crust that is truly crispy and rustic.
Bringing the Golden Casserole Together
Phase 1: Prep and Emulsify
Preheat your oven to 350°F (175°C) and grease your baking dish generously with butter or non stick spray. In a large bowl, whisk together the melted (and cooled!) butter, sour cream, and beaten eggs.
You want this to look like a smooth, pale yellow liquid before you add anything else. Note: Adding hot butter to eggs will scramble them, so let it cool first.
Phase 2: Incorporate the Corn
Fold in the drained whole kernel corn and the entire can of cream style corn. Stir gently until the kernels are evenly distributed throughout the liquid base. You should see the mixture start to thicken slightly as the starch from the cream corn reacts with the dairy.
Phase 3: The Dry Fold
Sprinkle the sea salt, pepper, and the box of Jiffy mix over the wet ingredients. Use your spatula to fold the dry mix in until just combined. Stop as soon as you see no more dry flour streaks. Over mixing at this stage will lead to a rubbery texture rather than a tender one.
Phase 4: Add the Cheese
Gently fold in half of the shredded sharp cheddar cheese. Save the other half for the topping later if you want a visible cheese crust, or mix it all in for a more uniform, savory interior. I find that mixing most of it in provides a better structural "chew" to the dish.
Phase 5: The Golden Bake
Pour the batter into your prepared dish and smooth the top with your spatula. Bake for 45 minutes until the edges are pulling away from the sides and the top is golden brown. The center should have a slight, firm wobble but shouldn't look liquid.
Phase 6: The Vital Rest
Remove the dish from the oven and let it sit for at least 10 minutes before serving. This is the hardest part, but it is crucial. The internal temperature continues to cook the custard, allowing it to firm up so you can get clean scoops that hold their shape.
Fixing Sogginess and Dense Centers
One mistake I once made was taking the casserole out too early because the top looked dark. I ended up with a soup in the middle. The key is the "jiggle test." If it ripples like water, it needs more time. If it moves as one solid mass, it’s done.
Why Your Corn Casserole is Watery
If your dish comes out weeping liquid, it’s usually because the whole corn wasn't drained well enough or the oven temperature was too low. The eggs need a specific heat to "snap" into a solid state. If they cook too slowly, they can separate from the fats.
| Problem | Root Cause | Solution |
|---|---|---|
| Gummy texture | Over mixing the Jiffy mix | Fold ingredients until just barely combined |
| Soggy middle | Excess moisture in corn | Drain the whole kernels thoroughly in a sieve |
| Burnt edges | Oven running too hot | Tent with foil and lower temp by 25°F |
Common Mistakes Checklist
- ✓ Always drain the whole kernel corn; that extra canning liquid will ruin the set.
- ✓ Don't skip the eggs - they provide the necessary structure to keep it from being a mush.
- ✓ Use sharp cheddar rather than mild; you need the extra flavor to stand out against the corn.
- ✓ Let the melted butter cool slightly before mixing with eggs to avoid "scrambling" them.
- ✓ Resist the urge to peek! Opening the oven door frequently drops the temp and slows the custard set.
Spicy Variations and Cheese Swaps
If you want to move away from the traditional paula deen corn casserole recipe, there are plenty of ways to spice this up without spending extra. I often throw in a small can of diced green chiles for a Tex Mex vibe. It adds a lovely acidity that cuts through the richness of the butter.
For a Spicy Tex Mex Kick
Add 1 small can of drained diced green chiles and swap the cheddar for Pepper Jack cheese. This version is incredibly fueling and pairs perfectly with grilled chicken for a hearty midday meal.
The Healthier Alternative
You can swap the sour cream for plain Greek yogurt. It keeps the moisture levels high but adds a bit more protein. Just be aware that yogurt is more acidic, so the final flavor will have a sharper tang.
For a Smoky Heat
Add a teaspoon of smoked paprika or half a teaspoon of chipotle powder. This gives the corn a "charred" flavor profile that mimics elote. If you love this flavor, you can also check out my Cheesy Hashbrown Casserole recipe which can be adapted with similar smoky spices.
Adjusting for Crowds or Small Meals
Scaling this recipe is fairly straightforward, but because it involves a pre measured box of mix, you have to be careful with ratios.
- To Half the Recipe: Use a 1/2 cup of cornmeal and 1/2 cup of flour instead of the Jiffy box. Use only 1 egg and half of each can of corn. Bake in an 8x8 pan for about 30 minutes.
- To Double the Recipe: Use two 9x13 pans rather than one giant deep pan. This ensures the center cooks at the same rate. You can scale the spices and salt by 1.5x instead of 2x to avoid it being overly salty.
- For Individual Servings: Bake the mixture in greased muffin tins. They take about 15-20 minutes and are perfect for energized meal prep during the week.
Debunking Common Corn Myths
"Canned corn is nutritionally empty." Actually, canned corn is picked and processed at its peak ripeness, locking in the fiber and nutrients. In a casserole like this, the starch in canned corn helps thicken the sauce better than some fresh varieties.
"You must use a specific brand of mix." While many prefer the jiffy corn casserole style, any 8.5 oz corn muffin mix will work. The secret isn't the brand; it's the ratio of liquid to starch. As long as you keep the moisture measurements exact, you'll get a great result.
"Casseroles are only for dinner." I disagree! This is the perfect hearty midday fuel. Because it contains eggs, corn, and dairy, it's a balanced way to stay energized through the afternoon slump. I often eat a square of this cold for a quick lunch.
Keeping Your Leftovers Fresh
This dish stores remarkably well, which makes it a favorite for my meal prep Sundays.
Storage: Place leftovers in an airtight container in the fridge for up to 4 days. The texture actually firms up even more once chilled, making it easy to slice into perfect squares.
Freezing: You can freeze the baked casserole for up to 3 months. Wrap individual portions in foil and then place them in a freezer bag. To reheat, thaw in the fridge overnight and bake at 350°F until sizzling.
Zero Waste Tip: If you find yourself with just a small scoop of leftovers, crumble it over a bowl of chili or use it as a filling for a hearty breakfast burrito. The sweet corn flavor is a brilliant contrast to spicy beans or savory sausage.
Serving a Crowd with Style
When I serve this at a lunch party, I like to top it with a sprinkle of fresh chives or chopped green onions right before it hits the table. The bright green pop against the mahogany crust looks professional and fresh.
If you want to take the presentation further, serve it directly from a cast iron skillet. There's something about the weight of the iron and the rustic look of the corn that makes the meal feel more substantial and satisfying.
Trust me, once you master this budget smart corn casserole, it will become the most requested dish in your rotation. It's simple, it's hearty, and it works every single time.
For another crowd pleaser that fits into this category of high energy comfort food, don't miss our Breakfast Casserole recipe, which uses similar structural principles but with a savory sourdough base. Keep cooking, keep experimenting, and most importantly, keep enjoying those hearty midday meals!

Corn Casserole FAQs
What is the best type of corn to use?
Use a combination of whole kernel and cream style corn. Whole kernel adds texture and a "pop," while cream style creates the velvety base.
Can I make corn casserole ahead of time?
Yes, you can mix the base ingredients up to 24 hours in advance. Store the unbaked mixture covered in the refrigerator and bake as directed, adding a few extra minutes to the bake time.
Why is my corn casserole watery?
This is usually due to excess moisture. Ensure the whole kernel corn is thoroughly drained, and check that your oven temperature is accurate for proper custard setting.
How do I prevent the edges from burning?
Tent the casserole with aluminum foil during the last 10-15 minutes of baking. This allows the center to finish cooking without over browning the edges. You can also lower the oven temperature slightly if this is a persistent issue.
Can I make this recipe healthier?
Yes, swap sour cream for plain Greek yogurt. This will provide similar moisture but with added protein. Be aware it might result in a slightly tangier flavor profile.
What pairs well with corn casserole?
This pairs perfectly with hearty main dishes and robust side salads. Consider serving it alongside a Country Fried Steak Recipe Oven Baked in 30 Minutes or a fresh green salad for a balanced meal.
How long should corn casserole rest after baking?
Let it rest for at least 10 minutes before serving. This resting period is crucial for the custard to fully set, allowing you to get clean, firm scoops.
Corn Casserole
Ingredients:
Instructions:
Nutrition Facts:
| Calories | 343 kcal |
|---|---|
| Protein | 8g |
| Fat | 21g |
| Carbs | 34g |
| Fiber | 2.5g |
| Sugar | 8g |
| Sodium | 718mg |
