How to Make Brown Gravy: Silky and Rich
- Time: Active 8 mins, Passive 2 mins, Total 10 mins
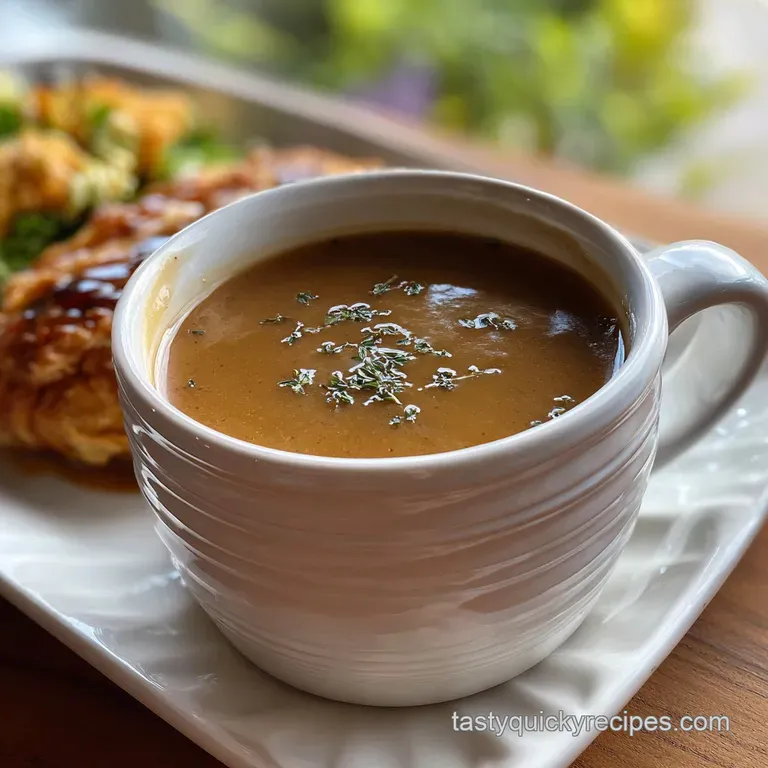
- Flavor/Texture Hook: Silky, savory, and rich with a mahogany hue
- Perfect for: Weeknight comfort meals and budget-friendly dinner prep
- Simple techniques for how to make brown gravy
- The Science of Starch and Fat Suspension
- Specific Measurements for Consistent Savory Results
- Essential Elements for a Rich Umami Foundation
- Basic Kitchen Tools for Lump Free Sauce
- Detailed Stages of Creating a Silky Sauce
- Correcting Texture and Seasoning Mid Cook
- Creative Ways to Customize Your Sauce Profile
- Proper Cooling and Reheating Methods for Safety
- Optimal Pairings for Your Savory Brown Sauce
- Debunking Savory Sauce Misconceptions
- Brown Gravy FAQs
- 📝 Recipe Card
Simple techniques for how to make brown gravy
The smell of butter melting in a heavy skillet is one of those sensory triggers that immediately makes me feel hungry. I remember my first attempt at this years ago, standing over a stove with a clump of raw flour and cold broth, wondering why my sauce looked like lumpy grey paste. It was a disaster that almost ruined a perfectly good Country Fried Steak recipe I’d spent all afternoon prepping.
Since then, I've learned that a great sauce isn't about luck or expensive ingredients. It’s about the sizzle of the butter and the patience to let the flour toast until it smells like toasted hazelnuts. That transformation from a pale paste to a deep, dark brown base is where the magic happens.
We've all been there, staring at a pot hoping the lumps will just disappear, but once you master the roux, you'll never buy a packet of mix again.
This version is designed for those moments when you don't have a pan full of roast beef drippings but still crave that satisfying, fueling finish for your mashed potatoes. It's quick, uses pantry staples, and gives you a result so smooth it glides off the back of a spoon.
We’re going to focus on getting that intense color and rich flavor using just a few smart techniques.
The Science of Starch and Fat Suspension
- Dextrinization: Toasting the flour breaks down starch into smaller units called dextrins, which creates a darker color and a nutty flavor profile.
- Emulsification Stability: The fat in the butter coats the flour particles, preventing them from clumping together when they hit the liquid broth.
- Starch Gelatinization: As the broth heats, the starch granules swell and burst, creating a thick, velvety network that traps the liquid.
- Viscosity Control: Simmering the sauce for a few minutes allows the flavors to meld while the texture stabilizes into a cohesive sauce.
The Physics of the Roux
The secret to this how to make brown gravy is the temperature of your whisking. When you add liquid to a hot roux, the starch molecules expand rapidly, so adding the broth in a slow, steady stream while whisking constantly ensures those molecules distribute evenly rather than sticking together in clumps.
| Method | Time | Texture | Best For |
|---|---|---|---|
| Stovetop | 8 minutes | Silky and smooth | Immediate serving and control |
| Oven Finished | 15 minutes | Thick and slightly crusty | Large batches for casseroles |
| Microwave | 5 minutes | Thin and less deep | Emergency quick fixes only |
Choosing the stovetop method is almost always the right move for this specific recipe because you need to see the color change in real time. The oven method works well if you are making a massive amount for a Thanksgiving Dinner Plate recipe, but for a quick midday meal, the skillet is your best friend.
Specific Measurements for Consistent Savory Results
| Ingredient | Science Role | Pro Secret |
|---|---|---|
| Butter | Fat carrier for flavor | Use unsalted to control the final seasoning levels |
| All Purpose Flour | Primary thickening agent | Toast it until it reaches a peanut butter color |
| Beef Broth | Liquid base and umami | Use low sodium to avoid a salt heavy finish |
When selecting your broth, look for a deep brown variety. Since we aren't using meat drippings, the quality of the broth provides the backbone of the flavor. If you're feeling fancy, you can even use a bone broth for extra body and a more fueling, collagen rich result.
Essential Elements for a Rich Umami Foundation
- 4 tablespoons unsalted butter: Why this? Provides the fat needed to cook the flour and adds a rich, creamy mouthfeel.
- Substitute: Beef tallow or bacon grease for a more intense, smoky flavor.
- 1/4 cup all purpose flour: Why this? The standard thickener that creates a smooth, stable sauce when cooked properly.
- Substitute: gluten-free all purpose flour (ensure it contains xanthan gum) for dietary needs.
- 2 cups low sodium beef broth: Why this? The liquid foundation that carries the savory beef notes.
- Substitute: Vegetable broth for a lighter version, though the color will be paler.
- 1 teaspoon Worcestershire sauce: Why this? Adds fermented depth and a hit of acidity to balance the fat.
- Substitute: Soy sauce or tamari for a similar hit of umami and salt.
- 1/2 teaspoon onion powder: Why this? Provides a savory base note without the texture of chopped onions.
- Substitute: Very finely grated fresh onion (sautéed in the butter first).
- 1/4 teaspoon garlic powder: Why this? Adds a subtle aromatic layer that complements the beef broth.
- Substitute: One smashed garlic clove simmered in the sauce and then removed.
- 1/2 teaspoon freshly cracked black pepper: Why this? Essential for a little bite and warmth in the finish.
- Substitute: White pepper for a more subtle heat and a cleaner visual look.
- 1/4 teaspoon salt: Why this? Enhances all other flavors; adjust based on your broth's saltiness.
- Substitute: Smoked salt to add a hint of outdoor grill flavor.
Basic Kitchen Tools for Lump Free Sauce
You don't need a professional kitchen to make a great sauce, but a few specific tools make the process much smoother. I personally swear by a heavy bottomed stainless steel skillet because it allows me to see the color of the roux clearly.
A dark non stick pan can make it hard to tell if your flour is golden or burnt, which is a mistake I've made more than once.
A balloon whisk is also non negotiable here. You want something with plenty of wires to break up any stubborn flour pockets. If you only have a fork, you're going to be working twice as hard for a result that might still be a bit grainy.
Keep a measuring glass nearby for your broth so you can pour with one hand and whisk with the other. It’s all about that rhythmic motion.
Detailed Stages of Creating a Silky Sauce
- Melt the 4 tablespoons unsalted butter in a medium saucepan or skillet over medium heat until it starts to foam and sizzle. Note: This removes excess water from the butter.
- Whisk in the 1/4 cup all purpose flour gradually to form a smooth paste.
- Cook the roux for 3-5 minutes, whisking constantly, until it turns a deep golden brown and smells nutty. Note: Don't rush this part; color equals flavor.
- Slowly pour in the 2 cups low sodium beef broth in a thin, steady stream while whisking vigorously.
- Add the 1 teaspoon Worcestershire sauce, 1/2 teaspoon onion powder, 1/4 teaspoon garlic powder, and 1/2 teaspoon black pepper.
- Continue whisking over medium heat as the mixture comes to a gentle simmer.
- Simmer for 2-3 minutesuntil the sauce thickens and coats the back of a spoon.
- Taste the sauce and add the 1/4 teaspoon salt (or more) only if needed.
- Remove from heat immediately once the desired consistency is reached.
- Pour into a warm gravy boat and serve while it’s still hot and velvety.
Correcting Texture and Seasoning Mid Cook
Even the most experienced cooks run into trouble sometimes. The most common issue I see is the sauce thickening too much as it sits. If you're working on an Irresistible Thanksgiving Pot recipe and the gravy turns into a gel, don't panic. A splash of warm broth and a quick whisking over low heat will bring it right back to life.
To Rescue Lumpy Gravy
If you added the liquid too fast and ended up with "flour islands," the best fix is a fine mesh strainer. Pour the sauce through the sieve into a clean bowl, then return the smooth liquid to the pan.
You can also use an immersion blender for a few seconds, but be careful not to over process it, which can make the starch feel gummy.
To Fix Thin or Runny Sauce
If your sauce is too thin, it usually means the flour wasn't cooked long enough or the ratio was slightly off. You can fix this by mixing a teaspoon of cornstarch with a teaspoon of cold water (a slurry) and whisking it into the simmering sauce. It will thicken almost instantly.
| Problem | Root Cause | Solution |
|---|---|---|
| Lumpy Texture | Liquid added too quickly | Whisk vigorously or pass through a fine mesh sieve |
| Too Salty | Broth reduction or high sodium brand | Add a splash of water or a pinch of sugar to balance |
| Bitter Taste | Roux was burnt | Start over; you cannot fix burnt flour flavor |
Common Mistakes Checklist: ✓ Whisk the flour and butter constantly to prevent hot spots and burning. ✓ Ensure the broth is at room temperature or slightly warm to prevent "shocking" the roux. ✓ Use a light colored pan so you can accurately monitor the browning of the flour.
✓ Don't skip the Worcestershire sauce; it provides the acidity needed to cut through the fat. ✓ Add salt only at the very end after the sauce has reduced and thickened.
Creative Ways to Customize Your Sauce Profile
If you're looking for a midday meal that feels a bit more indulgent, try the "Steakhouse Classic" variation. Simply add a tablespoon of heavy cream at the very end of cooking. It transforms the mahogany sauce into a lighter, silkier version that pairs beautifully with peppercorn crusted meats.
It's incredibly satisfying and keeps you fueled for a busy afternoon without feeling overly heavy.
For those who love a bit of texture, sautéing some finely diced mushrooms in the butter before adding the flour is a game changer. The mushrooms release their own liquid, which adds another layer of earthy umami to the final how to make brown gravy.
Just make sure to cook the mushrooms until they are browned and their liquid has evaporated, or your roux will become greasy.
For a Richer Mushroom Twist
Add 1 cup of sliced cremini mushrooms to the melted butter. Sauté until they are deeply browned and shrunk in size before proceeding with the flour. This adds a "meaty" texture that is perfect for vegetarian adjacent meals where you still want that heavy beefy flavor profile.
For a Peppery Country Style
Increase the black pepper to 1 full teaspoon and add a pinch of dried thyme. This version is a bit more aggressive and works perfectly over biscuits or thick cut fries. It's the kind of hearty, fueling sauce that reminds me of diner breakfasts on a cold Saturday morning.
Proper Cooling and Reheating Methods for Safety
Proper storage is key if you're meal prepping. I always let the sauce cool to room temperature before putting it in a container. If you put hot gravy directly into the fridge, the steam will condense and create a watery layer on top, which can lead to a weird texture when you reheat it.
Storage: This sauce stays fresh in an airtight container in the fridge for up to 4 days. If you find it has separated slightly, just give it a good stir.
Freezing: You can freeze this for up to 3 months. I like to freeze it in silicone ice cube trays so I can pop out just a portion or two for a quick lunch. To thaw, let it sit in the fridge overnight.
Reheating: Use a small saucepan over low heat. You will likely need to add a tablespoon or two of water or broth to loosen it up, as the starch continues to set while cold. Whisk constantly as it warms to maintain that velvety emulsion.
Zero Waste Tip: If you have just a little bit left over, don't toss it. Stir it into a beef stew or use it as a base for a shepherd's pie. Even a few tablespoons of leftover gravy can add incredible depth to a store-bought soup or a quick pan sauce for chicken.
Optimal Pairings for Your Savory Brown Sauce
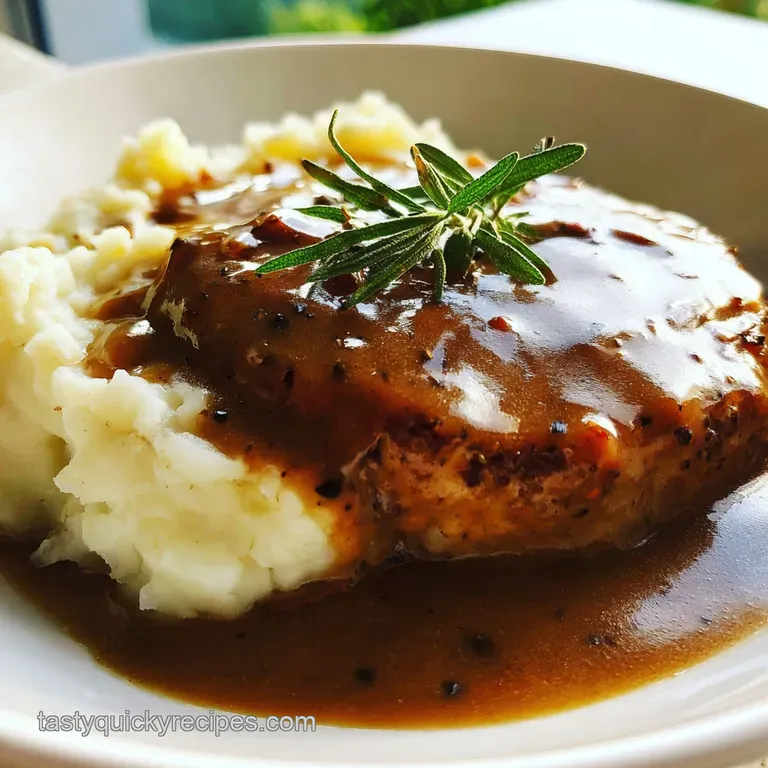
This sauce is the ultimate chameleon of the kitchen. While it’s the natural partner for mashed potatoes, I love drizzling it over roasted root vegetables like carrots and parsnips. The sweetness of the caramelized veggies plays perfectly against the salty, peppery notes of the gravy.
It makes a simple vegetable side feel like a hearty, fueling main event.
If you’re doing a quick stovetop meal, try serving this over a simple Salisbury steak or even thick slices of toasted sourdough bread for an open faced sandwich. The way the bread soaks up the sauce is pure comfort.
Trust me, once you realize how easy it is to make brown gravy from scratch, you'll be looking for excuses to put it on everything from meatloaf to steamed rice.
Debunking Savory Sauce Misconceptions
One major myth is that you need meat drippings to get a "real" brown sauce. While drippings add great flavor, the Maillard reaction from toasting your flour and using a high-quality broth provides more than enough complexity for a fantastic result. You don't need to wait for a roast to finish to enjoy a great sauce.
Another common thought is that you must use cornstarch for a clear sauce. While cornstarch gives a glossy finish, a flour based roux provides a much sturdier, more satisfying mouthfeel that won't break down or become "weepy" if it sits on the plate for a few minutes.
Flour is the traditional choice for a reason it holds its structure and provides a richer, more opaque look that we associate with classic comfort food.
Finally,, some people think you have to use boiling broth. In reality, room temperature or even cold broth is often easier to incorporate without creating instant lumps. The key isn't the temperature of the liquid, but the speed at which you whisk and the consistency of your pour.
Taking it slow is the secret to success every single time.

Brown Gravy FAQs
What are the ingredients for brown gravy?
Butter, flour, and beef broth are the core ingredients. You'll also commonly use Worcestershire sauce, onion powder, garlic powder, salt, and black pepper for flavor.
How do I make my own brown gravy easily?
Melt butter, whisk in flour, toast to a nutty aroma, then slowly whisk in beef broth. Simmer until thickened, adding seasonings like Worcestershire sauce to taste.
Can you make gravy with just flour and water?
No, it won't taste like brown gravy. Flour and water will create a very thin, bland paste without the rich flavor and color you get from butter and broth.
What can I use if I don't have brown gravy mix?
You can easily make your own from scratch using pantry staples. This recipe focuses on building rich flavor with toasted flour and quality broth, perfect for Thanksgiving Meal Essential Dish for Joyful Feasting with Herb Roasted.
How long does it take to make brown gravy?
About 10 minutes total. The active cooking time is around 8 minutes for toasting the roux and whisking in the liquid, with minimal passive time for thickening.
What's the secret to lump free brown gravy?
Whisk constantly and add liquid slowly. Ensure your roux (butter and flour mixture) is smooth before you begin adding the broth, and use a whisk with plenty of wires to break up any small clumps that form.
Can I make brown gravy without meat drippings?
Yes, absolutely. By toasting the flour to a deep brown color and using a good quality beef broth, you can achieve a rich, savory flavor that rivals drippings. This technique is also foundational for other savory sauces, similar to how you'd build flavor in a Hoppin John Recipe: Ultimate Smoky Southern Classic.
Brown Gravy Recipe

Ingredients:
Instructions:
Nutrition Facts:
| Calories | 95 kcal |
|---|---|
| Protein | 1.4 g |
| Fat | 7.9 g |
| Carbs | 4.5 g |
| Fiber | 0.2 g |
| Sugar | 0.4 g |
| Sodium | 185 mg |
