One Pot Chicken and Rice Recipe
- Time: Active 15 mins, Passive 30 mins, Total 45 mins
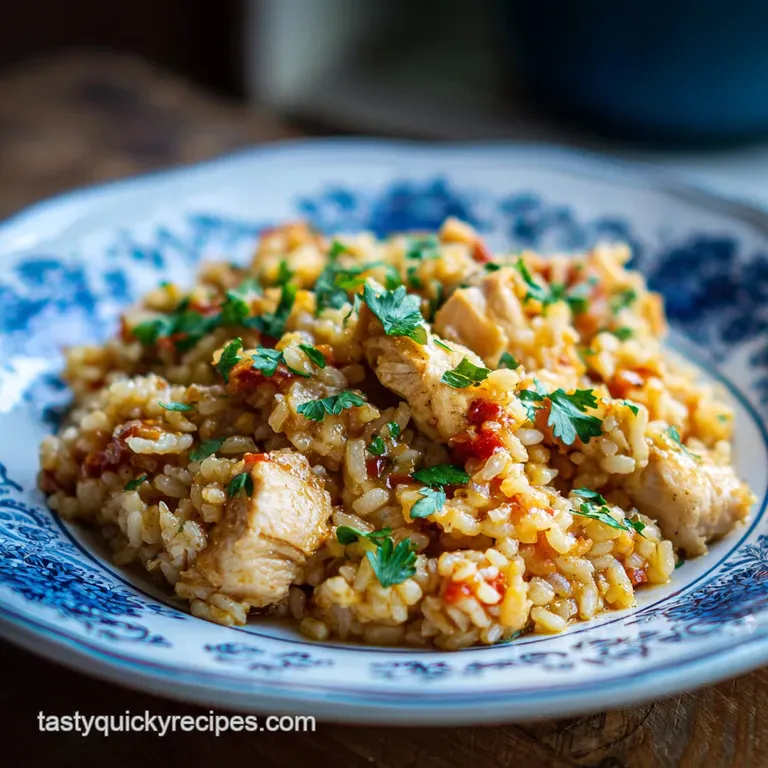
- Flavor/Texture Hook: Smoky, tender chicken with fluffy, herb infused rice
- Perfect for: Juggling a hectic weeknight schedule with family-friendly comfort
- Creating This Effortless One Pot Chicken and Rice Recipe
- The Mechanics of Starch and Protein Synergy
- Component Analysis for Maximum Flavor Depth
- The Essential Elements for a Successful Dinner
- Tools for Efficient One Pan Execution
- The Sequential Flow for a Perfect Skillet Meal
- Correcting Common Pitfalls for the Best Results
- Creative Modifications for Every Dietary Need
- Debunking Common Kitchen Beliefs
- Long Term Storage and Flavor Extraction Secrets
- Finishing Touches for a Vibrant Family Table
- Recipe FAQs
- 📝 Recipe Card
Creating This Effortless One Pot Chicken and Rice Recipe
The sizzle of chicken thighs hitting a hot skillet is my favorite sound after a long day of juggling work and family. I remember the first time I tried to make a version of this, I ended up with what looked like savory rice pudding because I used too much liquid and didn't rinse the rice.
It was a mushy mess, but the flavor was there, so I spent the next few months obsessing over the ratio until the grains finally came out separate and fluffy.
Now, this dish is a staple at our table because it’s fast, flavorful, and only requires one pan to clean. When you get that smoked paprika hitting the oil, the whole kitchen smells like a cozy bistro.
It’s the kind of meal that makes everyone wander into the kitchen to ask, "Is it ready yet?" because the aroma of garlic and thyme is just that inviting.
We’re going for a golden sear on the chicken first, which leaves behind those beautiful brown bits on the bottom of the pan. Those bits are where the magic happens once we add the broth. Trust me, you don't want to skip the browning step.
It transforms a simple dinner into something that feels much more intentional and hearty.
The Mechanics of Starch and Protein Synergy
Maillard Reaction: Searing the chicken thighs creates complex flavor compounds on the surface that later dissolve into the cooking liquid. This process provides a deep, savory backbone to the rice that you can't get from broth alone.
Starch Management: Rinsing the rice removes excess surface starch, which is the secret to preventing a gummy or sticky texture. This ensures each grain stays distinct and tender rather than clumping together during the simmering phase.
Thermal Retention: Using a heavy bottomed skillet or Dutch oven maintains a steady, even temperature across the cooking surface. This consistency prevents the rice at the edges from scorching while the center remains undercooked.
| Thickness | Internal Temp | Rest Time | Visual Cue |
|---|---|---|---|
| 0.5 inch | 165°F | 3 mins | Juices run clear |
| 0.75 inch | 165°F | 5 mins | No pink in the center |
| 1.0 inch | 165°F | 5 mins | Opaque and firm to touch |
Choosing the right cut of meat is just as important as the technique itself. While breasts are leaner, they can dry out quickly during the 30 minute simmer, so I always reach for boneless, skinless thighs for their moisture and forgiving nature.
Component Analysis for Maximum Flavor Depth
| Ingredient | Science Role | Pro Secret |
|---|---|---|
| Chicken Thighs | Fat & Protein | Pat them completely dry with a paper towel before searing to get a better crust. |
| Long grain Rice | Structural Base | Toast the rice in the oil for 2 minutes before adding liquid to lock in the shape. |
| Chicken Broth | Hydration & Umami | Use low sodium versions so you can control the salt levels without it becoming a brine. |
| Smoked Paprika | Aromatic Depth | Bloom the spice in the oil for 30 seconds to release fat soluble flavor compounds. |
Toasting the rice is a technique I learned after many batches of soggy dinner. By coating each grain in the avocado oil and chicken fat, you create a tiny barrier that slows down water absorption. It’s similar to the method used in a Chicken Stroganoff Recipe where building layers of flavor in a single pan is the goal.
The Essential Elements for a Successful Dinner
To make this chicken and rice recipe, you'll need the following specific ingredients. I've included my favorite substitutions if you're missing something in the pantry.
- 1.5 lbs chicken thighs, boneless and skinless: Why this? Stays juicy during the long simmering process unlike lean chicken breasts. (Substitute: Chicken drumsticks, but increase cook time by 10 minutes).
- 2 tbsp avocado oil: Why this? High smoke point allows for a hard sear without burning the oil. (Substitute: Grapeseed oil or vegetable oil).
- 1 large yellow onion, finely diced: Why this? Provides a sweet, aromatic base once softened. (Substitute: 2 shallots for a milder flavor).
- 3 cloves garlic, minced: Why this? Essential for that classic savory profile. (Substitute: 1 tsp garlic powder added with the spices).
- 1 tsp smoked paprika: Why this? Adds a subtle earthiness and a beautiful golden hue. (Substitute: Sweet paprika for less smoke).
- 1 tsp dried thyme: Why this? A classic herb that pairs perfectly with poultry. (Substitute: 1/2 tsp dried oregano).
- 1.5 cups long grain white rice, rinsed: Why this? Provides the fluffy texture needed for a skillet meal. (Substitute: Jasmine rice for a floral aroma).
- 2.5 cups low sodium chicken broth: Why this? The primary flavor vehicle for the rice grains. (Substitute: 2.5 cups water plus 2 bouillon cubes).
- 0.5 cup frozen peas: Why this? Adds a pop of color and sweetness at the very end. (Substitute: Frozen corn or diced carrots).
- 1 tsp kosher salt: Why this? Enhances every other ingredient in the pan. (Substitute: 1/2 tsp table salt).
- 0.5 tsp cracked black pepper: Why this? Adds a mild heat and bite. (Substitute: White pepper for a finer grind).
- 2 tbsp fresh parsley, chopped: Why this? A fresh finish to cut through the richness. (Substitute: Fresh cilantro).
- 1 lemon, cut into wedges: Why this? Acid brightens the heavy starches and fats. (Substitute: 1 tsp apple cider vinegar stirred in at the end).
| Original Ingredient | Substitute | Why It Works |
|---|---|---|
| Avocado Oil | Butter | Adds richness. Note: Lower smoke point, so watch the heat carefully during searing. |
| Yellow Onion | Leeks | Provides a delicate, buttery onion flavor. Wash thoroughly to remove grit. |
| Chicken Broth | Vegetable Broth | Maintains the savory liquid base while being slightly lighter in flavor. |
If you find yourself wanting to experiment with more vegetables, you can easily adapt this by looking at how a Chicken Broccoli Rice recipe handles hearty greens. It’s all about when you add them to ensure they don't turn to mush.
Tools for Efficient One Pan Execution
You don't need a professional kitchen, but a few specific tools make this much easier to manage.
- 12 inch Heavy Skillet: A cast iron or stainless steel pan with a tight fitting lid is crucial. If your lid isn't tight, steam escapes, and the rice won't cook evenly.
- Fine Mesh Strainer: For rinsing the rice until the water runs clear. This is the single biggest factor for grain separation.
- Tongs: For flipping the chicken thighs without tearing the meat.
- Chef’s Knife: A sharp blade makes dicing the onion and mincing the garlic much faster and safer.
- Measuring Cups and Spoons: Precision matters with the rice to liquid ratio.
The Sequential Flow for a Perfect Skillet Meal

1. Sear for Mahogany Color
Season the 1.5 lbs of chicken thighs with half the salt and pepper. Heat the 2 tbsp of avocado oil in your skillet over medium high heat. Add the chicken and cook for 5 minutes per side until a deep golden crust forms. Remove the chicken to a plate (it won't be fully cooked yet).
2. Sauté and Toast
In the same pan, add the diced onion. Cook for 4 minutes until translucent and soft, scraping up any brown bits. Stir in the 3 cloves of minced garlic, 1 tsp smoked paprika, and 1 tsp dried thyme. Cook for 1 minute until fragrant and aromatic.
3. Incorporate the Rice
Add the 1.5 cups of rinsed rice to the pan. Stir constantly for 2 minutes until the grains are coated in oil and smell toasted. Note: This prevents the rice from becoming gummy later.
4. The Deglaze and Simmer
Pour in the 2.5 cups of chicken broth and the remaining salt and pepper. Stir once to combine. Place the chicken thighs (and any accumulated juices) back into the pan, nestling them into the rice.
5. Cover and Cook
Bring the liquid to a boil, then immediately turn the heat to low. Cover with a tight lid. Simmer for 18 to 20 minutes until the liquid is fully absorbed and the rice is tender.
6. The Final Steam
Turn off the heat. Quickly lift the lid, scatter the 0.5 cup of frozen peas over the top, and replace the lid immediately. Let it sit for 5 minutes until the peas are bright green and heated through. Note: Residual heat is all you need for frozen peas.
7. Fluff and Garnish
Remove the lid and use a fork to fluff the rice around the chicken. Sprinkle with the 2 tbsp of fresh parsley.
8. Finish with Brightness
Serve immediately with lemon wedges on the side. Squeeze the lemon over the chicken and rice just before eating to make the flavors pop.
Chef's Tip: If you want an extra layer of flavor, add 1 tablespoon of butter right before the final 5 minute rest. It melts into the rice and creates a velvety finish that is absolutely irresistible.
Correcting Common Pitfalls for the Best Results
Fixing Texture Issues in Rice
The most common heartbreak in this chicken and rice recipe is rice that is either too crunchy or too soggy. Usually, this comes down to the heat level or the seal on your lid. If your heat is too high, the liquid evaporates before the rice can soften.
If your lid is loose, you're losing the steam required to finish the job.
Dealing with Scorched Bottoms
If you smell something burning before the timer goes off, don't panic. Immediately remove the pan from the heat. Do not stir it! The burnt part is likely just the bottom layer. Transfer the top layers and chicken to a serving dish, leaving the scorched bits behind.
Next time, ensure your "low" heat is truly the lowest setting on your burner.
| Problem | Root Cause | Solution |
|---|---|---|
| Crunchy Rice | Not enough liquid or heat too high | Add 1/4 cup broth and cover for 5 more minutes on low. |
| Mushy Rice | Too much liquid or over stirring | Cook uncovered for 3 minutes to evaporate moisture; don't stir. |
| Bland Flavor | Under seasoning | Add a pinch of salt and a heavy squeeze of lemon at the end. |
Common Mistakes Checklist
- ✓ Rinsing the rice until the water is clear to remove excess starch.
- ✓ Patting the chicken dry before it hits the hot oil for a proper sear.
- ✓ Not lifting the lid during the simmering process (keep that steam in!).
- ✓ Letting the dish rest for 5 minutes after cooking to finish the hydration.
- ✓ Using low sodium broth to avoid an overly salty final result.
Creative Modifications for Every Dietary Need
Scaling for Groups
If you need to feed a larger crowd, you can double this recipe, but you’ll need a larger vessel like a wide Dutch oven. For 8 servings, use 3 lbs of chicken and 3 cups of rice. However, only use 4.5 cups of broth (reduce the liquid by 10% when doubling) to prevent sogginess.
You’ll also want to sear the chicken in batches so the pan doesn't get overcrowded and steam the meat instead of browning it.
Scaling Down
For a solo dinner or a couple, you can easily halve the ingredients. Use a smaller 8 inch skillet and reduce the cooking time by about 3 to 5 minutes. If you have half an egg from another recipe, you don't need it here, but keep an eye on the liquid levels as they evaporate faster in smaller pans.
If you want X, do Y
- If you want a creamier texture, stir in 1/4 cup of heavy cream or Greek yogurt right before serving.
- If you want a crispier bottom (like a socarrat), turn the heat up to medium high for the last 2 minutes of cooking until you hear a crackling sound.
- If you want more vegetables, add small broccoli florets at the same time as the peas.
| Method | Time | Texture | Best For |
|---|---|---|---|
| Standard Skillet | 45 mins | Fluffy & Light | Classic weeknight dinner |
| Dutch Oven | 50 mins | Tender & Moist | Even cooking for beginners |
| Rice Cooker | 40 mins | Very Soft | Hands off preparation |
Debunking Common Kitchen Beliefs
One popular myth is that you must use boiling broth to start the rice. While it speeds things up by a minute, cold or room temperature broth works perfectly fine as long as you bring it to a boil once it's in the pan. The rice will hydrate properly either way.
Another misconception is that searing meat "seals in the juices." Science tells us this isn't true; moisture loss happens regardless of the sear. What searing actually does is create the Maillard reaction, which develops the complex, savory flavors that make the rice taste like it’s been simmering for hours.
Long Term Storage and Flavor Extraction Secrets
Storage Guidelines
Store leftovers in an airtight container in the fridge for up to 4 days. When reheating, add a splash of water or broth to the rice before microwaving. This creates steam and prevents the grains from becoming hard and rubbery.
Freezing and Reheating
This dish freezes surprisingly well for up to 3 months. Let it cool completely before transferring to a freezer safe bag. To reheat, thaw overnight in the fridge and warm it in a skillet over low heat with a bit of extra liquid to restore the texture.
Zero Waste Tips
Don't toss those parsley stems! Chop them finely and sauté them with the onions for extra herbal flavor. If you have leftover lemon halves, toss them into the pan while the rice simmers to infuse the dish with even more citrus aroma.
The chicken bones (if you used bone in) can be saved in a freezer bag to make a quick stock for your next batch of this chicken and rice recipe.
Finishing Touches for a Vibrant Family Table
Presentation doesn't have to be fancy to be effective. I like to serve this straight from the skillet to keep it hot and give it that rustic, home cooked feel. Place the lemon wedges directly on top of the rice so everyone can grab one as they serve themselves.
The bright yellow lemons against the green parsley and golden chicken look beautiful.
If you have kids who aren't fans of "green things," you can serve the peas on the side, but I find that when they're cooked in the savory rice, most people don't mind them at all. This meal is truly a complete package, but if you want to stretch it further, a simple side salad with a vinaigrette provides a nice crisp contrast to the warm, soft rice.
Honestly, the best part about this dish is how it brings everyone together. There's something about a one pot meal that feels communal and relaxed. It’s my go to when I want a "real" dinner but only have the energy for one round of dishes.
Enjoy the process, don't sweat the small stuff, and make sure you get some of that crispy rice from the bottom of the pan it’s the cook’s treat!

Recipe FAQs
What should I add to my rice and chicken?
Add aromatics, acid, and fresh herbs. Sautéing diced onion and minced garlic before adding the rice builds a crucial savory base. Finish with a squeeze of fresh lemon and chopped parsley to brighten the rich flavors.
What are some common mistakes in chicken and rice?
Not rinsing the rice or stirring during simmering. Rinsing removes excess surface starch, which prevents gummy results. Once covered, avoid lifting the lid; stirring releases starch and breaks the steam needed for fluffy grains.
What to add to chicken and rice to make it less bland?
Use smoked paprika and toast your rice grains. Smoked paprika introduces depth that broth alone cannot provide. Toasting the dry rice in fat for two minutes before adding liquid locks in flavor; this principle is vital for techniques used in our Kosher for Pesach recipe variations.
Can you cook chicken and rice together at the same time?
Yes, in a single layer pan. Sear the chicken first to develop flavor, remove it, sauté aromatics, then toast the rice before adding liquid and nestling the chicken back in to simmer together.
Is it true I must sear the chicken thighs before simmering with rice?
No, this is a common misconception. Searing does not "seal in juices," but it creates essential brown bits (fond) on the pan bottom, which dissolve into the broth, giving the rice a deep, savory backbone.
What is the correct rice-to-liquid ratio for this skillet method?
Use 1 part rice to 1.66 parts liquid (e.g., 1.5 cups rice to 2.5 cups broth). This slightly lower ratio is ideal for skillet cooking where some evaporation occurs but prevents the mushiness seen in slow cooker methods. If you want to try a different protein approach, the technique for balancing liquid in our Stuffed Chicken Breast recipe relies on similar precise hydration control.
How do I ensure the chicken is fully cooked without overcooking the rice?
Sear chicken until golden, then finish it during the rice simmer. Chicken thighs should be seared for about 5 minutes per side, then removed; they finish cooking completely (to 165°F) during the 18-20 minute low-heat simmer submerged in the broth alongside the rice.
One Pot Chicken And Rice

Ingredients:
Instructions:
Nutrition Facts:
| Calories | 572 kcal |
|---|---|
| Protein | 38.5 g |
| Fat | 15.8 g |
| Carbs | 63.2 g |
| Fiber | 2.4 g |
| Sugar | 2.6 g |
| Sodium | 665 mg |
